Showing posts with label Recipe Index. Show all posts

Friday, June 22, 2012

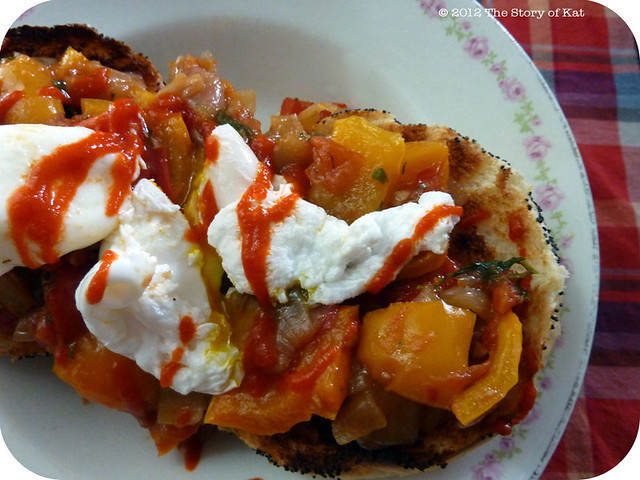
Crafting Food: Spicy Pepperonata

Spicy Pepperonata
It also makes great lunch leftovers

I had a dish something like this for brunch when I visited NYC this past March at a wonderful little place on the upper west side. I wanted to try and recreate it as soon as I got home and after sorting out some quirks, I can't get enough of the stuff—especially since you can eat it in so many ways and it lasts for days! I've used this recipe as a starting off point and combined it with what I remember of the dish I had which was much spicier than the traditional Italian pepperonata that I've read about since.


Spicy Pepperonata

Ingredients
  • 1–2 TBLS extra virgin olive oil
  • 1–2 TBLS balsamic vinegar
  • 2lbs bell peppers in various colors, rough chopped into large bite-size pieces
  • 1lb yellow onions, chopped the same size as the peppers
  • 1lb tomatoes, chopped to 1/2 inch
  • 3 cloves garlic, minced
  • 1/4 cup parsley, finely chopped
  • 1 TBLS Sriracha
  • 1/4 tsp crushed red chili pepper flakes
  • Freshly ground black pepper and sea salt, to taste
Directions 
  1. Heat the olive oil in a large skillet on medium heat. Add the onions and let them get soft and just slightly brown by sizzling briefly and then cooking on low heat for 20 minutes. Add the garlic after 15 minutes and stir occasionally to make sure nothing is sticking.
  2. Add the peppers and cover the pan. After a couple minutes, open and leave the lid just slightly ajar. Allow the peppers to cook this way for 15–20 minutes and continue to stir occasionally.
  3. Remove the lid and add the tomatoes and balsamic vinegar. After the liquid has evaporated, add the parsley and season with sriracha, crushed chili pepper flakes, salt, and pepper.

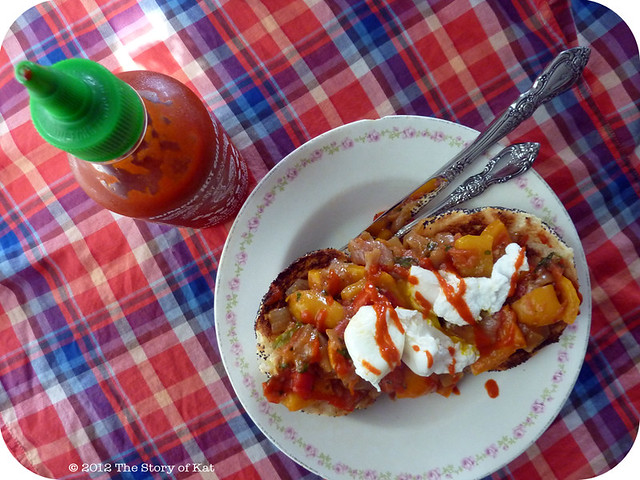
Spicy Pepperonata, detail

Spoon it over thick toasted bread and top with a poached egg and a drizzle of sriracha. This recipe makes enough for 4–6 people or will last for a few meals for just 2. You can store it in an air-tight container in the fridge for up to one week.

It makes for a great breakfast, brunch, or lunch as is, or you can combine it with some mixed greens and roasted potatoes to round it out as a meal for supper. The nice thing about the pepperonata itself is that you can serve it warm or cold, have it with any meal of the day, and eat it alone as a side dish, mix it in with pasta or whole grains, add to sandwiches, you name it!

Saturday, February 18, 2012

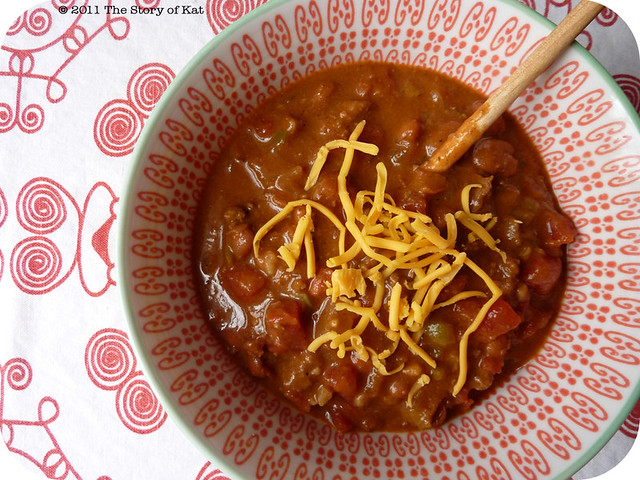
Choose Your Own Adventure Chili

Choose Your Own Adventure Chili
O hello cheese! You want in on this chili goodness too?

Chili is one of my all time favorite cold-weather meals. A big bowl of this, and we are happy campers no matter how much snow we've shoveled (well, not that we've been doing much of that this year!). Usually I make it on a Sunday afternoon when I have more time and there is enough to last us a couple nights. Thank goodness for things that taste just as good the next day and heat up easily.

This is based on a recipe from my mom but I've gussied it up and changed it a bit depending on how much heat and what kind of backdrop flavors I want to highlight. So go ahead, feel free to mix it up to make it hotter, lighter, spicier, or any "ers" that suit your fancy!

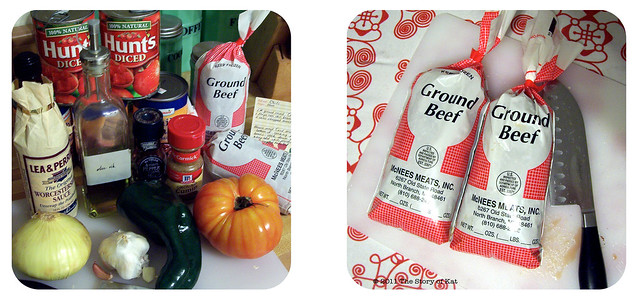
Choose Your Own Adventure Chili—ingredients
Gotta love free organic meat from your parent's farm.

Choose Your Own Adventure Chili

Ingredients:
1 lb. lean ground beef
(or ground turkey, chicken, or pork)
3 14 oz. cans of chili beans
2 14 oz. cans of diced tomatoes
(or 1 can + two freshly diced tomatoes)
1 large yellow onion, diced
2–4 cloves garlic, finely chopped
1 large poblano pepper, rough chopped
(Prefer less heat? Use just one anaheim, poblano, or cubanelle pepper)
(Want to try it mild? Pick up a couple serranos or chipotles)
(Love it hot and spicy? Try a couple habaneros or jalapenos)
olive oil 
freshly ground pepper and salt
1 tsp. ground cumin
2 tsp. chili powder
(cut the amount of these two in half for less spice)

To kick up the flavor (optional):
1/2 teaspoon beef bullion
2 TBLS ketchup
a few splashes of worcestershire sauce, to taste
(I'm currently experimenting with sriracha, crushed chili peppers, and dried peppers to layer the heat)

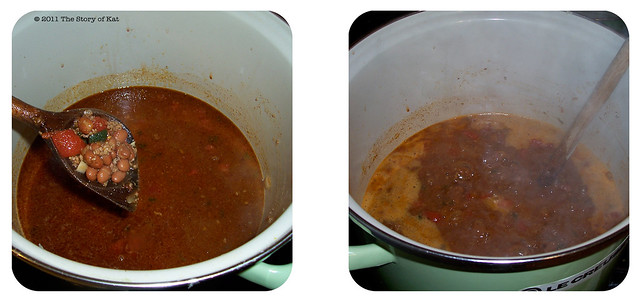
Choose Your Own Adventure Chili—cookinglet it simmer, let it thicken

Directions:
1. Finely chop the garlic and add to 1–2 TBLS of heated olive oil (medium heat).

2. Just when it starts to get golden, add in meat (be sure to salt and pepper it first), onion, and pepper. Sometimes, if I'm still working on chopping the vegetables, I add in just a bit of water at this point to slow the browning and give myself more time. Stir here and there until meat has browned.

3. Add in the optional flavorings at this point, as much or as little according to your own tastes.

4. Add chili beans and diced tomatoes, cumin, and chili powder.

5. Bring all the ingredients to a roiling boil and then immediately turn it down to medium heat. Let simmer for 1/2 to 1 hour until thickened, stirring now and then so it does not stick to the bottom.

6. Add more salt and pepper if you like before serving. Top each bowl with a bit of sharp chedder and switch into couch potato mode.
(...or monteray jack, or swiss...well, you get the idea...)

Monday, December 26, 2011

To Grandmother's House We Go...

Homemade marshmallows


We had a lovely little Christmas here and I hope you and your family enjoyed your holiday celebrations as well! We are off to visit family in Michigan for the next week and will be sans internet so I just wanted to pop in before taking off and thank each and everyone of you for being a part of my blog and my life this past year. It has meant so much to me and I am looking forward to sharing much more with you in the new year.

One last project for 2011 though before I go: homemade marshmallows! I tried a new recipe this year and really love the way they turned out more so than the first ones I made last year. I love melting them in a mug of hot chocolate although they are so good, very springy and fluffy, that you might end up just eating them one by one...not that anyone in this house did anything like that! The taste is so much more incredible than store-bought which I don't really go in for much. I got the recipe over on Smitten Kitchen and it's got great step-by-step instructions and insight which I found really helpful since I've only been dabbling in candy making for a year or so. Last year I made caramels all wrapped up in wax paper and decided to continue the food giving trend with these—a sweet and simple gift that, for me, speaks to what the holidays are really all about. And on that note...

Wishing you warmth, health, happiness, love, hope, peace, and all awesome things now and in the new year—see you back here in 2012 friends!

Monday, October 10, 2011

Crafting Food: Grandma Sorenson's Kosher Dills

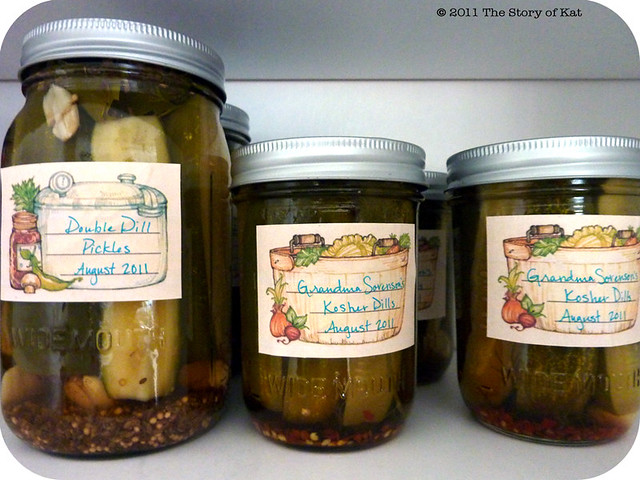
Pickles in the pantry, 2011

At the tail end of August, I made two batches of pickles from some farmstand cucumbers and they've finally set up long enough to be taste tested—lordy lordy, do these pickles have zing! Seriously, my eye twitched a bit longer than was socially acceptable, but I have a growing fondness for food with a kick so now it's all I can do to try and make them last us through the winter.

I made one batch using this recipe for Triple Dill Pickles (but made them into just double dill and they were still great) and one batch of my Great Grandma Sorenson's Kosher Dills (see below). Both were good but I prefer the spicy notes playing off the standard dill of the family recipe. I've made just a couple small changes, mainly leaving out the alum (it was used to add crispness back in the day but is now believed to be cancer causing so out it goes.)

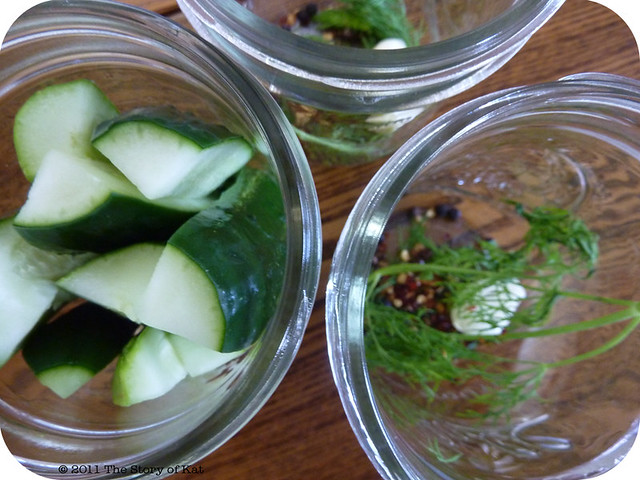
raw pack method
The raw pack method

Grandma Sorenson's Kosher Dills
Makes 6–8 quarts

Ingredients:
20-25 pickling cucumbers
1 quart vinegar
3 quarts water
1 cup pickling salt (you can use kosher salt)

Per quart:
1/2 tsp red pepper flakes or 1 hot red pepper
1 tsp black peppercorns (my addition)
1 tsp whole mustard seeds
1 clove garlic
2 heads fresh dill
1 grape leaf
 
Directions:
1. Prep jars and canning equipment according to the Ball Blue Book or other book on preserving.
2. In a large pot, boil together the water, vinegar, and salt
3. Meanwhile, wash and quarter cucumbers lengthwise into spears that will fit your jars. Place peppercorns, pepper flakes, mustard seeds, garlic, and dill in the bottom of each jar.
4. Pack in cucumber spears tightly, enough so that they cannot move much but still with space for pickling liquid.
5. Pour in pickling liquid and be sure to leave 1/4–1/2 inch head space. Place one grape leaf just at the top of the water line (optional). Process in a hot water bath—no pressure cooking required for these pickles! Do consult your preferred canning book on how to execute a proper water bath though. I found it time consuming while I waited on all that water to reach the boiling point, but it was otherwise surprisingly easy. As someone who was paranoid about the possibilities of botulism, I'm pleased to announce it all went off without a hitch!

Make sure all your lids pop and re-process or eat right away if they don't. For those that are successfully processed, allow to set up for 4–6 weeks and then enjoy as long as they last! Store in a cool dry place and refrigerate once opened.

Recipe Tip: I highly recommend trying these pickles out on a Double Onion Turkey Sandwich via Real Simple. They were so good that I forgot to put the turkey on when we made them a second time round for leftovers and didn't even miss it. What can I say, the genius within strikes again.

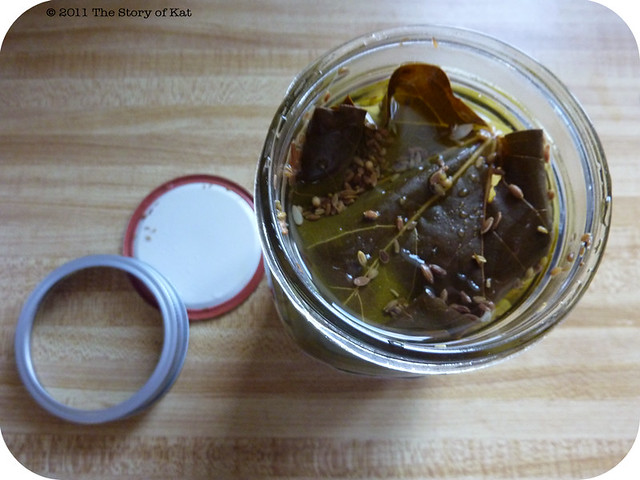
grape leaf trick
The grape leaf trick: My Grandmother's recipe calls for the age old trick of placing a grape leaf at the top of the jar to help keep the pickles crisp. I couldn't resist trying and am sad to report that I didn't notice any difference between this jar and the others without, c'est la vive!

If anyone has tips for crisper home pickles without using alum or the pre-packaged "Pickle Crisp" stuff (since I can only seem to find it mixed with lame-o pre-packaged spices), I'd love to hear your tips!

Canning Resources:
Ball Blue Book (tried and true, don't can without it)
Ball Complete Book of Home Preserving (got this for christmas a while back and love it!)
The instruction manual for your pressure cooker (I inherited mine from my mom and she handed it over with the words, "don't blow yourself up Katrina." Sigh, she knows me so well.)

And last but not least, I've gathered several vintage inspired canning labels (plus all kinds of other free printables) on a pinterest board for you so have at it!

Thursday, September 29, 2011

Leaf Pie: Q & A

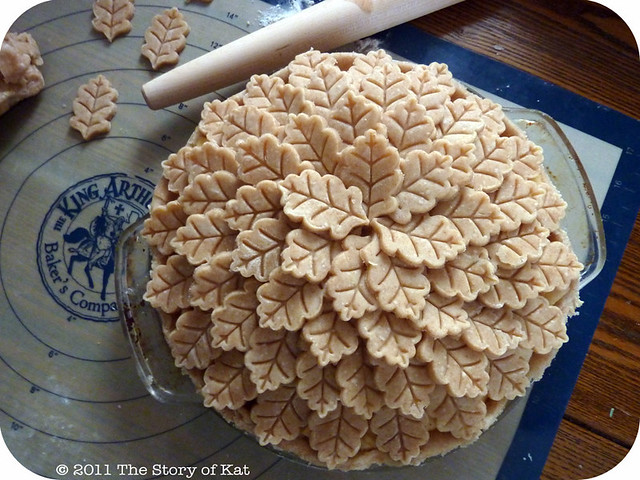
Leaf pie

A long time ago, and far far away, I shared this little number amidst the depths of winter as part of a "scenes from a weekend" post. It was just something I happened to do that weekend and while great times were had by all I'm sure, it never really occurred to me to explain more about it. Then came along Pinterest.

I was stoked when I found out that a colleague of mine from where I used to work in DC founded the site (he was always one of the best researchers to work with and good things should happen to good people!) and then even more stoked when I saw just how popular this little pie had gotten. This seems fitting for me as I used to bake pies for my researches when I had to work on the weekends since baked goods have a way of getting people to not keep you in your cubicle for all hours of the night on a Saturday. Well anywho, I was never the popular girl at school (teenagers who are into baking pies and working at antique stores so often are not, alas) but it's several months down the line now and I am still fielding questions about it so I thought it was high time I posted them here for all to see! Let's get right to it, shall we?

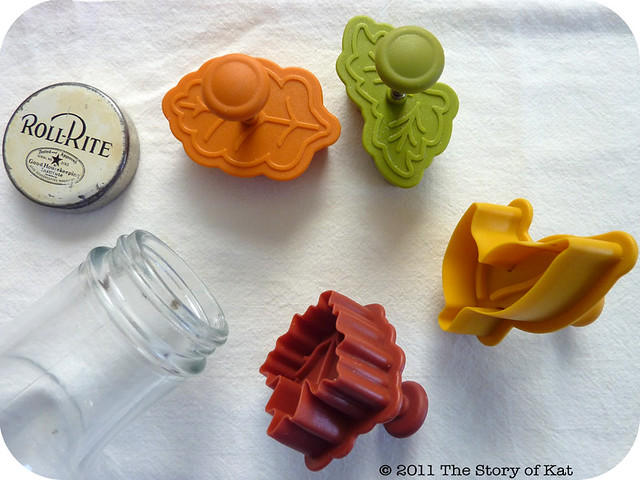
pastry cutters

How did you get those leaf shapes?
I used these cool little pasty cutters from Williams-Sonoma that make the indented leaf shape. I believe they make different shapes according to the seasons and I got mine as a stocking stuffer. Cuz, you know, my husband knows I am way too cheap to buy them for myself.

You could use cookie cutters but the nice thing about these is they have a spring mechanism that helps press the dough out without smooshing them (yes, smooshing is my technical term). And as anyone who's made pie knows, the key to a good one is handling the dough as little as possible.

Hint from my Nana:
Wrap the dough in plastic wrap and refrigerate the dough as soon as you get it all mixed. After 15-20 minutes, place the dough on your floured surface and roll it out with the plastic wrap spread out between your rolling pin and the dough. This will ensure it handles better and that you touch it less. The refrigeration will also give the dough the "umph" it needs to sit out and play nice while you cut it up.

How did you stack these leaves in the pie? Is there a top crust too? Did you use an egg wash to make them stick to each other?
The leaves you see are the top crust, there is no dough underneath supporting it and no egg wash. I just went at it and started placing them in ever smaller concentric circles that slightly overlap, beginning from the outside in. I think the key is in just having them barely overlap like they are here as too much overlapping would create a whole heck of a lot of dough. Also, you can see I left some spaces at the first layer and there are some more little spaces between each layer due to the barely overlapping placement—this leaves air vents to make sure that your innerds gets cooked all the way.

How long did it take you?
Not that much more than a usual lattice crust (so, like 10 minutes?). I think the pie probably looks intimidating but it really didn't take that long. Lots of folks end up buying store bought because they think pie crust is hard, but you don't have to hate on those who make pie because it's actually super easy once you get the hang of it. I just wouldn't lie to you about something like pie!

What kind of pie supports that crust? 
I have always used the Basic Pie Dough recipe from my hand-me-down 1980 copy of The Joy of Cooking (recipe blogged here).  That said, I rolled the dough out a bit thinner than usual for the leaves (app. 1/4 inch), so the weight of the thing did not even cross my mind at the time and I think you could get away with just about any fruit/mince meat type filling as long as it was not too runny. In that particular photo, I used an apple filling from scratch which gave it that nice crested shape.

How messy is it to serve?
Mine crumbled a bit when we cut it but not to the extent that anyone cared. Because, well, it's pie that you made from scratch and everyone is just really excited about how cool it looks and how awesome it's going to taste, you know? Embrace the crumbles!


Good luck and happy pie making! If you've got anymore questions, just leave them in the comments section on this post and I will answer so everyone can see.


P.S. If you want to follow me on pinterest, I'm over here.

Tuesday, September 6, 2011

A Finger Food Smorgasbord

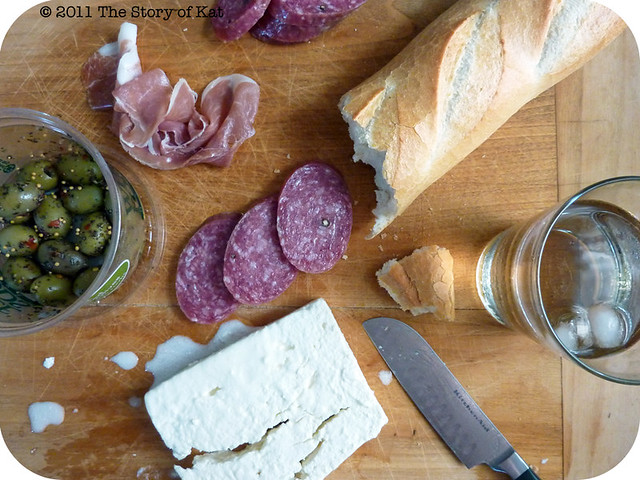
Smorgasbord
Easy Smorgasbord: herbed olives, summer sausage, feta, proscuitto, baguette, and cold mint tea

We didn't have any travel plans this past holiday weekend, so instead I decided to overdo myself around the house and we embarked on a major cleaning/baking assault including making a batch of stock out of leftover vegetable bits I've been freezing for the soups that I feel are right around the corner, my first bagels ever, and some peanut butter fudge that turned out looking horrible but tasting brilliant (and I am not really a fudge girl...I know, weird). In between all that I managed to get groceries, read a big hunk of my readings for class (out of a couple hundred+ pages assigned from the first class...), get a section of the chuppah completed, and finish two custom pillow orders for the shop. Yowza, I just want to collapse now and nurse the cold that I seem to have picked up along the way. I haven't had a weekend of such massive productivity in a while so I feel good but rather exhausted and feeling the need for some balance between my tendencies for procrastination and overachieving (hehe). I guess we may be using that stock sooner rather than later!

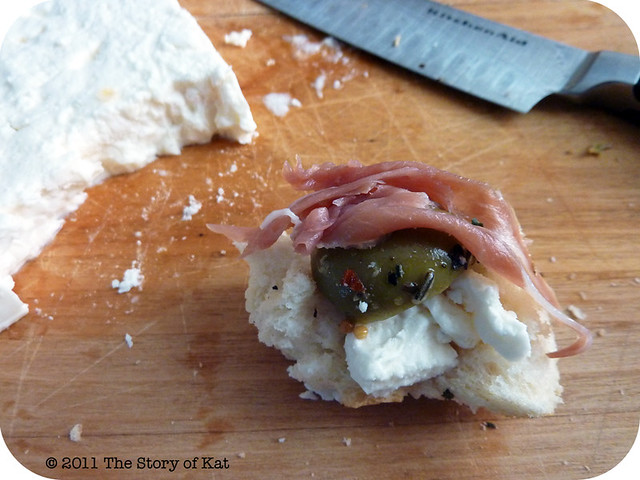
Smorgasbord, detail
The best in finger foods

In the midst of it all, we sat down for a rather blissful lunch together. I had picked up a few odds and ends to make use of the last of the olives we'd splurged on at whole foods a while back and it was the perfect antidote of simplicity (but lots of tastiness) to all the cooking I was doing. There was even enough to make two lunches out of it for the weekend, so all in all, not too shabby!

Thursday, September 1, 2011

Crafting Food: Prickly Pear and Papaya Freezer Smoothies

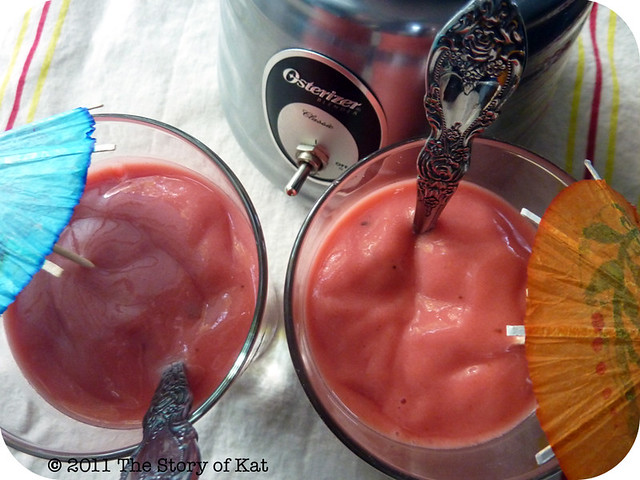
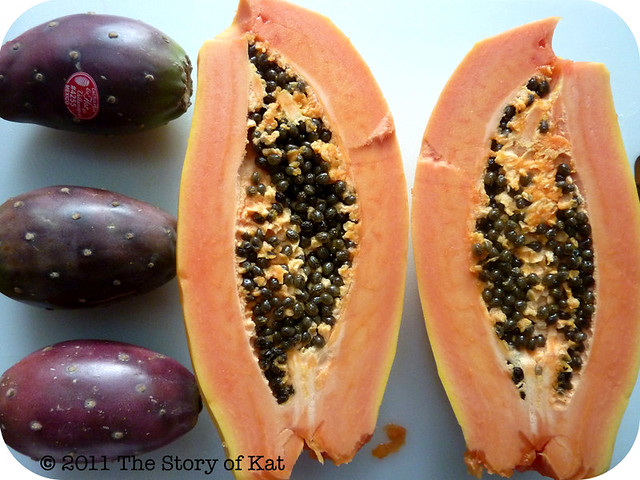
prickly pear and papaya smoothies
Cheers to the last days of summer

I like to fill out a summer meal with a fruit smoothie as they're cool, refreshing, surprisingly filling for a drink, easy on a weeknight, and a healthy alternative for that ice cream craving. The challenge is that fruit can be expensive, difficult to keep fresh for whenever the craving hits, and a pain to chop up on a busy hot night. Because of this I wholeheartedly rely on the freezer method as it streamlines the whole process (and frozen ingredients create a better smoothie texture anyways). It's all about the prep work beforehand so I wait until fruit goes on sale or when it's super fresh at the farmer's market, chop it all up right when I get back home (which is manageable if you make some time on the weekend), and freeze it in individual sandwich size ziploc bags. Each ziploc contains an equal mix of fruit so I can just pull a frozen bag out when I need it, toss a couple other items in the blender, and wahlah: two large (or three tumbler sized) smoothies!

My go to version is the classic strawberry/banana/orange juice combo but recently I found some discounted and unusual fruits at our grocer. They don't come in stock often and make for a great flavor combo, so I made my move. If you can't find these at your grocer, fill up a bag with whatever combination of fruit you like and add the other ingredients listed below, changing up the flavors (but not the amounts) of the yogurt, sorbet, and juice ice cubes to complement them.

papaya

Prickly Pear and Papaya Freezer Smoothies
(makes 4 ziploc bags full/8 smoothies)

1 Papaya
(remove skin with potato peeler, scoop out seeds with a spoon, cut into big cubes)
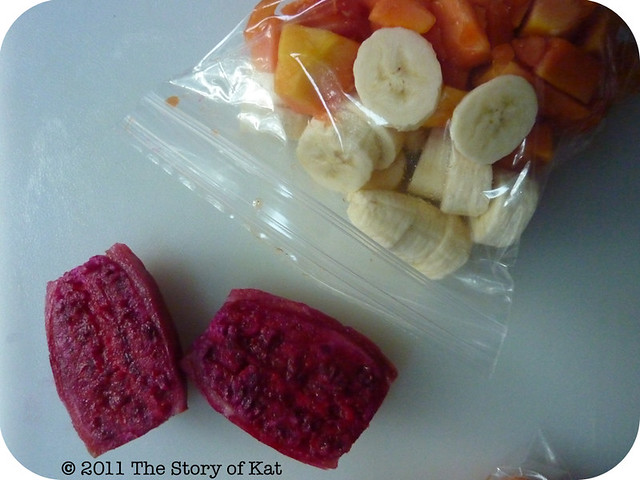
4 prickly pears
(remove skin with paring knife, quarter and scrape off seeds, slice into big chunks)
4 bananas
(remove peel and slice into 1/2 inch medallions)

Divide the papaya equally among 4 sandwich size plastic bags. Add in 1 banana and 1 prickly pear to each, seal, and freeze. These can be frozen for up to 8 months but I don't think we've ever taken that long to use up our smoothie ingredients.

prickly pears
The inside of prickly pears can be yellow, orange, or deep red like these.

When you are ready to make some, take a bag from the freezer and let it thaw just until the fruit begins to separate from each other. Most days, I just zap it on defrost mode in the microwave for 10–20 seconds so that it's still frozen, but not as hard as a rock when it goes into the blender. Once ready, add to the blender:

1/4 cup yogurt
(Avoid those fake sugary ones—I like Glen Oaks drinkable low-fat yogurt with probiotics for smoothies as they have a ton of complimentary flavors but you can use just about any.)
1 cup mango sorbet
(which is naturally fat free!)
3-4 guava juice ice cubes
(you can find affordable tropical juice flavors in small cans in the Mexican grocery isle. Just freeze it in your ice cube trays, transfer to a ziploc, and pull some out whenever you need them.).

Blend thoroughly and serve immediately. Pad yourself on the back for making friends with your freezer and revel in how delicious being thrifty, organized, and healthy can be!


A note on prickly pears...
Also known as cactus pears, these little guys have a ton of antioxidants in them and are crazy good but they are full of seeds. You can scrape them off the flesh, some will break up if blended thoroughly, and they are completely edible if you just swallow and do not try to chew them...it's up to you. The fruit tastes so incredible and is such a fun food that I don't mind dealing with them one way or another. If you get them from the store, they will likely be removed of any prickly outer thorns (hence the name) but be careful if you are harvesting them from the cactus itself!

Thursday, June 2, 2011

Crafting Food: Skillet Cabbage

Skillet Cabbage
 The cabbage starts out purple but will run to pink once the lemon juice is added—beautiful and delicious
but be careful you do not get pink spots on your tablecloth. Not that I know anyone who did that...

It's been a while since I've posted a recipe, mostly because we've been relying on old favorites and leftovers for the past month so that I could concentrate on getting ready for the show (which is just two days away now! holy rocks batman!). I'm always looking for new ways to make vegetables interesting though and this little dish saved my lunch several days running.

Perhaps the best nutritional advice I ever got was that the more color there is on your plate, the better (that is, not in reference to artificial dyes and confectionery delights) since a wide variety of colors indicates that you are getting a wide variety of nutrients with dark leafy greens of purple and green being the most nutrient dense choices. Since it's so easy to end up with a plate of brown fried/starchy/baked carbo goodness, I've found this advice has really come in handy when it comes to meal planning and making healthy but tasty(!) choices.

So when I was about to get some of my usual brussels sprouts at the grocery store recently and realized they were all out, I decided to wing it and get a red cabbage instead since it seemed like it would have a similar body and crunch once shredded. I almost always steam or roast vegetables but prepared it the same way I do the brussels sprouts (using less butter in an effort to make it healthier) and was surprised once again with how delicious a traditionally scorned vegetable can be with this treatment! Not too cabbage-y-y-y at all but savory and with a nice little kick thanks to the lemon and pepper. Since one head of cabbage can be served as a side for two dinners for the both of us or make up the whole of 3-4 lunches for me, it makes a pretty good showing for a 99 cent head of cabbage!

Edit: it's a large serving but I accompany it with only a cup of rice/pasta for a quick weeknight meal. You could quarter the cabbage into smaller portions for two people or use half the head to serve as a side for a more elaborate dinner of 4-6 people. This will also work with regular green cabbage which is even cheaper.


Skillet Cabbage
1 head red cabbage
1/2-1 TBLS unsalted butter
1/2 fresh lemon
course ground kosher salt
freshly ground black pepper


-Divide your cabbage into halves or thirds, depending on how many meals you'll need it for. Shred the designated portion with a large chopping knife or food processor (I prefer the courser bits the knife will give you) and refrigerate the rest. Cabbage, even after being cut, will keep a bit longer than other vegetables so there's no need to worry if you don't want to eat the other portions several nights in a row.

-About halfway through shredding, place your pat of butter in a large skillet over medium heat. If preparing it in halves, use 1 tablespoon of butter. If preparing it in thirds or quarters, use just a 1/2 tablespoon.

-Place shredded cabbage in the pan and quickly toss to coat with butter. Add salt and pepper to taste and turn heat up to high.

-Continue to toss and cook for 1-2 minutes or for desired tenderness. I don't like to go any longer than a couple of minutes because I like to have a lot of crunch and avoid the wilted stewed effect. Remove from heat and in a bowl mix with 1 TBLS fresh lemon juice (about half a lemon). OPTIONAL: sprinkle on slivered almonds as a topping.

BAM! you're done! That was relatively painless right?
Plus, you can't beat cheap + tasty + nutritional so proceed to plate that goodness up and devour.

I'm having the last of mine for lunch today and will then proceed to busy myself in tying up some loose ends for the festival this Saturday (insert much excitement, nerves, and crazy panic here). If you're in the downtown Providence, Rhode Island area I hope to see you there! If not, I'll see you back here on Monday with photographic evidence of how it all went!

Monday, March 7, 2011

crafting food: chocolate-hazelnut gelato in chocolate-peanut butter bowls

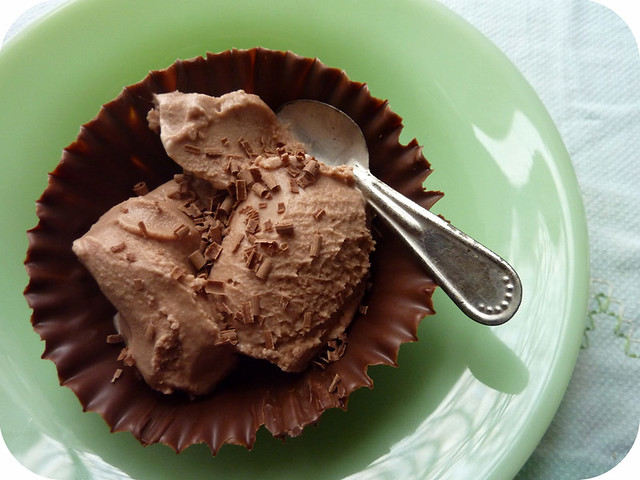
homemade chocolate-hazelnut gelato
chocolate + jadite = bliss

the piéce de résistance of my birthday weekend was this chocolate-hazelnut gelato, spooned into these molded chocolate bowls and golly gee it was the most frigging divine thing i've had in a while!

we had made this same nutella flavored gelato to compliment our pie and coffee at thanksgiving with our handy kitchen aid ice cream mixer attachment and i decided to make it again and spruce it up a bit once i saw these on pinterest (if you have not yet gotten addicted to pinterest, do yourself a favor and get on that).

but the more i read about the ins and outs of making your own chocolate bowls with semi-sweet chips and balloons as molds here and here, the more nervous i got about how sadfrustratingwasteoftimeandchocolate it would be if/when the balloons popped and my bowls right along with them. i also had the designsponge peanut butter cups on the brain while at the craft store when i had the idea to use half dark chocolate/half peanut butter candy melts and jumbo muffin cups as molds, eliminating the need of volatile balloons and taking advantage of the fact that these candy melts are made for melting/hardening/molding. i looked everywhere for jumbo silcone cups but couldn't find any and ended up buying paper cups instead....i was worried but needlessly as they worked beautifully! it turned out so well that i decided to take a few snapshots and share the process with you:

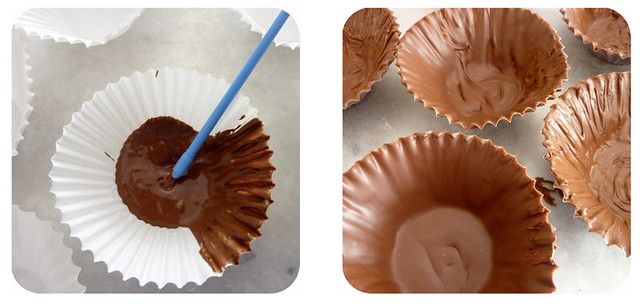
chocolate bowls, detail

i started by laying out a baking sheet and lining it with a bit of wax paper just to be safe and tidy. then i melted together half of each bag of candy melts (i used dark chocolate + peanut butter but you could do just a whole bag of one or so many other combinations!) in a double boiler and spooned 1 1/2 to 2 heaping TBLS into each cup. this made enough for me to coat 8 jumbo muffin cups (ahem and just a smidge to lick off the spoon when i was done).

working quickly with a decorating brush, pull the chocolate up the sides making sure to thoroughly coat them so that no light shines through (light spots = weak spots). i had about 10-15 minutes to do this so grab a warm body to help you or melt your coating in smaller batches. they should start to set up by the time you are painting the last one but to harden completely, set them in the fridge for at least one hour (i was paranoid and went for two).

chocolate bowls, detail
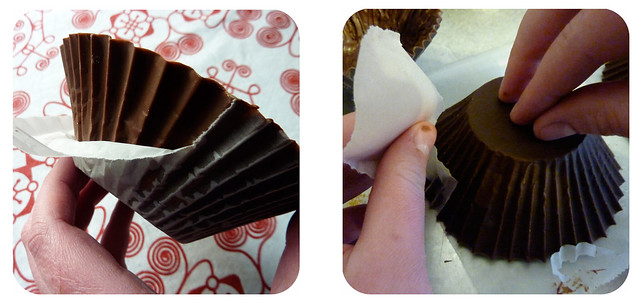
to the left is the wrong way to remove the paper cup, to the right is the correct way

once they've completely hardened, pull them out and set on the counter. do not pick one up and start tearing the paper down the ridges as this puts too much pressure on the chocolate (i say this having broken the first two this way). instead, you can gently get use a vegetable peeler to pull just a sliver of paper away from the ridge at the edge of each cup to get you started. then turn the whole thing upside down onto the baking sheet and gently peel the paper in a sideways motion across and around the ridges. i was happily surprised to find that it was easy to remove them this way without worrying about any stray bits of paper getting stuck AND without breaking them.

keep in fridge until you add the ice cream/mousse/pudding/whatever you like and then enjoy!


p.s. thank you to each of you for the warm birthday wishes, you guys are so kind and it means a lot to me! i did indeed have a nice little weekend but also seem to have developed a nice case of seasonal allergies (or maybe a cold? both?) which i'm finally going to stop ignoring. hence, i am writing this from the couch and am crossing my fingers that i will be back in action soon. blurgh.

Friday, February 25, 2011

crafting food: pasta from scratch

pasta in the making

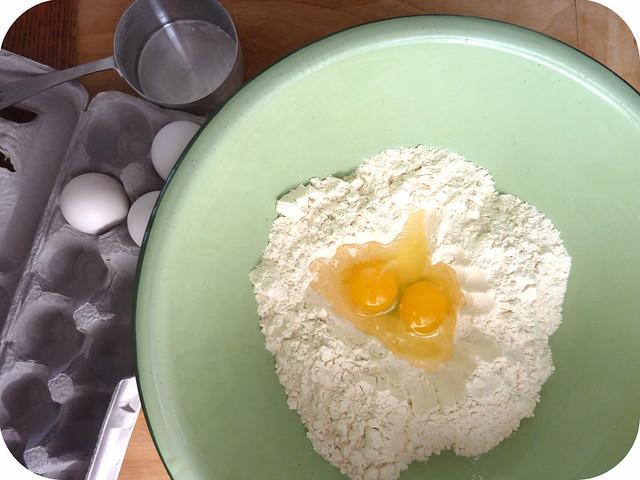
i spent part of an afternoon last week making pasta. i wish i used my hand-crank machine more often because it can be both delicious and economical but it can also require a bit of time and muscle....two things which i've never had much of. on the other hand, i love how the hand-crank puts you directly in touch with the most authentic pasta there is and it's such a satisfying thing to see the way in which the most humble of tools, our hands, can produce food for the table.

the recipe is simple and while there are variations, the main ingredients have remained the same for centuries:

3 cups all-purpose flour
2 large eggs
2 TBLS water
1 tsp salt
(i always end up needing to add more water than that to get my dough to stick together but this is a good place to start.)
more flour for dusting as you work the dough through the machine

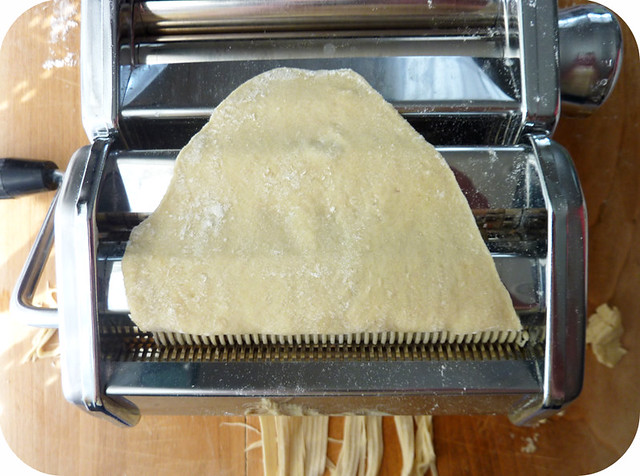
mix the ingredients together thoroughly and add more water as needed until dough pulls away from the sides of the bowl. use your hands to finish forming it into a ball and divide this into several smaller ones the size of large golf ball. follow the directions that accompany your particular machine for thinning and cutting the dough.

hand-cranked pasta
yummy fresh goodness

once you've got that part done, you can either dry it and it will last for eons or you can freeze it and it will last a half eon (just my rough estimate, ahem):

drying: you can dry your pasta by placing it on linen towels along the counter (if you use towels or your pasta is just thick, you do need to move the it around every so often so that the air is getting circulated), over the back of a chair, or even spread out along the length of a broom stick setting between two chairs. you can use a fancy pasta drying rack or a clothes drying rack. whatever you do, just make sure the surface that the pasta is touching is clean and that your canine or feline friends are kept away from the area as it can take a while to dry completely, depending on the humidity of the room/time of year.

freezing: if the whole drying process sounds a bit elaborate, the good news is that you can freeze or refrigerate fresh pasta (refrigerate only up to a week) so that all your hard work is easily stored for later use. plus, fresh pasta boils in just a minute or two so it's ready to eat in a jiffy. yep, i just said jiffy.

i'm looking forward to eating ours with chicken parmajohn. yes, parmajohn. it's one of my husband's go-to meals for when i just need a night off from cooking and i must say he does a great job. especially considering that when i met him, he was living off of pan-friend steak, subway, chinese take-out, and tortellini salad...o dearie my, sometimes learning about food and putting more muscle into it is totally worth it  :)

Friday, January 21, 2011

crafting food: cheddar ale soup

cheddar ale soup

so what do you do when you've had a rough week, you've got 20 some odd inches of snow on the ground with 7 more falling, and you don't have the cash on hand to escape to some exotic local? well, um, if you're anything like me, you might do a bit of CARBO-LOADING! yes, the caps are necessary today and yes, something along the lines of carbs! salty! chrunchy! cheesy! goodness! in my belly! sounds like just the thing right about now (me, an emotional eater? bah, what is this you speak of?!)

we made this wonderful cheddar ale soup recently, compliments of williams-sonoma, and it really hit the spot. as usual, i changed a couple things so i will just list them below in italics (the rest being the original recipe, slightly paraphrased in kat-speak).

Cheddar Ale Soup
Serves 6

Ingredients:
1 bacon slice per bowl/person (we usually go with low-sodium but turkey bacon would be a great healthy alternative too of course. or, just leave out and wah-lah: vegetarian friendly.)
2 TBLS unsalted butter
1 large yellow onion, diced
2 carrots, peeled and diced
3-4 garlic cloves, minced
1/3 cup all-purpose flour (you can substitute whole wheat flour if you like)

1 cup pale ale
(make sure it's one you really like as the taste comes though quite strongly and i made the mistake of just using whatever we had in the fridge...oops)
1 TBLS worcestershire sauce
2 cups milk
2 cups chicken broth
(you can use stock too, i had some homemade turkey stock i'd frozon from thanksgiving and it really gives it a great depth of flavor! substitute vegetable stock for vegetarian version.)
1 1/4 lb. sharp cheddar cheese
(we used a combination of inexpensive sharp cheddar from the grocery store and some gourmet vermont cheddar....holy awesomeness batman!)
kosher salt and freshly ground black pepper, to taste


Directions:
in a 4 1/2 quart dutch oven (um, yeah i wish i had one of those..my stock pot sufficed) over medium-high heat (bacon is crispier if cooked on lower heat, i usually go with medium), cook the bacon until crisp and then transfer to a paper-towel lined plate to drain while you move onto other things.

discard all but 2 TBLS of the fat in the pot (that's about all i had actually). reduce heat to medium and melt butter. add the onion, carrots, and celery, cover and cook, stirring occasionally, until the vegetables are softened, about 20 mintes (20 minutes was too much for mine as they got a little black despite stirring. all stoves are calibrated differently so just keep a careful eye out).

add the garlic and cook for 1 minute.
add the flour and cook, stirring occasionally, for 3-4 minutes.
add the ale and cook, stirring constantly, for 2-3 minutes.

add worcestershire, milk, and stock, increase the heat to medium high and bring to a simmer. then reduce heat to medium-low and simmer for 10-12 minutes. remove the pot from the heat and puree the soup with an immersion blender until smooth (yes, that would have come in handy but no immersion blender here. i pureed the soup in my regular old blender once it had cooled a bit but it was so full that it was difficult to keep the lid on. next time i will just use the food processor like a smart person).

return soup to pot on medium-low heat and add cheese by the handful, stirring constantly; do not allow the soup to boil. season with salt and pepper to taste and then ladle into bowls. top of with the crumbled bacon and, instead of croutons, serve with large hunks of freshly baked bread to rip off and dunk in your soup! i'm thinking a bread bowl might not be a bad idea next time...

add:
1 part Masterpiece Theatre's Downton Abbey on PBS
1 grandma's quilt
2 sleeping cats curled up around you
=start feeling like maybe the world is not half as rotton as it felt the day before!


edit: i was just reading that tomorrow (January 22, 2011) is National Soup Swap Day...what a neat idea to try sometime or anytime during the colder months! i'm sure you could even work in a charitable component...hmm, must let this one simmer in m' brain for a bit!

Friday, January 7, 2011

Crafting Food: Garlic Hummus

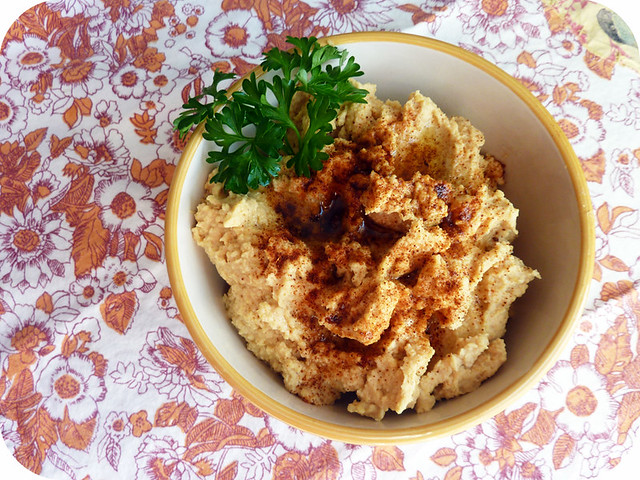
garlic hummus

I am hunkered down with a few pairs of custom embroidered shoes for the next few days so I thought I would share a tasty recipe with you in the meantime. This is my own recipe for garlic hummus, a middle eastern dip made with chickpeas.

You can cut the recipe in half if you're just making enough to go with a normal meal. I use two cans of chickpeas here as I usually make it for parties. Serve with torn up bits of pita bread, pita chips, or even crostini!

Warning: I am kind of a garlic freak so the taste really comes through here. Try just 3-4 if you prefer less and try a few extra shakes of the cayenne pepper if you like lots of heat as the 5-6 shakes listed here will just give it a bit of a kick. Chickpeas are a great source of protein and can carry other flavors and spices very well so don't be afraid to customize it to your own tastes!

INGREDIENTS:
2 15oz. cans chickpeas, drained and rinsed
4-6 cloves garlic
1/4 cup extra virgin olive oil + some for drizzling
fresh squeezed juice of 1 lemon
3 TBLS tahini (sesame seed paste you can get at the store)
5-6 shakes cayenne pepper
1 tsp. parika + some for garnish
1 tsp. cumin
1 tsp. kosher salt


DIRECTIONS:
Combine ingredients in a food processor, adding liquid a bit at a time as you go, until creamy. Sprinkle with paprika and drizzle with extra virgin olive oil. garnish with a sprig of parsley. Enjoy!

Friday, December 10, 2010

Eat your vegetables (with butter if you have to).

eat your vegetables

OK. You have got to try this recipe.

And I have got to post about something completely non-christmas related so I can maintain some sense of sanity as I work through all these custom orders.

I came across this recipe on a PBS cooking show, made a couple small changes, and was pleasantly surprised to discover that, um, I like brussel sprouts (wt?)! Actually I haven't found a recipe I've loved this much in a while so thought it was definitely worth sharing. I even cooked up the extra brussels sprouts for my lunch today so it looks like there's no going back for me...


My Version:
-First things first, I made this dish vegetarian by simply not cooking the sprouts in with the juices from the steak. We don't eat much meat here, especially red meat, and it tasted delicious all on its own. Plus, with the almonds, you still get a bit of protein.

-Place your slivered almonds in the pan (no oil, no nothing) and toast until golden brown. Set aside in a small bowl. Toasting nuts helps enhance their flavor, but if you're short on time, feel free to skip this step as it's not going to ruin the dish.

-Chop the ends off 1 Lb sprouts and then shred them lengthwise. While you're doing this, place 2 TBLS of unsalted butter in the pan and allow to melt on medium heat.


-Place sprouts in the pan with the melted butter and toss. Immediately turn heat up to high and add salt and freshly ground pepper to taste.


-After 1–2 minutes you'll have some tender bright green pieces and some crispy golden brown pieces. Remove from heat and in a bowl mix with 1 TBLS fresh lemon juice (about half a lemon) and the toasted almonds.


FINITO! once you get the hang of this recipe, it is very quick to prepare but still impressive I think.

Monday, November 22, 2010

crafting food: baking powder biscuits

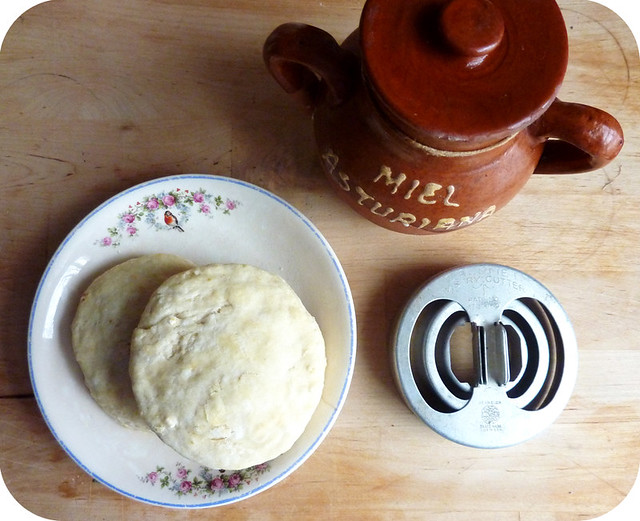
baking powder biscuits
a good rule of thumb: if it involves a honeypot, it's probably going to be a beautiful thing.

one of my favorite fall traditions is sitting down with lord of the rings (the books or the movie) and a big bowl of stew. i usually serve this with apple cider and homemade baking powder biscuits which are so scrumptious with a touch of butter and honey!

here is a family recipe i use to make these very simple biscuits that are a great compliment to hearty sunday night dinners:

Baking Powder Biscuits
Makes app. 10 biscuits
Preheat oven to 350 degrees

Sift together:
1 1/2 tsp. salt
3 cups flour
4 1/2 tsp. baking powder

then add:
6 TBLS. shortening
1 1/4 cups milk

biscuit cutters
i love my antique biscuit cutters but you can also use an upside down drinking glass
with a little flour on the edge to cut out your dough.

mix together and roll out at app. 1 inch thick. cut out circle shapes for biscuits and place on baking sheet. bake at 350 degrees until lightly browned and fluffy (if i recall, you can check them at about 10-15 minutes and go from there).


see, i told you they were simple!

Thursday, October 14, 2010

Recipe Index

I've gathered up all my recipes on the blog for you here and hope you find something you'll want to make again and again—feel free to let me know how a dish turned out for you in the comments section of each recipe as I'd love to hear from you. Happy cooking!

P.S. Although there is a separate vegetarian category, I have tried to make notes for vegetarian options in as many other recipes as possible.


Main Dishes
Proscuitto Flatbread
Cheddar Ale Soup
Fresh Pasta
Choose Your Own Adventure Chili

Vegetarian Meals
Quinoa Vegetable Salad
Kat's Quiche
Spicy Pepperonata

Side Dishes
Roasted Asparagus
Buttered Brussel Sprouts
Skillet Cabbage
Farmer's Market Summer Salad
Cool Cuppa Cucumber Salad

Appetizers and Snacks
Roasted Pumpkin Seeds
Finger Food Smorgasbord
Bruschetta Two Ways

Baking
Gingerbread Men (and Women!)
Oatmeal Bread
Baking Powder Biscuits
Pie Crust Design and Leaf Pie Crust Q & A

Desserts
Chocolate-Hazelnut Gelato in Chocolate-Peanut Butter Bowls
Homemade Marshmallows

Canning
Granny's Strawberry Freezer Jam
Grandma Sorenson's Kosher Dills

Dressings, Frosting, Sauces, and Dips
Nana's "Beat the Hell Out of it" Buttercream Frosting
Garlic Hummus

Drinks
Prickly Pear and Papaya Freezer Smoothies