
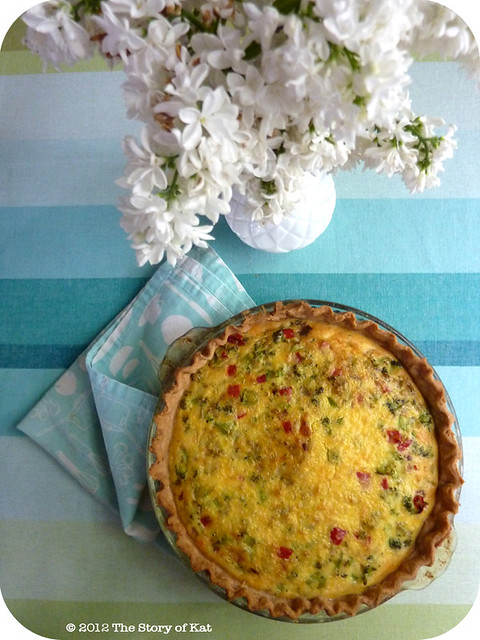
Quiche is one of those dishes that helps me make ends meet, one that can stretch our grocery list without stretching our budget. It's also delicious, perfect for a drizzly spring day when you want something warm and cozy, but not too heavy. Plus, when cut it into four big pieces, it renders two meals for two (the second night being incredibly easy when you just heat it up and then eat it up). Winning on every front, ya? Ok, so stick with me and read on to see how it's done.
Kat's Quiche
Pie dough
Make this on a Sunday when you have time to spare for the dough. It'll take you a 1/2hr tops and is well worth it in the taste category compared to the cardboard dough you can get at the supermarket (yes, I am a pie dough snob as you may well be aware). This is the basic pie dough recipe from Joy of Cooking and it has served me well over the years for many many pies.
Ingredients:
2 cups flour
(I use white whole wheat as it's healthier but still lends a proper texture needed for pastry)
1 tsp salt
2/3 cup shortening
2 TBLS unsalted butter, chilled and cut into cubes
4 TBLS ice water
Directions:
—Combine everything but the water with a fork until it reaches the consistancy of peas. Doing this by hand instead of using the mixer or food processor as it will ensure a dough with better texture that's easier to work with.
—Add the water one tablespoon at a time and pull the dough together with you hands until it forms a ball. A little extra water may be needed, the exact amount will depend on the temperature/dryness/etc. of your kitchen.
—Cover with plastic and refrigerate immediately for app. 20 minutes to make it easier to work with.
—Sprinkle some flour on your counter (you can also use one of those handy silicone mats with the radius marked so you're sure to roll out to the right size) and roll your dough out in a circle. The less you handle it and work it the better.
—Lift gently and slide into a greased pie dish that is oven safe. Chill in the refrigerator while you work on the innerds.
The Innerds
Now here is where you save the moh-nay. During the rest of the week when you don't quite need that entire red pepper in your salad, save the remainder in a tupperware. When you've made steamed broccoli as a side-dish, save all the unused raw stalks and add them to the tupperware. When you're not sure what to do with the remaining onion from those sandwiches you had the other day, put the other half in that tupperware (a few scallions work well here too). I love the broccoli/red pepper/onion combo for my quiche, but you get the idea—you can fill the whole thing up with whatever vegetables you have leftover from the week prior (just don't wait longer than that or the vegetables will be a big tupperware full of gross waste). Since they're going to be cooked twice inside what is basically a casserole, you are never going to notice that they weren't as sparkling fresh as they were at the beginning of the week and nothing goes to waste! Come Sunday, get that tupperware out, and roll up your sleeves:
Ingredients:
Your tupperware of vegetable goodness
1–2 garlic cloves, finely chopped
1 TBLS unsalted butter
freshly ground salt and pepper to taste
6 eggs (4 would do ya if you have a shallow dish or are just running low)
3/4 cup milk (your choice of grade, use just 1/2 cup with 4 eggs)
enough shredded cheese to cover the bottom of your pie dish
Directions:
—Rough chop all your vegetables to bite size
—In a skillet, melt the butter and cook the onions and garlic on medium. Once the garlic starts turning golden, add in the rest of your vegetables and cook until bright and soft.
—Take your pie dough out of the refridgerator and cover the bottom with shredded cheese (mostly I use cheddar as we always have a chunk of that around, but almost any flavor of hard cheese is going to be good so get adventurous and work with what you've got on hand). The cheese will form a barrier between your dough and the egg so that it does not get soggy.
—In a large bowl, whisk together your eggs and milk. Work the whisk until you get some frothy bubbles to make sure they will be nice and fluffy.
—Layer your cooked vegetables on top of the cheese and then pour your egg mixture over that.
—Bake for 50 minutes at 350 degrees. Allow to cool for at least 10 minutes after.
—Eat! Enjoy! Eat again on Monday night when you don't feel like lifting a finger and enjoy two home cooked meals for effort of one and the cost of less than one!


5 comments:
Sounds fantastic! will definitely try it out as quiche is a family favourite!
Thanks so very much for sharing!
Yum! We love quiche in our house, and I love it because it's never exactly the same twice. We just use what's on hand and those little leftover bits that otherwise wouldn't likely get used at all.
Some ingredients we love; spinach, arugula, chives and even the blossoms if you have them....that one lonely leftover slice of prosciutto, chopped up and thrown in. :-)
Ooh, I'm a big believer in quiche as a budget-saver! This looks so good.
This looks so yummy! I love quiche and used to make it all the time before I gave up gluten. I have yet to find a really good gluten free crust recipe, they all taste too griddy (like the consistency of sand, ack!) SO, I gave up!
Enjoy it!! :)
What can I use in place of shortening. Is it like a. Butter
Post a Comment