Showing posts with label tutorial. Show all posts

Saturday, September 22, 2012

Back To School: A Grown-up Lunchbag

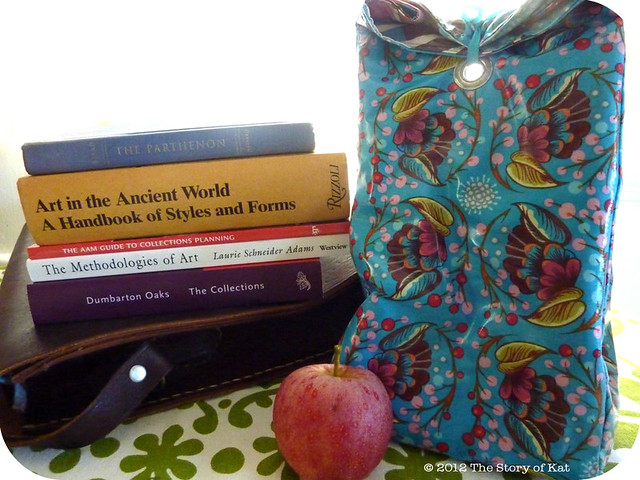
Lunchbag

Summer is winding down and I am attempting to wind back up for my first semester as an official master's candidate. Part of me is still mourning the end of summer and freedom, but the other half of me is excited because there is nothing quite like a university campus in fall...the smell of laundry in the back of a brick dormitory, the line of chattering students in the bookstore, the timeworn pavement beneath your feet and leaves that are just starting to crackle, stacks of beautiful books, sunny-but-not-sweaty-with-a-hint-of-autmun-chill days in which to cherish the last bit of your summer wardrobe, and sweaters and layered looks and boots just around the corner as fall encroaches completely.

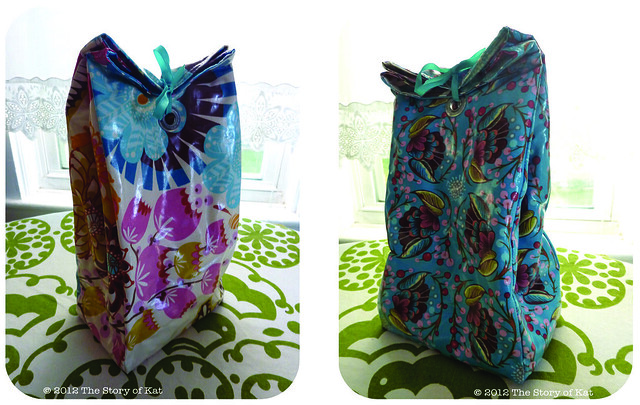
Lunchbag, double sided
ok, these did not look all neon-y weird when I was editing them...
methinks this laminated surface must pick up some strange lighting reflections in photos.

Given that, there couldn't be a better time to share this project with you! Just before my sewing machine broke over the summer, I was able to finish this lunchbag made with laminated cotton (traditionally oilcloth). Because I don't have the luxury of a fridge at work and am on the go all day, a layer of cotton batting acts as a great insulator to keep things cold or hot longer. I love it because I go from 9am to 9pm every Monday and Wednesday packing in both work and classes, so a fresh and cheap lunch is a godsend for both my waistline and my wallet. Plus, making it double-sided adds versatility and makes it easy to clean so no arguments there (I stick it right under the faucet, and BAM! I am done with my lunch dishes!).

Lunchbag, grommet detail
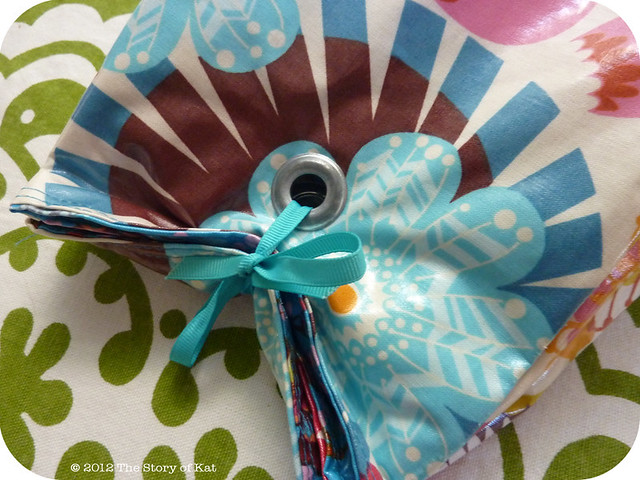
 Detail of the grommet + ribbon closure

To finish it off, I decided to go with a grommet and some grosgrain ribbon since it's more permanent than a clip and doesn't present the same difficulties that velcro would in sewing it down to a double-sided piece. Either which way you turn it, the grommet is there and the ribbon can be stashed inside or even top-stitched to the bag itself so as not to loose it.

Below, you can find how to make these changes, using the following tutorial as a starting off point:
Oilcloth lunch bag by Tumbling Blocks

Oilcloth Tips
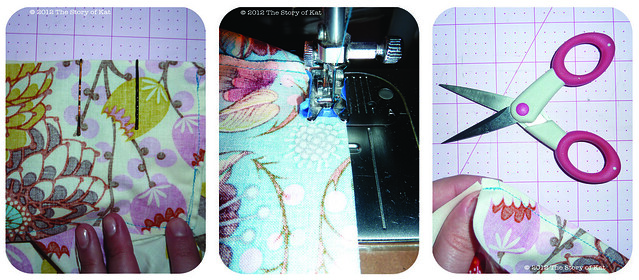
Tips for working with laminated cotton and oilcloth, from left to right: A, B, C

Forgive the neon glare of these flash photos, I try to avoid it at all costs, but sometimes one has to cram in a bit of late-night crafting!

First off, there are three important tips on working with oilcloth or laminated cotton—
A: Don't use pins! Like working with plastic or leather, they will leave permanent holes in your fabric. Instead, try hair pins or paper clips to hold layers together while you sew.

B: To sew with these slippery and thicker fabrics, you will want to use a walking foot for your machine. If you don't have one, you can use a bit of painter's tape on the bottom of your regular foot so that it can run smoothly along (masking tape works too, but the painter's tape is sure not to leave residue). Just cut a hole so that your needle can go through uninhibited.

C: Instead of cutting triangles, cut straight slits at the corners of seams so as to reduce bulk and increase flexibility.

This is a great resource for even more tips for working with oilcloth, including guidance on choosing an appropriate needle size and stitch length:
Oilcloth International Blog

Lunchbag, insulation detail
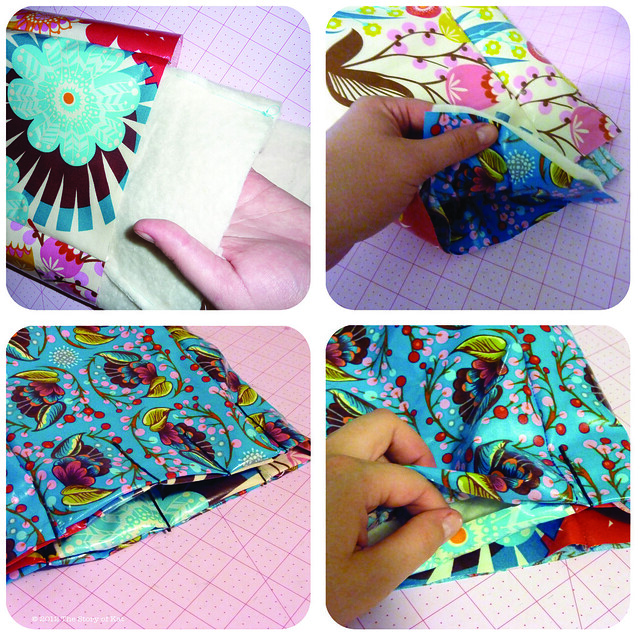
 Clockwise, from top left: 1, 2, 3, 4.

Following the technique and dimensions of the linked tutorial, you will make three bags—two from your chosen laminates, and one from cotton batting at a 1/4 inch smaller on all sides than the other two. Once you've done that, follow these simple steps to finish your bag, referring to the photos above:

1. With one of the oilcloth bags turned right-side out, slip your batting layer into it, making sure the corners are flush with eachother as much as possible.

2. Next, slip your second oilcloth layer (right-side in) into the batting so that you have the three bags sandwiched into one with the batting in the middle and the oilcloth facing out on both sides. If the ends of your bag do not quite match up, you can trim them to reduce bulk, however, you will need some extra to tuck in so that you can create a clean edge so read on first, and don't worry about that too much.

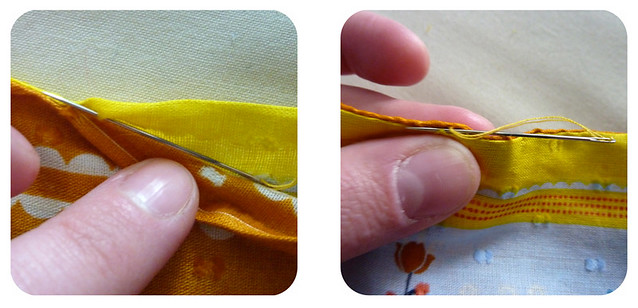
3. As you can see in the photo, you will want to fold the edges of both laminates towards the middle so that they meet as if you are getting ready to close it with a ladder stitch.

4. Pin as you go with the hairpins and then topstitch all the way around a couple times to close it up.

Following the package directions for your grommets, attach one at a time to each side of the bag app. 4–5 inches down from the top edge and directly lined up with each other. Make sure you place them down far enough to fold the top edge over however many times you prefer. Secure fold with a 6–8 inch piece of ribbon (a grosgrain ribbon will fray the least and you can hand stitch it down to one side of the bag so as not to lose it)

TADA, you are ready to eat some lunch!

Most other tutorials you will find call for topstitching along all the seams of the bag, but if you are going to go for the insulation and double-sided approach, you will find that is not possible. With all these layers and the food you actually put into it, you are pretty much good-to-go for structure anyhow, but you could do it by hand if you really want those straight lines for the finished product.

Monday, October 24, 2011

How to: Quick and Dirty and Transfer Method

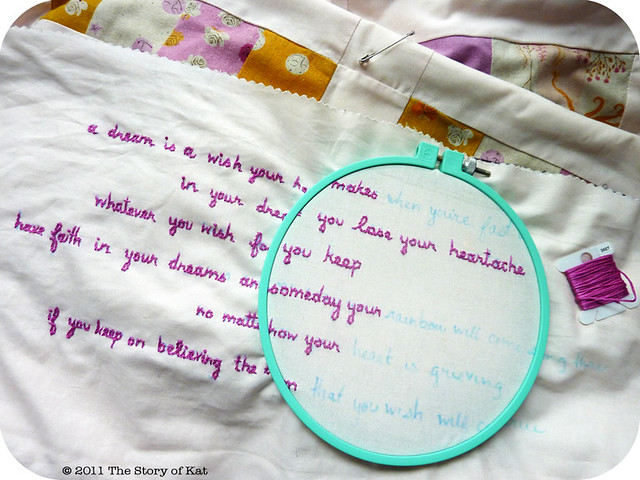
A dream is a wish your heart makes...

What better way to avoid finishing my eight page paper than to write a blog post instead? Sounds like perfect sense to me as this way I can get something important done and procrastinate at the same time plus I really am still writing so it's not completely unrelated...right? I feel like I have just discovered a loophole I shouldn't have and it is awesome, muahahaha!

But foreals now, the paper is pretty much done except for some editing and due tomorrow so I feel good about it and find that I am relishing my time blogging and crafting ever so much more these days as it is time that has become all the more rare and precious to come by.

One of the things I've been working on a bit each night is this embroidery that I am doing on the back of the FFAII quilt for my niece (seen here, here, and here). Of course the thought occurred to me just as I was about to start quilting the thing and the only quote that seemed perfect was this rather lengthy bit from the song in Disney's Cinderella...a perfect lullaby for a fairy tale themed quilt I thought and I placed it so that she'll see it on the edge of the underside every time she pulls it up around her. If I can't be there in person, at least this will be!

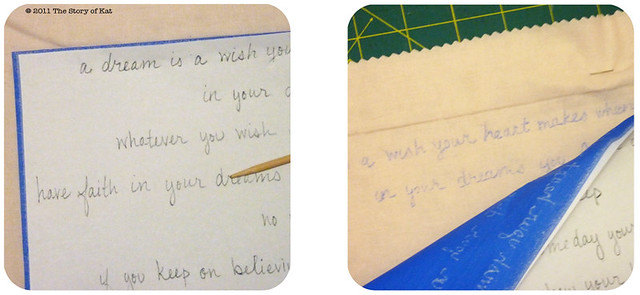
I copied it out using my own handwriting, scanned and adjusted it a bit on the computer to make sure it was lined up and would fit in the desired area, and then transferred it the quick and dirty way using wax free transfer paper from Seral (it's the best wax free stuff I've found and works on wood, paper, and metal too, but I'm dying to try the non-chalky carbon type). Now I will admit this is not my absolute preferred method but it was already dark out at the time so tracing was not an option for me (someday I will have a lightbox...) and I just didn't feel like working in the pristine way needed for the permanent  iron-on transfer pen. In such cases, it's the fastest and simplest method I've found. Here's how:

1. Place the textile or whatever item you are transferring to on top of a flat hard surface as this will ensure the clearest and darkest marks. Then line up your design where you want it and place the transfer paper between them, colored chalk side down.

2. You can use a pen or pencil to trace over your design but if you're concerned about being able to use it again, use a tracing stylus. A knitting needle is also a much cheaper and handier option that I have found to work quite well!

3. The more you're able to keep your arm up off the paper, the less chalky marks you'll end up with although they will disappear as you start handling it. If your design is small or you're going to be finished with it quickly, you're done at this point.

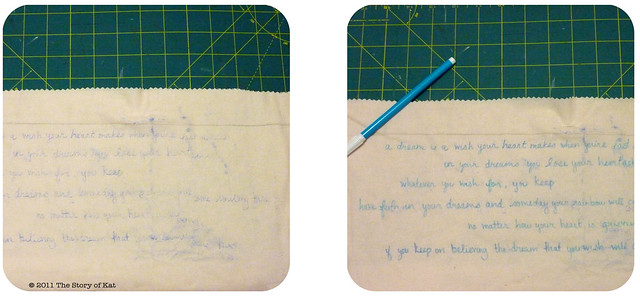
4. If your design is larger like mine and you're going to be working on it over a period of time, I like to use a water soluble fabric safe marking pen (Dritz makes a variety of them) to go over my design which gives it a bit more definition and gives you something more lasting to go off of as the transfer paper marks fade. As you can see in the very first photo of this post, I like to adjust as I go and any of those extraneous blue marks come right out with a bit of water when you're done.

Quick embroidery tip: after wetting your finished embroidery piece, ALWAYS allow it to air dry and ALWAYS iron it from the back side only. It's a simple precaution to take but will ensure a longer life and will keep the iron from crushing down the stitches you just worked so hard on.

Friday, July 15, 2011

A Mini Tutorial: French Seams

finished french seam
The backside of a finished french seam.

I've been working on a chuppah for a friend's wedding and since the piece will be viewed from both sides in such a formal setting, I knew I would need to finish the seams in such a way so that no raw edges could be seen.

Enter my new best friend: french seams.

At first they seemed intimidating but once I got my head around the way the fabric should fold back on itself before sewing the seam closed, it was a piece of cake and I can see how useful they'll be for finishing all sorts of items, but especially on home decor pieces such as pillowcase edges and curtains where both sides of the piece are more often seen as opposed to clothing where serging the raw edges of the inside seams does the trick just fine. I made sure to document my process as I always find photographs the most useful for learning a new technique when I'm not able to observe it in person.

french seam tutorial
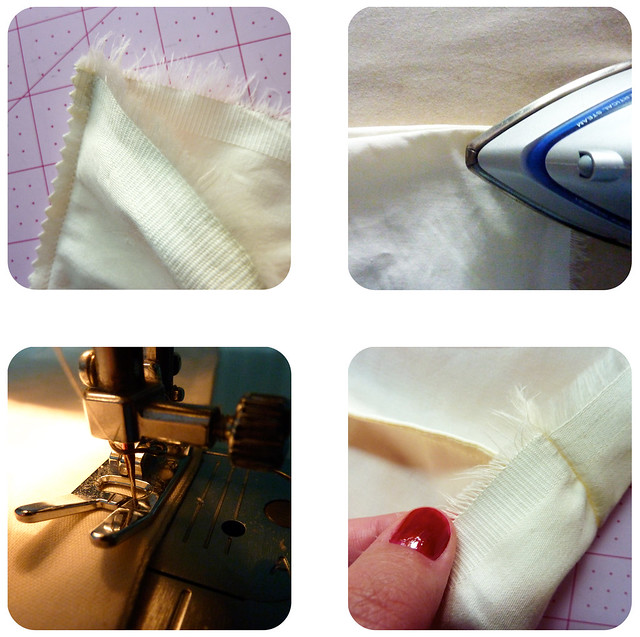
1/4 inch french seams, clockwise from top left.

Step one: A french seam consists of two seams, one that encloses another so that no raw edges are visible from the outside. To accomplish the first seam, simply sew as you normally would any seam with the only difference being that you have to make sure that you are sewing WRONG SIDES TOGETHER. Once sewn, trim off half of your seam allowance (see top left photo).

Step two: Once your first seam is sewn and trimmed, fold the fabric at the seam back on itself so that the right sides are facing each other. In other words, this means that the edge you just trimmed will be sandwiched inside the fold and the clean side of the seam will be facing out. Press that seam flat (see top right photo). While I tend to get a bit footloose and fancy free in deciding just how often I need to press my seams as I work, it really is necessary here as you need the fabric to lay nice and flat in order to sew it closed in the next step.

Step three: Ok, take a breath because the hardest part is over and you've just got one more thing to do!

Step four: With that pressed seam as the edge of your piece (your wrong sides are still facing out just as you pressed it, see placement of the pressed seam in the bottom left photo), go ahead and sew 1/4 inch away from that (1/4 inch if you started with 1/4 seam allowance on the first pass or 1/2 if you started with 1/2 seam allowance on the first pass). In doing so, you are effectively enclosing the first seam within the second so that your raw edges are hidden inside.

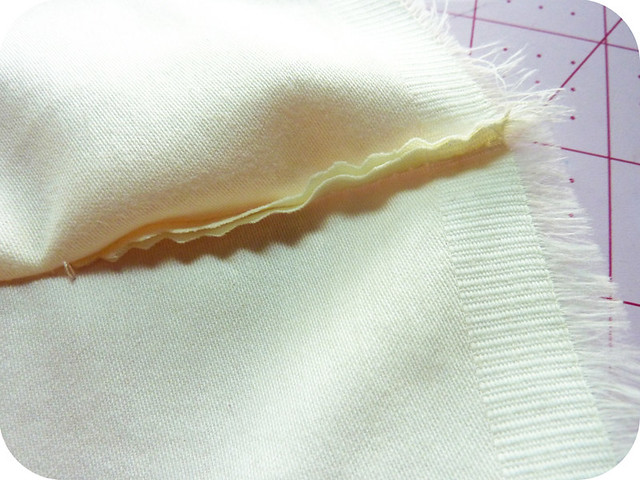
For clarity's sake, like this:


inside french seam
The second seam coming together and enclosing the first.

Here you see the second seam enclosing the first as it is sewn down so that you have a completely clean, normal looking seam on one side (where the right side of your fabrics are) and on the back, the enclosed seam edges, as seen in the image at the very top of this post.

Some Helpful Hints:–In the above example, I've ended up with 1/4 inch finished french seams for which you need to be sure to allow for a 3/4 inch total seam allowance before cutting your fabric to the desired size. For a finished 1/2 french seams, allow for 1 1/2 inches of seam allowance.
–Pinking shears are a great way to trim the first seam as it adds a little extra durability and defence against fraying.

So now that you've got the the basic concept, why not take your fancy french seams out for a spin? I've gathered up a few projects that make use them in very different ways, both for functionality and for a professional finish:
Pillowcases with Cuff and Trim from Film in the Fridge
DIY Duvet Cover from DesignSponge
Drawstring Bag from WhipUp

Wednesday, February 9, 2011

Tutorial: Double-Sided AMH Scarf (on the cheap!)

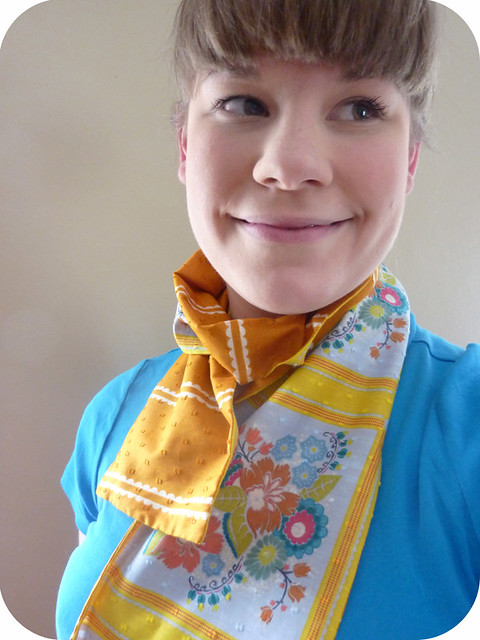
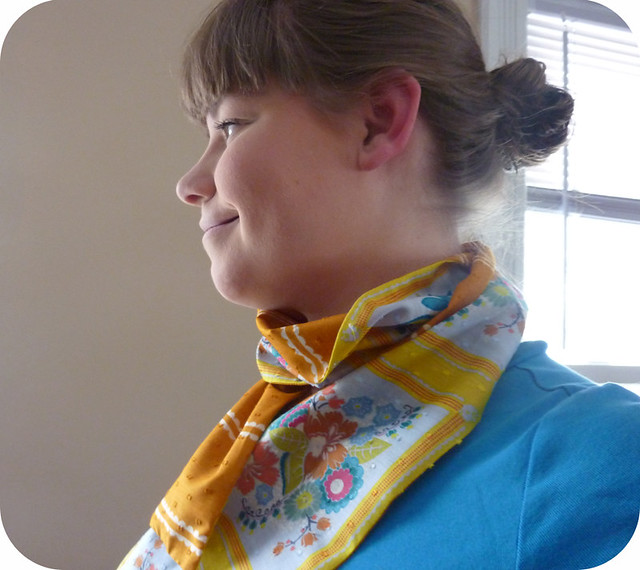
AMH Scarf and me
me and the finishd double-sided scarf

as you probably know, anna maria horner's little folks and dance line is my favorite fabric EVAH. all year long i've been saving up and buying small amounts all piecemeal like only to end up hoarding the stuff big time when i realized i still didn't have enough for every single project i wanted to make. yep, i'm in total covet mode and yep, i'm laughing at myself right now.

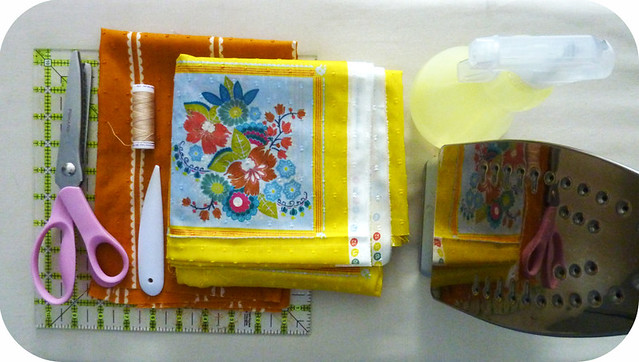
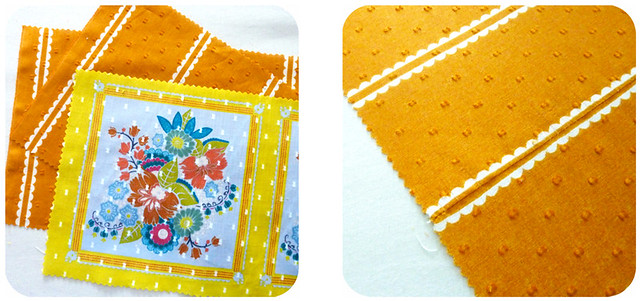
one of those projects is the double-sided scarf like the one featured in the promo photos for when the line first came out. she's since put out some kits for making these with other voiles from the line (and i'm thinking of getting one of the velveteen kits for the figure-8 scarf for my upcoming birthday...), but not any with the square dance and i thought that, to make my fabric stretch further for more projects, i could make one of these scarves with the the 6 inch squares instead of the 12 inch ones as featured and only 1 fat quarter of the pastry line cut from the width of the fabric instead of the length (double bonus: this way your dobby dots will run the same way on either side too!)...and tada! the double-sided AMH "on the cheap" scarf was born!

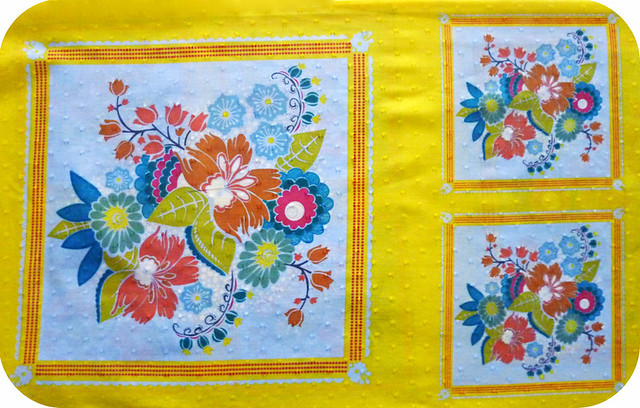
square dance panels
you can make a large version with the 12" squares or a smaller accent scarf with the 6" squares as i've done

now the concept and steps are totally simple so even beginner sewists can accomplish a scarf such as this one with minimal tools and experience. materials are as follows:

materials

-1 fat quarter of the pastry line fabric in your chosen color
-1 panel of the square dance fabric in your chosen color
-thread (matching is nice for the hand stitched knot at the end)
-scissors (pinking shears are helpful but not absolutely necessary)
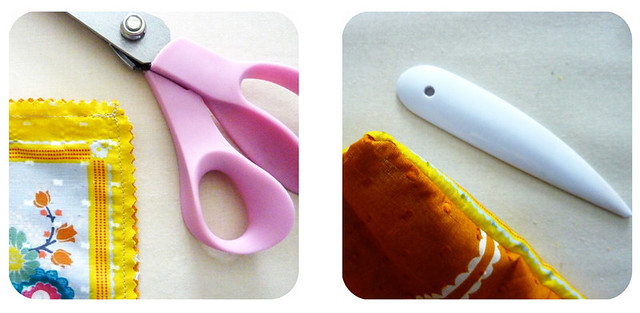
-point turner
(if you don't have one or just lose track of things as i do sometimes, a chopstick works well. o, the wisdom i have to impart!)
-quilter's ruler
-iron and ironing board

step 1

first off, you'll need to cut 1 strip of the square dance panels (that's a row of 8 squares for the 6" size) with a 1/4 inch seam allowance going around the whole thing (it may be a smidge tight on the long sides but you'll have a bit extra on the ends). i found measuring exact lengths for this material unnecessary since you can just follow the lines around each square and still be as exact as you need to be.

second, you'll cut two strips from the fat quarter of the pastry line fabric. each strip should be 27 1/2 x 7 inches which will use it up perfectly with some scrap leftover for patchwork projects! your pastry lines should run perpendicular to the length of the strip so that your dobby dots mimic the direction of those on the square dance fabric. even if you have the new printing of these fabrics, which do not have the lovely little dobby dots, i still prefer this placement of the fabric as it shows off the pastry lines quite nicely.

as you can see in the above photo on the right, i've cut and sewn my two strips of pastry line fabric together (right sides facing when you sew) right in-between the lines so that the seam is barely visible when you're wearing it. neat, huh? if you wanted to make one of these scarves that is double the length, you would just do this for two lengths of the square dance fabric and 4 lengths of the pastry line fabric.

step 2

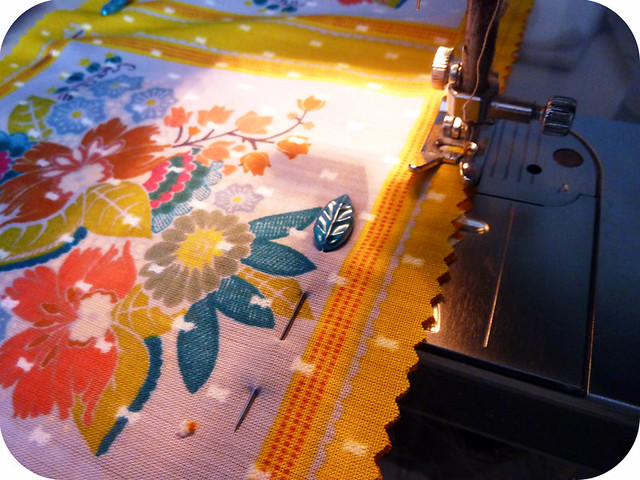
now, place the right sides of your fabric together and pin it so nothing shifts and gets wonky while you're sewing such a long strip of slippery material. sew both long sides and one of the ends shut with a 1/4 seam allowance (making sure to backstitch at each corner to secure your stitches). since the amount of fabric on the edge of the squares can be a bit tight, pinking your edges is a smart safety measure to take here.

the voile is a bit more buttery than what i usually sew with and i've learned now to take the tension on my machine down just a tad when working with it from now on.

step 3

wah-lah: you've got an inside-out tube looking thing with one open end now...you are going to look great! but better if you follow the last few steps, i promise.

on that last open end, begin to sew as if you were going to close it up like the other end. instead of going all the way across though, only sew about 2 inches in from the corner on each side, still making sure to anchor your ends by backstitching on the machine. this will leave you with an app. 2" opening and nicely uniform corners. go ahead and trim off the corners diagonally to reduce on bulk leaving about 1/8 of an inch between your corner seam and your cut so that it won't unravel on you.

now you are ready to turn it right-side-out through that 2" opening at the end. use your point turner (or chopstick..just nothing too sharply pointed) to make sure your corners are completely turned out.

step 4

once that's done, use your fingers to flatten the seam, pressing with the iron as you go. go ahead and also press that opening flat with the seam allowance toward the inside so that you have a straight edge. you can use the ladder stitch to close it (also known as a blind stitch), sewing along the inside of the seam allowance as shown above. the knot is the only thing that will show on the outside so that's why i recommend matching thread. it's great practice and one of my favorite stitches.

when that's done, so is the scarf!

all finished!

Thursday, October 14, 2010

Tutorial Index

All my tutorials and inspirational DIY projects gathered in one place for you—I hope you enjoy! If you make something using these, I'd love to see your work in my flickr group.


Embroidery
Satin Stitch
Transfer How To: Wax Free Transfer Paper

Sewing
Double-Sided AMH Scarf
French Seams
Oilcloth Lunchbag (double-sided and insulated!)

Miscellaneous Crafts
Felted Acorns

Vintage and Thrifting Know-How
Identifying Vintage Bakelite
Identifying Hand Embroidery Pieces

DIY Inspiration
Wedding Invites, Part I
Wedding Invites, Part II
Paper Crane Strings
Vintage Centerpieces

Wednesday, September 22, 2010

inspiration board


one of my recent weekend projects was this polka dot bulletin board for my studio. i am a chronic collector and pile maker so i can never have enough places to keep important scraps of paper and beautiful little things i want to display for inspiration.

the tutorial (link shared below) called for pre-cut cork board but i was trying to save some money and cut my own using a bowl from the kitchen for the template piece. i'd still like to paint in this room so the other thing i did a bit differently was to just hang them up with sewing pins so as not to leave big holes in the wall. my dad would be proud, haha.


overall, it was fairly easy and painless to make, i think it took me just a couple hours altogether. you can find the tutorial for these over here on craftzine.com.

Wednesday, March 24, 2010

Hey I Can Do That (OR Celebrating National Craft Month)

(p.s. these lace crochet napkins are available in my shop here!)

I've seen these felted acorns all over the internet lately and realized I already had all the materials to make them. The ones in the photo above are the ones I made with just a few tools and about a half hour! They'll make a nice little springtime decoration I think (I do love folklore and woodsy-inspired whimsical little things) OR try making them in warm fall hues for a very cool addition to your family's thanksgiving table!

And since March is National Craft Month, I thought what better way to celebrate than to get out these supplies and attempt something new...because if you're anything like me, than you've tried your hand at about a baker's dozen worth of different arts and crafts and probably have some supplies sitting away that never quite got enough attention ;)

Here is what I used to make these:
acorn tops (found on a recent walk in the woods)
roving in various colors for felting (if it's color you want try the rainbow room on etsy)
felting needles (there are ones with handles like in the photo or you can use a single one without the handle, just be careful!)
felting needle mat (you can use a regular clean sponge for this)
all-purpose super glue (you can buy specialty felt glues if you prefer)

I'm not an expert, I just like to play, but feel free to ask questions if anything isn't clear enough and i will certainly try to help!

1. Wash acorn tops gently in the palm of your hand or shallow dish with a little soap and water. Let dry on counter.

2. Rip off a little blob of roving in proportion to your acorn cap. You can achieve a basic round ball shape by bunching it up and constantly turning it 'round on your mat or sponge as you poke it repeatedly with the felting needle. BE VERY CAREFUL though! Felting needles have little barbs on them which is what allows them to take particles of the roving and smoosh them together to make sheets of felted fabric or shapes like this. Rhe barbs can hurt like the dickens though and special care and focus is needed to avoid this...yeah, I say this from experience.

3. To help shape your circle, you can roll it in your palms and then go back and forth to the mat to continue shaping with the needle. As the circle forms, add on small pieces of roving at the top so that it begins to look like a small thimble—the larger end will fit into the acorn cap and the rounded top will be the part that sticks out.

4. Once I had achieved this thimble-like shape that fit nicely into my acorn cap, I plopped a bit of glue into the cap and smooshed my felt acorn in. You can push your felt in with your thumb on the base of it so that it sits in there quite snugly and then you can always refine the shape a bit more at this point to achieve just the right look.

And there you have it, an eco-friendly and very cute addition to your decor!

Saturday, February 20, 2010

a first for me and a tutorial for you


i had the everlasting gobstopper of colds this past holiday season so while i was home in michigan for christmas, my dad gave me one of his hankies to use. after giving it a good wash, i was about to package it up as i was sending out packages for the shop today when i thought to myself a crafty and clever thought...i'll wait and send it back after i've upgraded it!

i've been attempting to polish up on my embroidery ever since i received these lovely dishtowels from my nana who is a master of the art herself. i've learned a lot just from studying the towels themselves but have been a bit intimidated by the satin stitch. SO i went right ahead and tried it for the first time on my dad's handkerchief: i decided to put his name alongside a little handlebar mustache. not because he's into cute little etsy fads, haha, but because the man can grow serious mustache! we were calling him wyatt earp at the time this photo was taken but i think he may even have him beat. i give you exhibit a:

(this was taken the day of my senior hs prom...my grandmother and i made the dress together
and i got all my accessories from the antique shop i worked at.)

OK. so here's the embellished handkerchief that i managed to start and finish this afternoon (don't you hate it when people say s*#t like that? lol). i'm sure there's a proper way to do a satin stitch and that that may very well be a far cry from what i'm showing you here, but these photos and instruction should at least give you a general idea of what it should look like and how to do it yourself!


1. lightly, with a fabric pencil (the kind that washes out), draw out your design. there are bajillions of iron-on transfers you can use for embroidery too if you want to leave the drawing to a pro. i usually draw mine on very lightly but adjust as i go with the thread as it is kind of like going over a thin line with a fat marker. i'm not totally happy with that last "b" but that's what i get for trying to freestyle my way through the letters. i think bob will be ok with that though ;)

2. TOP LEFT PHOTO: a satin stitch is used to give a smooth raised effect to your embroidery and to fill in larger areas. the first step here is to outline your design with the thread, pulling your needle up through the middle of each previous stitch so that they are all connected together and you have a clean line.

3. TOP MIDDLE PHOTO: once you're done outlining, you'll want to come into the middle and fill it with a few lines or x marks. these are for your final stitches to sit on top of and what will help to give it an evenly raised look. they will not be seen in the finished product except on the backside of the piece. a clean backside is one of the true markers of an experienced embroideress. yeeeah i don't know if embroideress is a real word either.

4. TOP RIGHT PHOTO: starting on one side of your design, bring your needle up through the material right at the point above your outline. pull through and then bring the needle down to the outer part of the outline across from where you started—top to bottom, bottom to top, so that all of the weight of these longer stitches sit on top of your material and not on the backside where they won't be seen. continue until you reach the other side of your design and WA-LAH! POOF! you've done the satin stitch!


if you're interested in learning more about embroidery, check out any of these three great books:
Doodle Stitching: Fresh & Fun Embroidery for Beginners, By Aimee Ray
Complete Guide to Needlework, Reader's Digest
Sublime Stitching: Hundreds of Hip Embroidery Patterns and How-To, Jenny Hart

Thursday, January 28, 2010

Fabric Corkboard Mosaic Tutorial


I'm in the middle of organizing and decorating my craft room in our new place and I think this project would be so great to make a cheap inspiration board with fabric samples, project designs, etc. It's a feature on craftzine.com, which, if you haven't yet checked it out, is one sa-weeeet crafty cyber-heaven! Just click on the photo above to see the complete tutorial!