Showing posts with label laminated cotton. Show all posts

Tuesday, January 15, 2013

Sewing For Little Girls

Laminated bibs
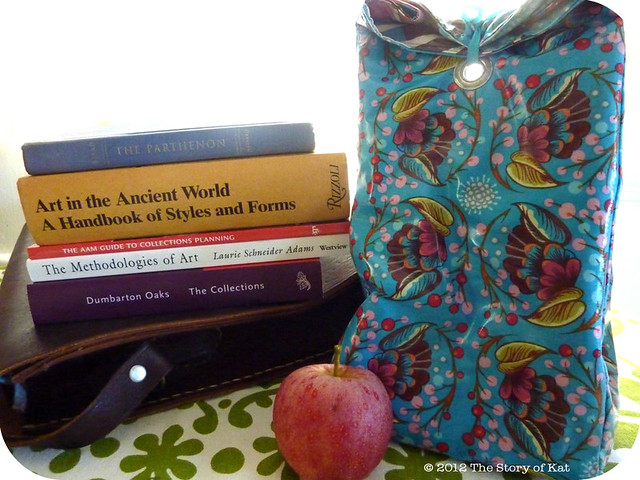
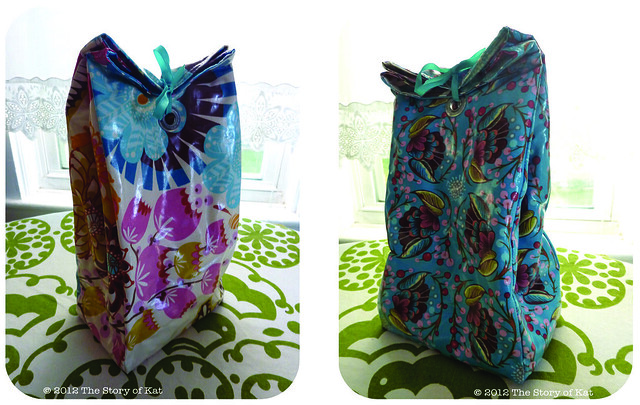
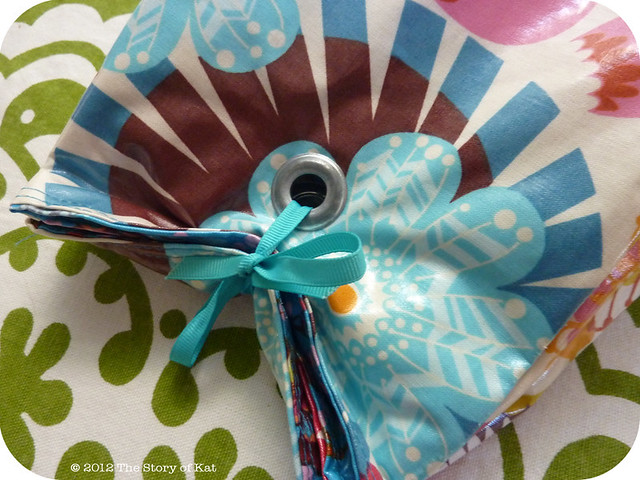
Laminated AMH and Echino

One thing I always look forward to in January is finally being able to share all the projects tackled as gifts for the holidays that are no longer top secret. I'll start with this batch of items I made for my three nieces and friend's baby girl first—I secretly (or maybe not so secretly) loved indulging in some frilly girly sewing!

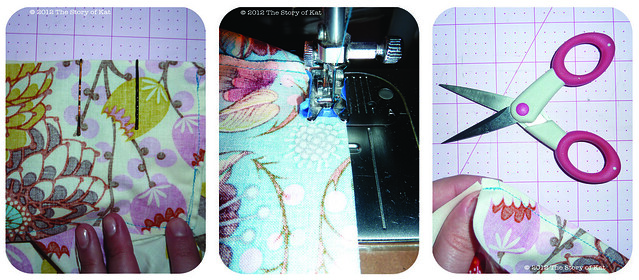
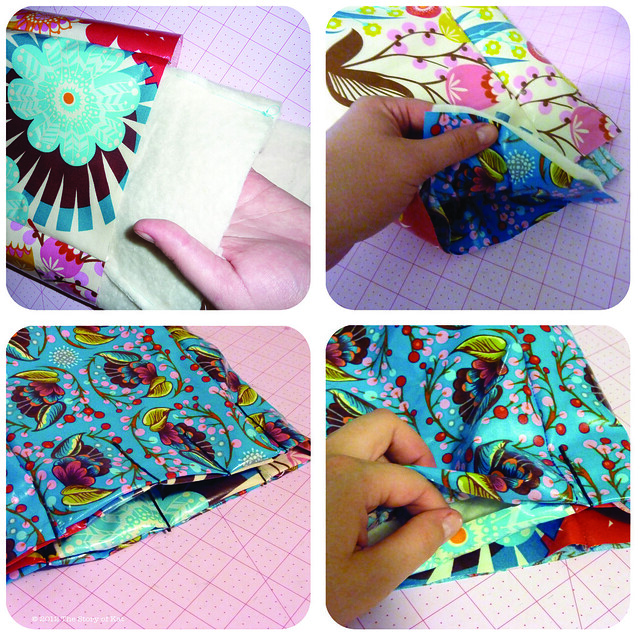
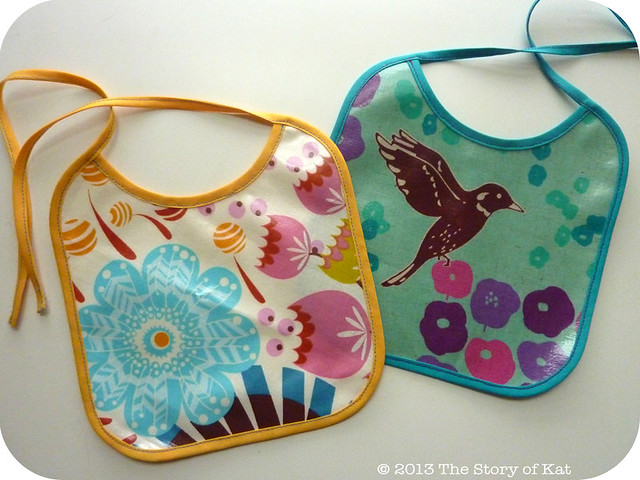
If only everything were as easy to make as these bibs with laminated cotton—I think the most difficult part was just working up the chutzpah to finally cut into the precious stuff. Using one of the Martha Stewart patterns and pre-made binding tape, I bound the edges and made ties all in one go with contrasting topstitching (a nice trick that makes for something that is still aesthetically pleasing for when you don't have thread on hand that matches your project).

Barbie Sleeping Bags
Soft flannel polka dots for the inside and Kona cotton for the outside

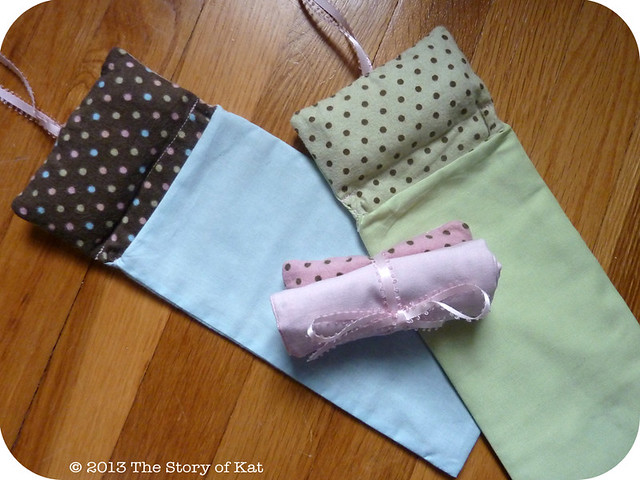
Next up were the Barbie sleeping bags I made for my niece who loves playing "sleepover" with her dolls. These were fun to make with some fabric I already had on hand from my stash. I found a tutorial here that gives you the basics and then added a stuffed pillow and ribbon ties for closure so that they could be rolled and stowed like real sleeping bags. Just try and overlook the creepy photos of the dolls playing in that link...whaaa?

Toddler skirts
Dress your child in corduroy and velveteen
(Get it? Such a clever old man pun, I know. Any DS fans out there?)

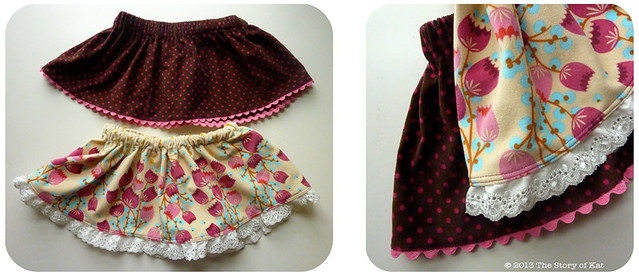
Last but not least are the two skirts I made for my youngest niece, done up in a heavier polka dot corduroy and AMH velveteen for the cold winter months. I have never made skirts before so I was proud of these, even though I made a slight goof with the elastic on the AMH one (you can see in the picture it doesn't lay as flat as I was about a milimeter short on the room needed for the 1" elastic waist...so close!). Chalking that up to lessons learned for next time, especially since they are still very wearable despite that.

I was able to find a free pattern online here. It's really well done although I wish I would have had the luxury of taking in person measurements to double check and customize it as my niece is very tall and could have used the extra length. I added trim to each using some rick-rack and cotton lace which really gave them a nice finished look.

Again, I was surprised by how quick and easy these were to whip up once I got over my own trepidation. No matter how simple the project, when you make something new, I've found it's always good to just take a deep breath, read the pattern as many times as you have to, and follow the old adage of "measuring twice, cutting once." Or in my case, measuring and rereading a bajillion times to combat the silly mistakes I tend to make when I am just way too enthusiastic about a project, haha.

Saturday, September 22, 2012

Back To School: A Grown-up Lunchbag

Lunchbag

Summer is winding down and I am attempting to wind back up for my first semester as an official master's candidate. Part of me is still mourning the end of summer and freedom, but the other half of me is excited because there is nothing quite like a university campus in fall...the smell of laundry in the back of a brick dormitory, the line of chattering students in the bookstore, the timeworn pavement beneath your feet and leaves that are just starting to crackle, stacks of beautiful books, sunny-but-not-sweaty-with-a-hint-of-autmun-chill days in which to cherish the last bit of your summer wardrobe, and sweaters and layered looks and boots just around the corner as fall encroaches completely.

Lunchbag, double sided
ok, these did not look all neon-y weird when I was editing them...
methinks this laminated surface must pick up some strange lighting reflections in photos.

Given that, there couldn't be a better time to share this project with you! Just before my sewing machine broke over the summer, I was able to finish this lunchbag made with laminated cotton (traditionally oilcloth). Because I don't have the luxury of a fridge at work and am on the go all day, a layer of cotton batting acts as a great insulator to keep things cold or hot longer. I love it because I go from 9am to 9pm every Monday and Wednesday packing in both work and classes, so a fresh and cheap lunch is a godsend for both my waistline and my wallet. Plus, making it double-sided adds versatility and makes it easy to clean so no arguments there (I stick it right under the faucet, and BAM! I am done with my lunch dishes!).

Lunchbag, grommet detail
 Detail of the grommet + ribbon closure

To finish it off, I decided to go with a grommet and some grosgrain ribbon since it's more permanent than a clip and doesn't present the same difficulties that velcro would in sewing it down to a double-sided piece. Either which way you turn it, the grommet is there and the ribbon can be stashed inside or even top-stitched to the bag itself so as not to loose it.

Below, you can find how to make these changes, using the following tutorial as a starting off point:
Oilcloth lunch bag by Tumbling Blocks

Oilcloth Tips
Tips for working with laminated cotton and oilcloth, from left to right: A, B, C

Forgive the neon glare of these flash photos, I try to avoid it at all costs, but sometimes one has to cram in a bit of late-night crafting!

First off, there are three important tips on working with oilcloth or laminated cotton—
A: Don't use pins! Like working with plastic or leather, they will leave permanent holes in your fabric. Instead, try hair pins or paper clips to hold layers together while you sew.

B: To sew with these slippery and thicker fabrics, you will want to use a walking foot for your machine. If you don't have one, you can use a bit of painter's tape on the bottom of your regular foot so that it can run smoothly along (masking tape works too, but the painter's tape is sure not to leave residue). Just cut a hole so that your needle can go through uninhibited.

C: Instead of cutting triangles, cut straight slits at the corners of seams so as to reduce bulk and increase flexibility.

This is a great resource for even more tips for working with oilcloth, including guidance on choosing an appropriate needle size and stitch length:
Oilcloth International Blog

Lunchbag, insulation detail
 Clockwise, from top left: 1, 2, 3, 4.

Following the technique and dimensions of the linked tutorial, you will make three bags—two from your chosen laminates, and one from cotton batting at a 1/4 inch smaller on all sides than the other two. Once you've done that, follow these simple steps to finish your bag, referring to the photos above:

1. With one of the oilcloth bags turned right-side out, slip your batting layer into it, making sure the corners are flush with eachother as much as possible.

2. Next, slip your second oilcloth layer (right-side in) into the batting so that you have the three bags sandwiched into one with the batting in the middle and the oilcloth facing out on both sides. If the ends of your bag do not quite match up, you can trim them to reduce bulk, however, you will need some extra to tuck in so that you can create a clean edge so read on first, and don't worry about that too much.

3. As you can see in the photo, you will want to fold the edges of both laminates towards the middle so that they meet as if you are getting ready to close it with a ladder stitch.

4. Pin as you go with the hairpins and then topstitch all the way around a couple times to close it up.

Following the package directions for your grommets, attach one at a time to each side of the bag app. 4–5 inches down from the top edge and directly lined up with each other. Make sure you place them down far enough to fold the top edge over however many times you prefer. Secure fold with a 6–8 inch piece of ribbon (a grosgrain ribbon will fray the least and you can hand stitch it down to one side of the bag so as not to lose it)

TADA, you are ready to eat some lunch!

Most other tutorials you will find call for topstitching along all the seams of the bag, but if you are going to go for the insulation and double-sided approach, you will find that is not possible. With all these layers and the food you actually put into it, you are pretty much good-to-go for structure anyhow, but you could do it by hand if you really want those straight lines for the finished product.