Showing posts with label AMH. Show all posts

Saturday, September 22, 2012

Back To School: A Grown-up Lunchbag

Lunchbag

Summer is winding down and I am attempting to wind back up for my first semester as an official master's candidate. Part of me is still mourning the end of summer and freedom, but the other half of me is excited because there is nothing quite like a university campus in fall...the smell of laundry in the back of a brick dormitory, the line of chattering students in the bookstore, the timeworn pavement beneath your feet and leaves that are just starting to crackle, stacks of beautiful books, sunny-but-not-sweaty-with-a-hint-of-autmun-chill days in which to cherish the last bit of your summer wardrobe, and sweaters and layered looks and boots just around the corner as fall encroaches completely.

Lunchbag, double sided
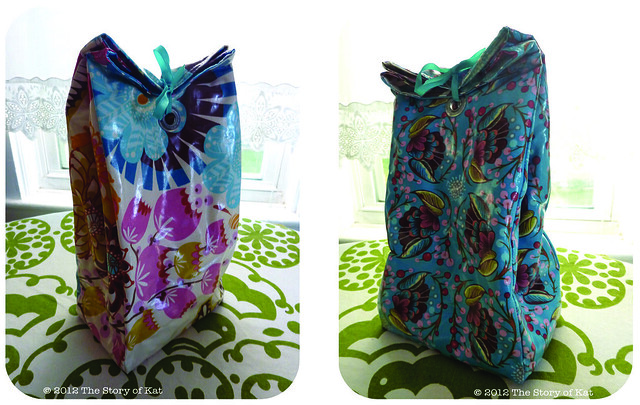
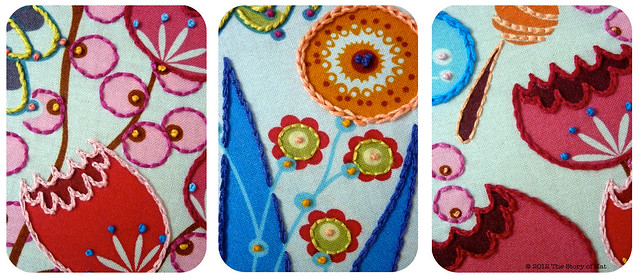
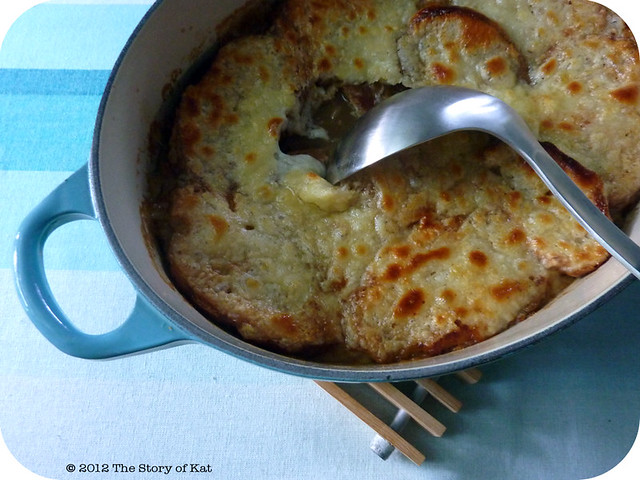
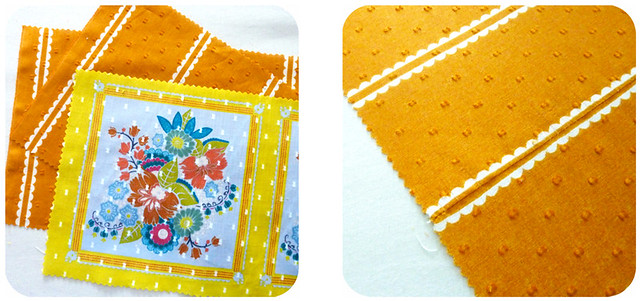
ok, these did not look all neon-y weird when I was editing them...
methinks this laminated surface must pick up some strange lighting reflections in photos.

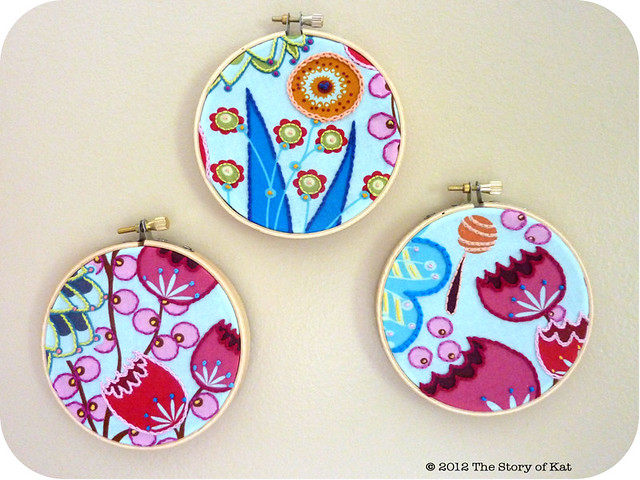
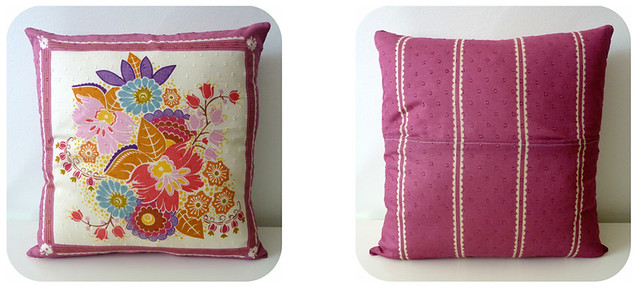
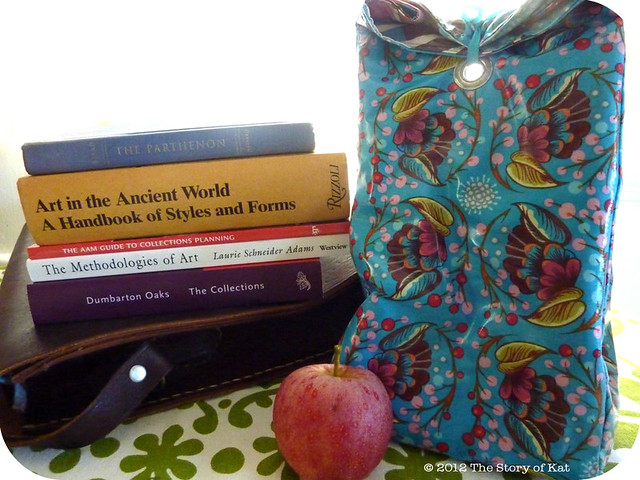
Given that, there couldn't be a better time to share this project with you! Just before my sewing machine broke over the summer, I was able to finish this lunchbag made with laminated cotton (traditionally oilcloth). Because I don't have the luxury of a fridge at work and am on the go all day, a layer of cotton batting acts as a great insulator to keep things cold or hot longer. I love it because I go from 9am to 9pm every Monday and Wednesday packing in both work and classes, so a fresh and cheap lunch is a godsend for both my waistline and my wallet. Plus, making it double-sided adds versatility and makes it easy to clean so no arguments there (I stick it right under the faucet, and BAM! I am done with my lunch dishes!).

Lunchbag, grommet detail
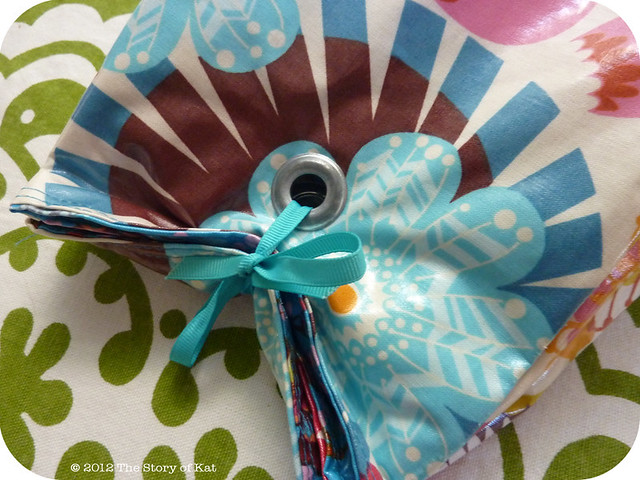
 Detail of the grommet + ribbon closure

To finish it off, I decided to go with a grommet and some grosgrain ribbon since it's more permanent than a clip and doesn't present the same difficulties that velcro would in sewing it down to a double-sided piece. Either which way you turn it, the grommet is there and the ribbon can be stashed inside or even top-stitched to the bag itself so as not to loose it.

Below, you can find how to make these changes, using the following tutorial as a starting off point:
Oilcloth lunch bag by Tumbling Blocks

Oilcloth Tips
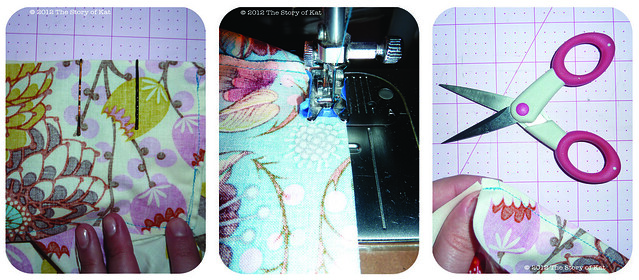
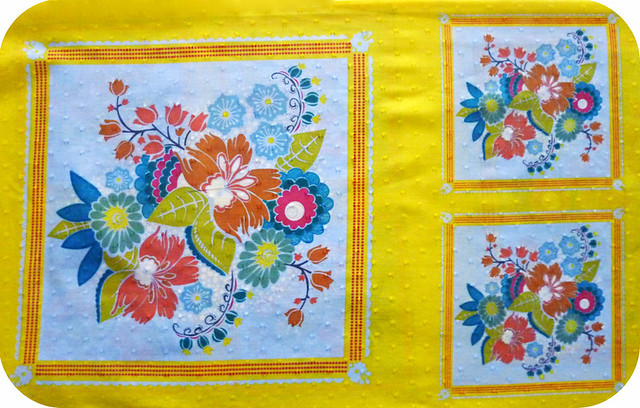
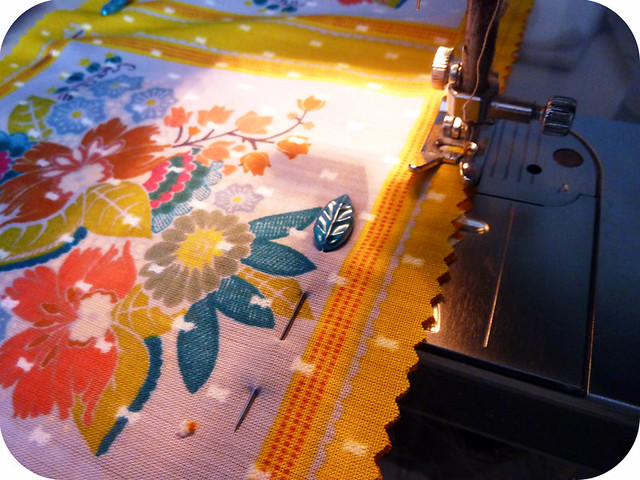
Tips for working with laminated cotton and oilcloth, from left to right: A, B, C

Forgive the neon glare of these flash photos, I try to avoid it at all costs, but sometimes one has to cram in a bit of late-night crafting!

First off, there are three important tips on working with oilcloth or laminated cotton—
A: Don't use pins! Like working with plastic or leather, they will leave permanent holes in your fabric. Instead, try hair pins or paper clips to hold layers together while you sew.

B: To sew with these slippery and thicker fabrics, you will want to use a walking foot for your machine. If you don't have one, you can use a bit of painter's tape on the bottom of your regular foot so that it can run smoothly along (masking tape works too, but the painter's tape is sure not to leave residue). Just cut a hole so that your needle can go through uninhibited.

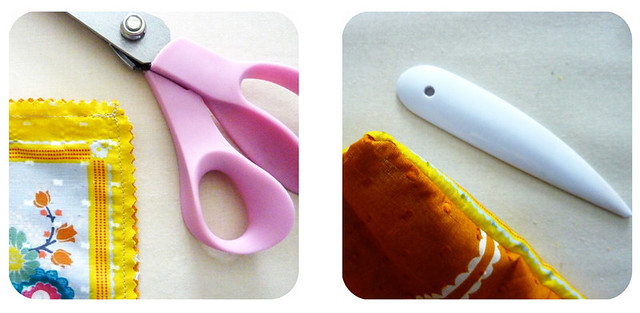
C: Instead of cutting triangles, cut straight slits at the corners of seams so as to reduce bulk and increase flexibility.

This is a great resource for even more tips for working with oilcloth, including guidance on choosing an appropriate needle size and stitch length:
Oilcloth International Blog

Lunchbag, insulation detail
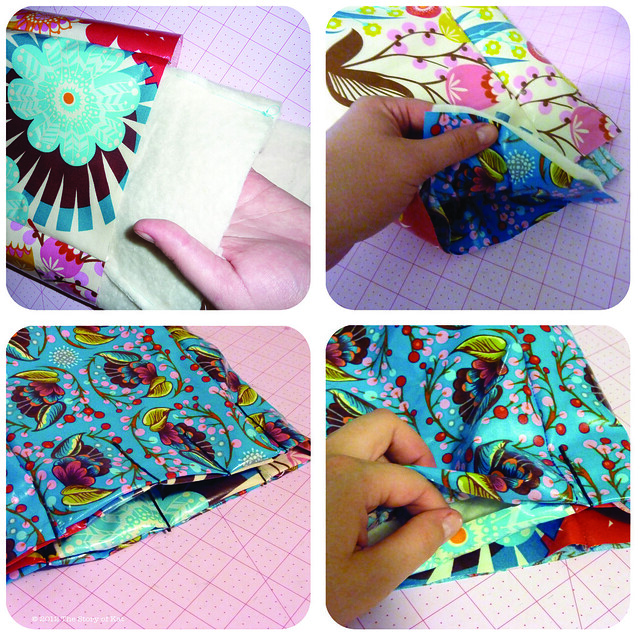
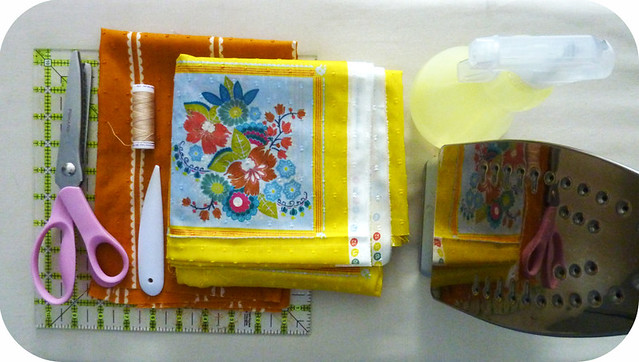
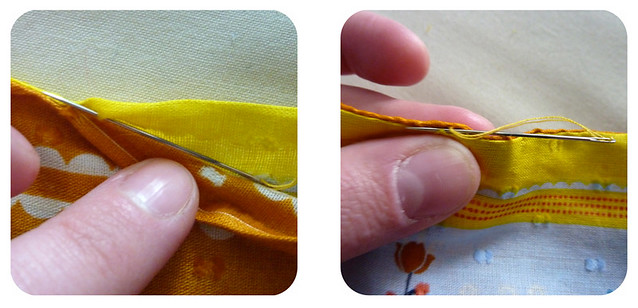
 Clockwise, from top left: 1, 2, 3, 4.

Following the technique and dimensions of the linked tutorial, you will make three bags—two from your chosen laminates, and one from cotton batting at a 1/4 inch smaller on all sides than the other two. Once you've done that, follow these simple steps to finish your bag, referring to the photos above:

1. With one of the oilcloth bags turned right-side out, slip your batting layer into it, making sure the corners are flush with eachother as much as possible.

2. Next, slip your second oilcloth layer (right-side in) into the batting so that you have the three bags sandwiched into one with the batting in the middle and the oilcloth facing out on both sides. If the ends of your bag do not quite match up, you can trim them to reduce bulk, however, you will need some extra to tuck in so that you can create a clean edge so read on first, and don't worry about that too much.

3. As you can see in the photo, you will want to fold the edges of both laminates towards the middle so that they meet as if you are getting ready to close it with a ladder stitch.

4. Pin as you go with the hairpins and then topstitch all the way around a couple times to close it up.

Following the package directions for your grommets, attach one at a time to each side of the bag app. 4–5 inches down from the top edge and directly lined up with each other. Make sure you place them down far enough to fold the top edge over however many times you prefer. Secure fold with a 6–8 inch piece of ribbon (a grosgrain ribbon will fray the least and you can hand stitch it down to one side of the bag so as not to lose it)

TADA, you are ready to eat some lunch!

Most other tutorials you will find call for topstitching along all the seams of the bag, but if you are going to go for the insulation and double-sided approach, you will find that is not possible. With all these layers and the food you actually put into it, you are pretty much good-to-go for structure anyhow, but you could do it by hand if you really want those straight lines for the finished product.

Thursday, May 24, 2012

Freshly Stitched

Hand stitched hoop art, detail
up close and personal

This fabric was just crying out to be stitched up and I couldn't resist it's call! The over sized floral print holds up well under detailed hand work, plus it's a great way to keep a bit of that special fabric around as a purely decorative element. Ahem...a good thing when you fall in love with a print and are having a hard time cutting into the stuff.

Once I go crazy embellishing something like this though, I like to display it against a stark calming neutral so that it doesn't end up looking clownish or saccharine-soaked. Whether it's a frame, wall color, or quilt border, the effect works nicely and is something I love to keep in mind with a lot of my pieces since I have such a penchant for vibrant colors.

Hand stitched hoop art

They turned out so bright and cheery and although I love the way they look on their own, I can't wait to try hanging some up as part of a salon style grouping of art in the living room or going up the stairs. These three in particular are available in my shop here so you can add them to your own wall—there are just the three for now though so act fast if they strike your fancy. Each one is completely unique from the others and showcases a variety of different stitches done in thick floss so the unique structure of each really stands out.

Thursday, May 17, 2012

From This to That


Spring semester 2012
The past few months of my life in one big stack...

I *finally* finished my semester last week and am thrilled to be able to divert my attention to other things for a while without feeling guilty...even just being able to listen to whatever I want on my laptop as I type without getting distracted is completely freeing! I really enjoyed my classes  and feel I've found the right path, but have been eagerly awaiting the freedom that the summer months offer to a student. Between the gallery and the historical society, I am still working a ton but at least have some room to breath a bit between projects now and am geared up to spend as much leftover time as possible sewing up a storm and getting my etsy shop ready for the holidays so that I don't have to worry about it once the fall semester starts up in August.

domino
Curling up with all good things in the falling light
(ahem, yes that is the new special edition of DOMINO!!! Hark, do you hear the angles singing?)

Since submitting my last research paper, I've been indulging in so many of the things  I love that I haven't gotten to enjoy much of these past few months...lots of extravagant cooking, a weekend camping get-away to the cape, a little lot of fabric stashing, and staying up late with my favorite magazines, embroidery, and darning work, while curled up with my cats, husband, and several seasons of How I Met Your Mother. The rewards in life certainly are so much sweeter when you know you've earned them several times over!


A little bit of this, a little bit of that...some yardage and fat quarters of AMH's loulouthi velveteen, cotton laminate,
and quilting cotton, Heather Ross' FFAIII in the  pink colorway, some Liberty of London from my Purl Soho trip,
AMH's pastry line and rare centerpiece, and a whole yard of Michael Miller's Vintage Stroll

Ok, so yeah, the above stash hoard is a bit more than I was planning on when I began picturing the reward I'd planned for myself upon the completion of a successful and utterly crazy semester. Luckily I was able to hunt down some sweet deals and it is lovely, ya?! It pretty much just has me smiling every time I look over at the freshly piled stack on my worktable and all I want to do is fondle it and ignore all other responsibilities. THERE, I admitted it!

Soupe å l'Oignon Gratinée
   Soupe å l'Oignon Gratinée

One of the more elaborate cooking adventures we've managed as of late was Julia Child's recipe for cheesy onion soup, or Soupe å l'Oignon Gratinée, if you're feeling fancy. It's the third recipe I've tried now from her classic "Mastering The Art of French Cooking" and every single one has been superb..of course. The other two were the ratatouille and the riz a l'orientale, which is basically a rice bowl (but o so much more than that and my favorite so far)—who knew such a thing as French comfort food existed and was so completely amazing? Umm...ok so probably lots of you but yeah, I'm learning here folks.

I'm looking forward to being able to blog more often again now and hope to be sharing some finished pieces with you soon...until then, wishing you all just as many good things to be distracted by!

Friday, May 6, 2011

Taking Shape

Home studio
(The blanket was crocheted by my great aunt, the pillows and bunting are both by moi,
the couch is Ikea, the vintage work basket is from Ginger's Girl, and the photo was a gift from my mentor
—an original from the Getty Museum archives of the Parthenon marbles, which I wrote my senior thesis on in college)

You've seen the better half of my home studio here but I never revealed the rest because it was always filled with boxes of supplies and odds and ends that wouldn't quite fit into our attic storage area. Just last weekend though, we got a new couch for our living room (which I think I'm going to re-upholster so stay tuned for that bit of madness...), cleaned in places I didn't know existed as we moved things around, and hauled this little Ikea sofa to my upstairs workroom. I had gotten it when I was working in DC and had a studio apartment in Alexandria, VA so perhaps it is fitting to have it up here now—I'm certainly happy to finally have a place to sit and do embroidery without hurting my back or having to haul my supplies to and from the living room!

I've been waiting so long to be able to bring this couch up here so I could make a pillow out of some of my AMH square dance/pastry line fabric to go with it:

AMH Pastry Pillow
VERY easy to make:
a large panel of the square dance fabric fits a 12x12 pillow (or 14x14 if you've got enough seam allowance) 
and then I just made an envelope closure for the back in coordinating pastry line fabric.

I've thought about embellishing some areas of the flowers with embroidery but like it just as it is for the time being. I think having a bit of my favorite fabric on display like this will be a nice bit of inspiration and I do like being able to decorate this room with anything that suits my fancy, in any colors I please since I do not have to go through the process of whether it is way too girly or not. Eventually I'd like to repaint (the blue was there when we moved in), but I'm pretty happy with how it's coming together for now.

Speaking of things coming together, I've made some good progress towards the show as well this week including 20 draft stoppers and 26 yo-yos! The weekend will find me holed up in the studio still so I can churn out a couple pairs of embroidered converse and some embroidery pattern work...I've definitely got my work cut out for me!

Wednesday, February 9, 2011

Tutorial: Double-Sided AMH Scarf (on the cheap!)

AMH Scarf and me
me and the finishd double-sided scarf

as you probably know, anna maria horner's little folks and dance line is my favorite fabric EVAH. all year long i've been saving up and buying small amounts all piecemeal like only to end up hoarding the stuff big time when i realized i still didn't have enough for every single project i wanted to make. yep, i'm in total covet mode and yep, i'm laughing at myself right now.

one of those projects is the double-sided scarf like the one featured in the promo photos for when the line first came out. she's since put out some kits for making these with other voiles from the line (and i'm thinking of getting one of the velveteen kits for the figure-8 scarf for my upcoming birthday...), but not any with the square dance and i thought that, to make my fabric stretch further for more projects, i could make one of these scarves with the the 6 inch squares instead of the 12 inch ones as featured and only 1 fat quarter of the pastry line cut from the width of the fabric instead of the length (double bonus: this way your dobby dots will run the same way on either side too!)...and tada! the double-sided AMH "on the cheap" scarf was born!

square dance panels
you can make a large version with the 12" squares or a smaller accent scarf with the 6" squares as i've done

now the concept and steps are totally simple so even beginner sewists can accomplish a scarf such as this one with minimal tools and experience. materials are as follows:

materials

-1 fat quarter of the pastry line fabric in your chosen color
-1 panel of the square dance fabric in your chosen color
-thread (matching is nice for the hand stitched knot at the end)
-scissors (pinking shears are helpful but not absolutely necessary)
-point turner
(if you don't have one or just lose track of things as i do sometimes, a chopstick works well. o, the wisdom i have to impart!)
-quilter's ruler
-iron and ironing board

step 1

first off, you'll need to cut 1 strip of the square dance panels (that's a row of 8 squares for the 6" size) with a 1/4 inch seam allowance going around the whole thing (it may be a smidge tight on the long sides but you'll have a bit extra on the ends). i found measuring exact lengths for this material unnecessary since you can just follow the lines around each square and still be as exact as you need to be.

second, you'll cut two strips from the fat quarter of the pastry line fabric. each strip should be 27 1/2 x 7 inches which will use it up perfectly with some scrap leftover for patchwork projects! your pastry lines should run perpendicular to the length of the strip so that your dobby dots mimic the direction of those on the square dance fabric. even if you have the new printing of these fabrics, which do not have the lovely little dobby dots, i still prefer this placement of the fabric as it shows off the pastry lines quite nicely.

as you can see in the above photo on the right, i've cut and sewn my two strips of pastry line fabric together (right sides facing when you sew) right in-between the lines so that the seam is barely visible when you're wearing it. neat, huh? if you wanted to make one of these scarves that is double the length, you would just do this for two lengths of the square dance fabric and 4 lengths of the pastry line fabric.

step 2

now, place the right sides of your fabric together and pin it so nothing shifts and gets wonky while you're sewing such a long strip of slippery material. sew both long sides and one of the ends shut with a 1/4 seam allowance (making sure to backstitch at each corner to secure your stitches). since the amount of fabric on the edge of the squares can be a bit tight, pinking your edges is a smart safety measure to take here.

the voile is a bit more buttery than what i usually sew with and i've learned now to take the tension on my machine down just a tad when working with it from now on.

step 3

wah-lah: you've got an inside-out tube looking thing with one open end now...you are going to look great! but better if you follow the last few steps, i promise.

on that last open end, begin to sew as if you were going to close it up like the other end. instead of going all the way across though, only sew about 2 inches in from the corner on each side, still making sure to anchor your ends by backstitching on the machine. this will leave you with an app. 2" opening and nicely uniform corners. go ahead and trim off the corners diagonally to reduce on bulk leaving about 1/8 of an inch between your corner seam and your cut so that it won't unravel on you.

now you are ready to turn it right-side-out through that 2" opening at the end. use your point turner (or chopstick..just nothing too sharply pointed) to make sure your corners are completely turned out.

step 4

once that's done, use your fingers to flatten the seam, pressing with the iron as you go. go ahead and also press that opening flat with the seam allowance toward the inside so that you have a straight edge. you can use the ladder stitch to close it (also known as a blind stitch), sewing along the inside of the seam allowance as shown above. the knot is the only thing that will show on the outside so that's why i recommend matching thread. it's great practice and one of my favorite stitches.

when that's done, so is the scarf!

all finished!