What better way to avoid finishing my eight page paper than to write a blog post instead? Sounds like perfect sense to me as this way I can get something important done and procrastinate at the same time plus I really am still writing so it's not completely unrelated...right? I feel like I have just discovered a loophole I shouldn't have and it is awesome, muahahaha!
But foreals now, the paper is pretty much done except for some editing and due tomorrow so I feel good about it and find that I am relishing my time blogging and crafting ever so much more these days as it is time that has become all the more rare and precious to come by.
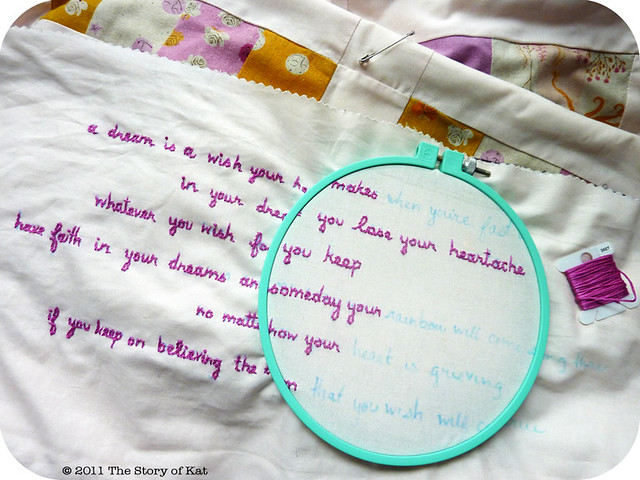
One of the things I've been working on a bit each night is this embroidery that I am doing on the back of the FFAII quilt for my niece (seen here, here, and here). Of course the thought occurred to me just as I was about to start quilting the thing and the only quote that seemed perfect was this rather lengthy bit from the song in Disney's Cinderella...a perfect lullaby for a fairy tale themed quilt I thought and I placed it so that she'll see it on the edge of the underside every time she pulls it up around her. If I can't be there in person, at least this will be!
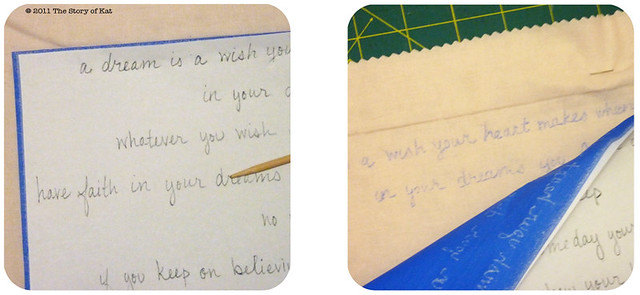
I copied it out using my own handwriting, scanned and adjusted it a bit on the computer to make sure it was lined up and would fit in the desired area, and then transferred it the quick and dirty way using wax free transfer paper from Seral (it's the best wax free stuff I've found and works on wood, paper, and metal too, but I'm dying to try the non-chalky carbon type). Now I will admit this is not my absolute preferred method but it was already dark out at the time so tracing was not an option for me (someday I will have a lightbox...) and I just didn't feel like working in the pristine way needed for the permanent iron-on transfer pen. In such cases, it's the fastest and simplest method I've found. Here's how:
1. Place the textile or whatever item you are transferring to on top of a flat hard surface as this will ensure the clearest and darkest marks. Then line up your design where you want it and place the transfer paper between them, colored chalk side down.
2. You can use a pen or pencil to trace over your design but if you're concerned about being able to use it again, use a tracing stylus. A knitting needle is also a much cheaper and handier option that I have found to work quite well!
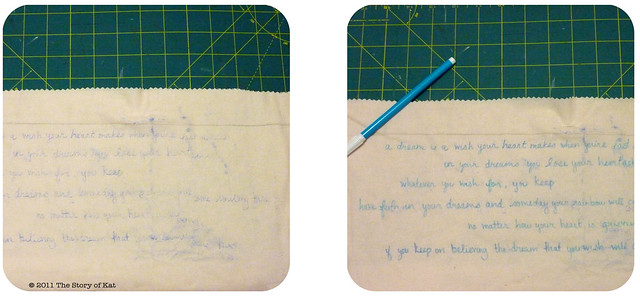
3. The more you're able to keep your arm up off the paper, the less chalky marks you'll end up with although they will disappear as you start handling it. If your design is small or you're going to be finished with it quickly, you're done at this point.
4. If your design is larger like mine and you're going to be working on it over a period of time, I like to use a water soluble fabric safe marking pen (Dritz makes a variety of them) to go over my design which gives it a bit more definition and gives you something more lasting to go off of as the transfer paper marks fade. As you can see in the very first photo of this post, I like to adjust as I go and any of those extraneous blue marks come right out with a bit of water when you're done.
Quick embroidery tip: after wetting your finished embroidery piece, ALWAYS allow it to air dry and ALWAYS iron it from the back side only. It's a simple precaution to take but will ensure a longer life and will keep the iron from crushing down the stitches you just worked so hard on.


2 comments:
What a beautiful embroidery! I can't wait to see this all finished.
Great tip!!
(and thanks for being a smidge mad at the antique mall for me ;)
Post a Comment