Showing posts with label quilting. Show all posts

Monday, October 20, 2014

Around the World Blog Hop

Melody Miller Quilt Top
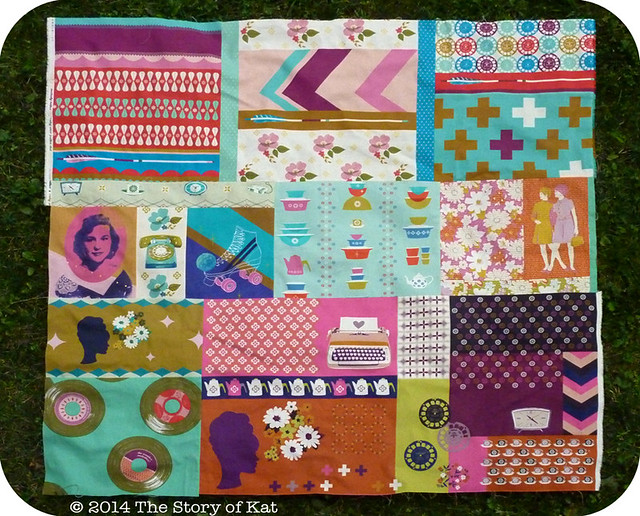
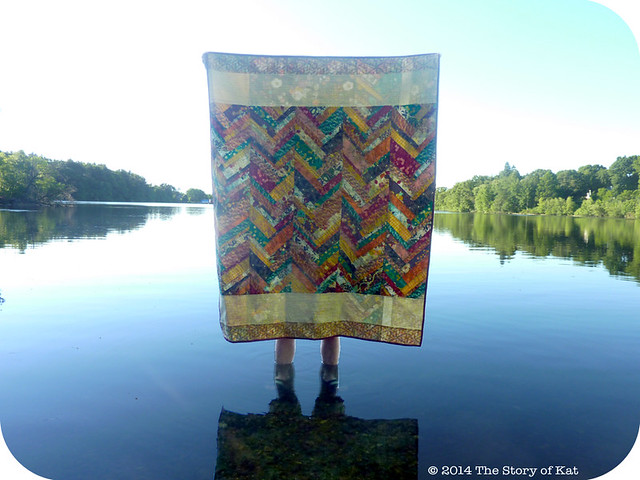
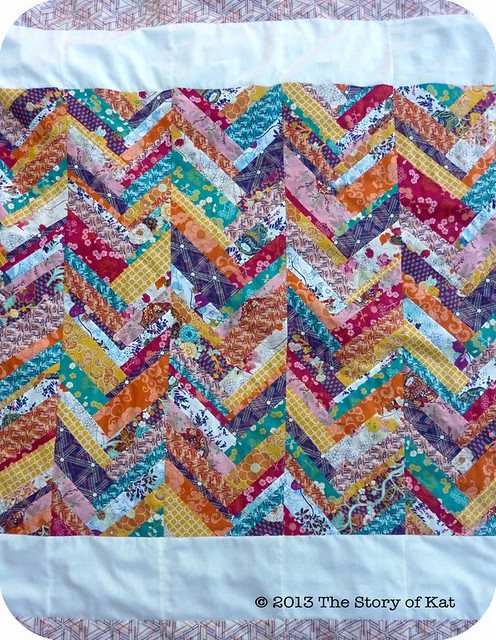
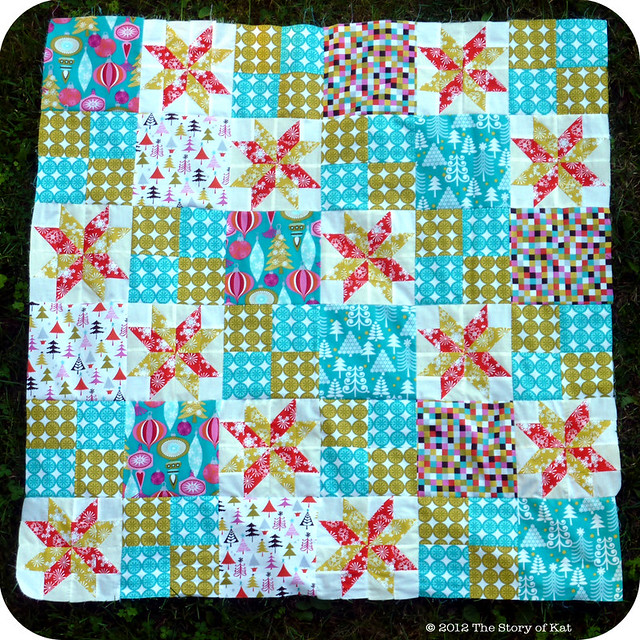
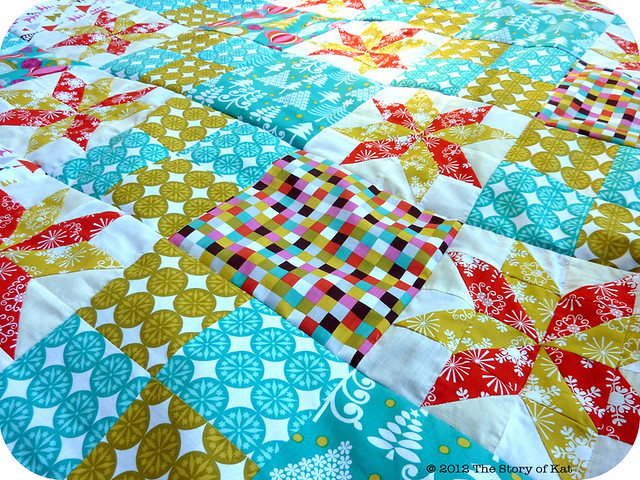
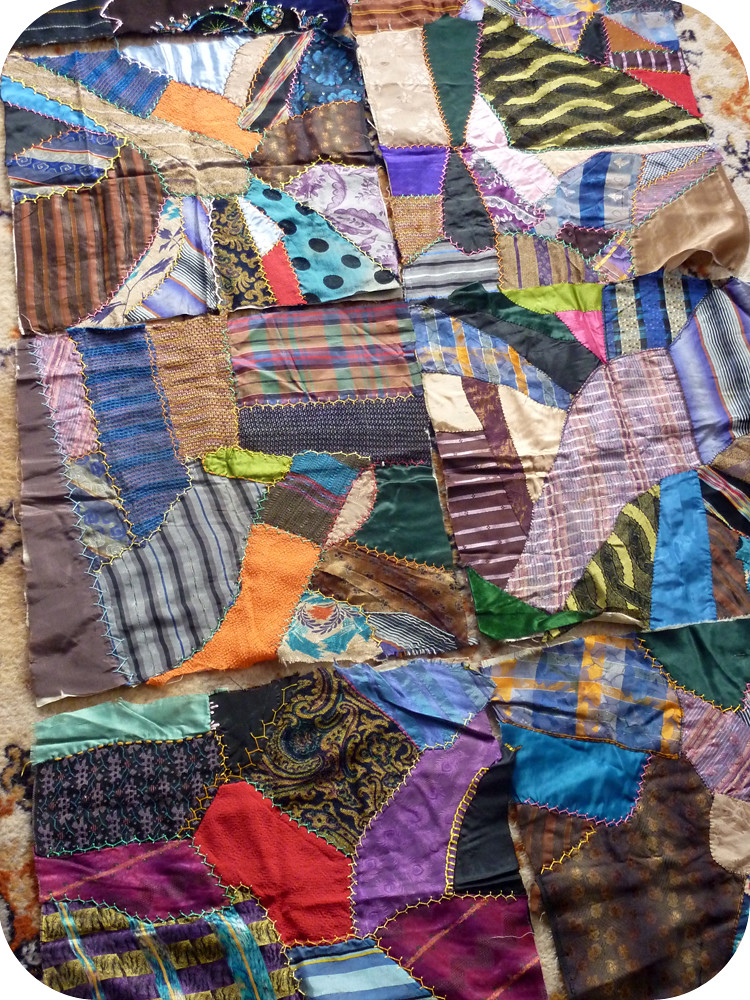
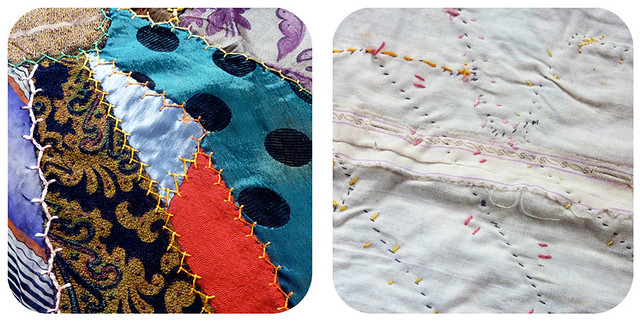
Melody Miller quilt top I'm going to start hand quilting next with sashiko stitches

Belated though I may be, I wanted to respond to my friend's gracious invitation to participate in the "Around the World" blog hop. To echo her sentiments, it's not normally my kind of thing, but I thought the nature of the questions posed were interesting and worth thinking about and sharing. Since I am so late to the party, I'm going to forgo tagging anyone but am sending a thank you to Natalie from Green Leaf Goods for thinking of me!

Sewing Table Reality Check
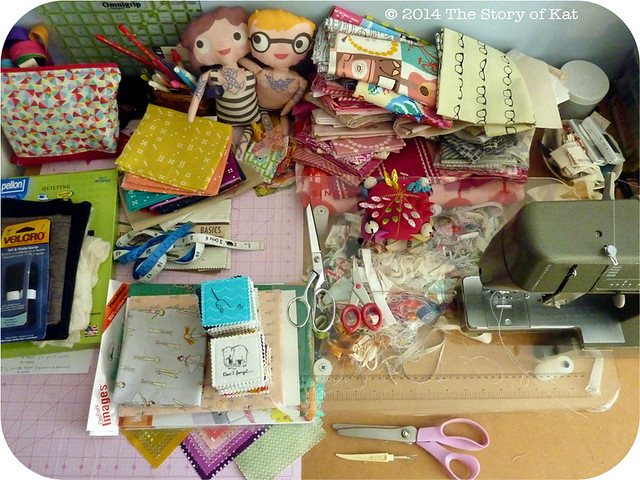
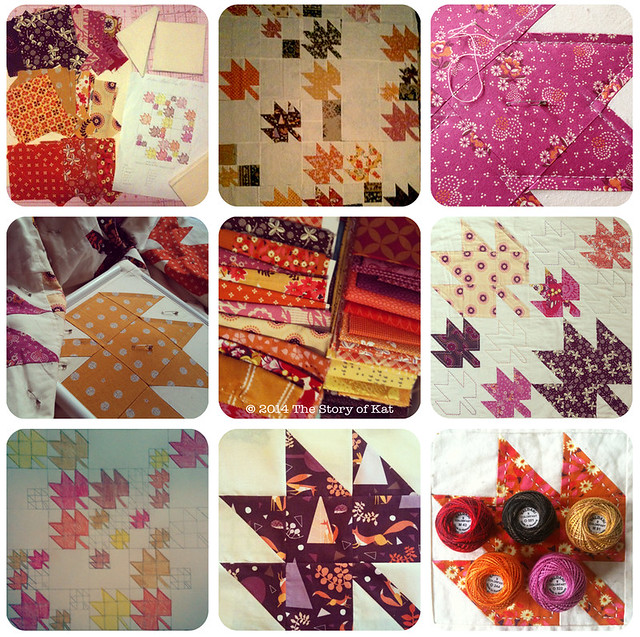
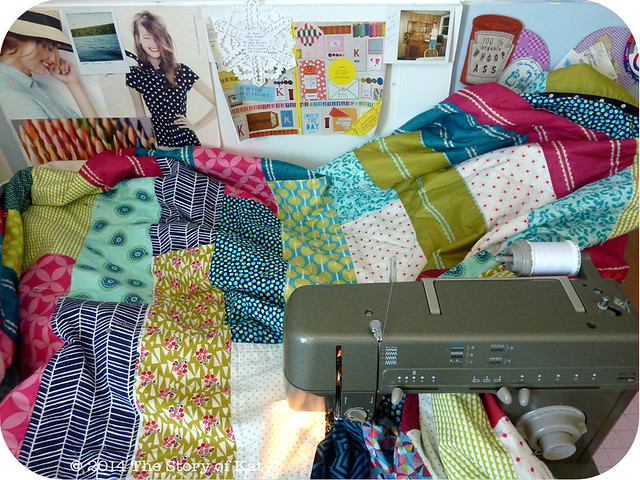
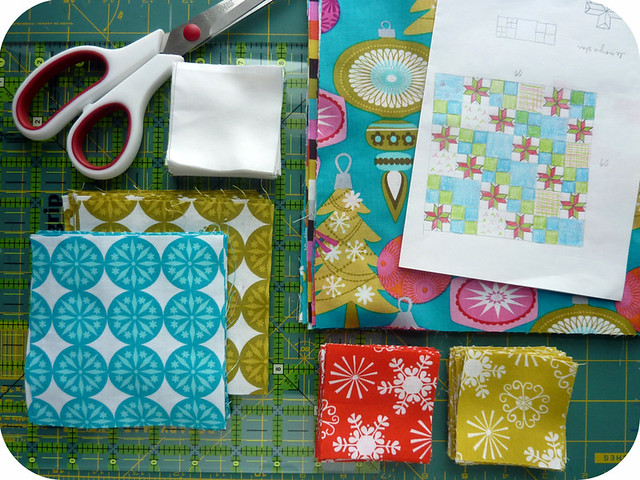
Reality Check: the sewing table in my workroom...want to play How Many Projects Can you Spot?!

1. What quilting/sewing thing am I working on?

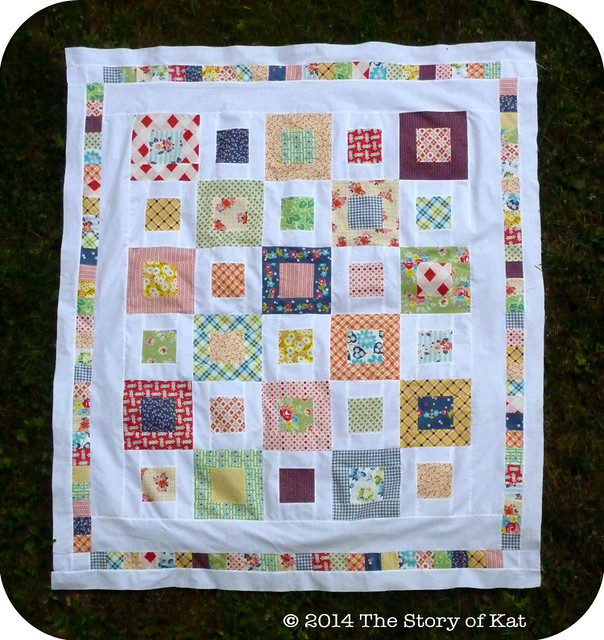
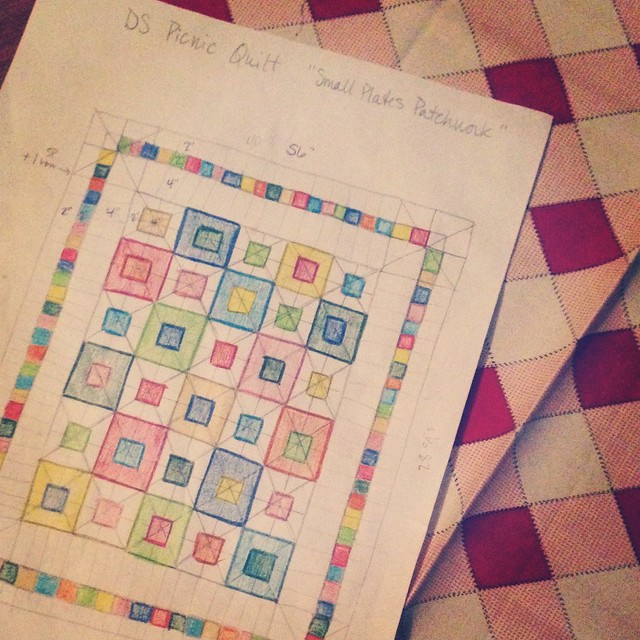
The short answer is that I have one last Quilts for Boston top to finish and two quilts to sandwich and baste, my DS Quilts picnic top and my Melody Miller top. I also have a laptop case I'm trying to design for myself and two baby gift projects I want to finish, an Amish Puzzle Ball and a matching game.

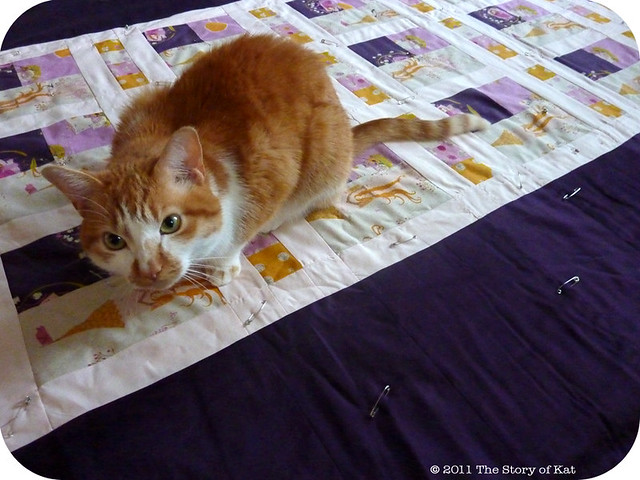
In trying to better answer this question though, I had a look around my sewing room and took full stock of what was going on. I currently have eight quilts in some state of progress and five other sewing projects including several items for my shop, and some home decor sewing. For a long time, I felt almost guilty for admitting to people that had so many WIPs, as if it were some kind of reflection on my ability to finish things (or not). A recent series of articles from Sew Mama Sew on Slow Sewing helped me to reframe the issue and I've gotten comfortable recognizing that I choose and enjoy working in this way. Like so many, I have a busy and chaotic work schedule so when I get home, I like to have a bevy of projects at the ready depending on how much time and focus I have. One night, it might make more sense to be downstairs with other family members working on hand stitching. Another night, I have to be working in my office and it's easier to take a break every now and then to run a few seams on the machine as a treat to myself. At other times, I'm on the go and need something portable. Either which way, my prep work has been completed and I can jump right in on whatever I'm in the mood for! 

Kim's french press
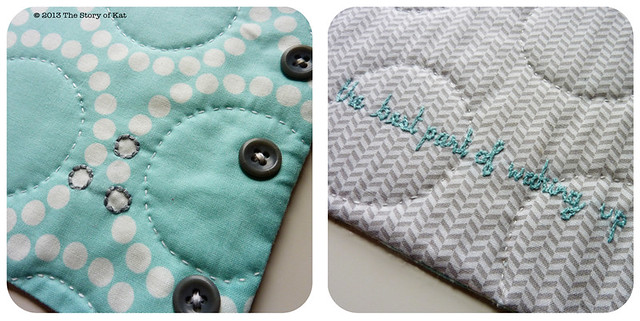
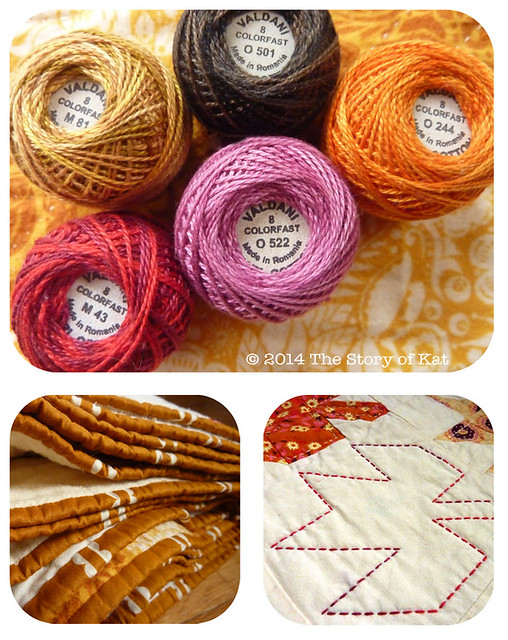
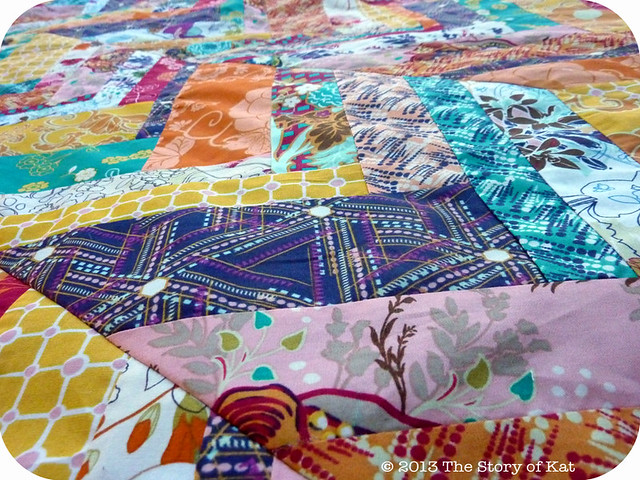
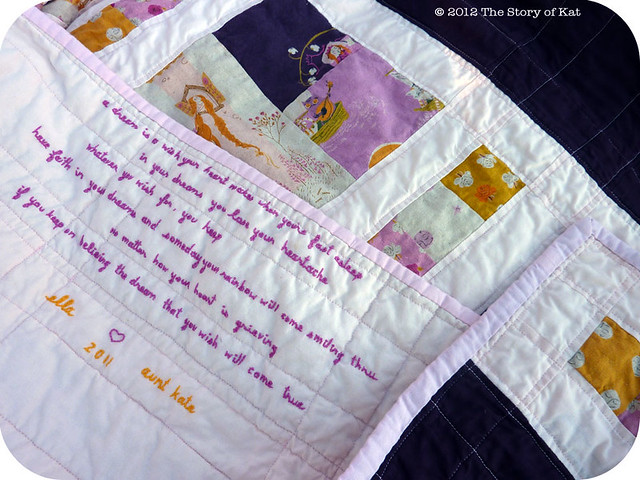
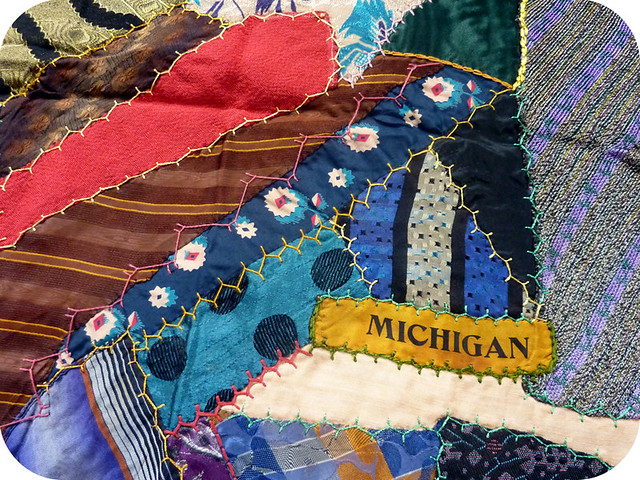
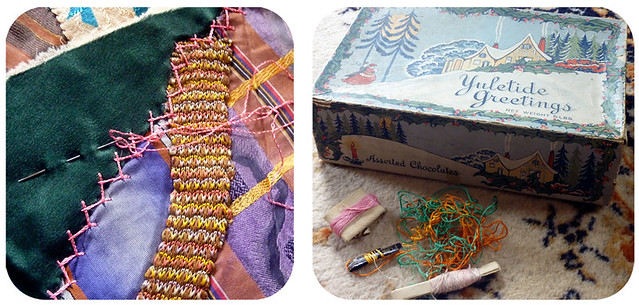
I love adding hand stitched and embroidered details to my sewing and quilting projects


2. How does my work differ from others of its genre?

I think I fall pretty well into the modern quilting movement in terms of my fabric choices, love of asymmetric designs that put a twist on traditional blocks, and embrace of whitespace. This speaks to my background in graphic design and I love conceiving of a quilt with those ideas in mind.

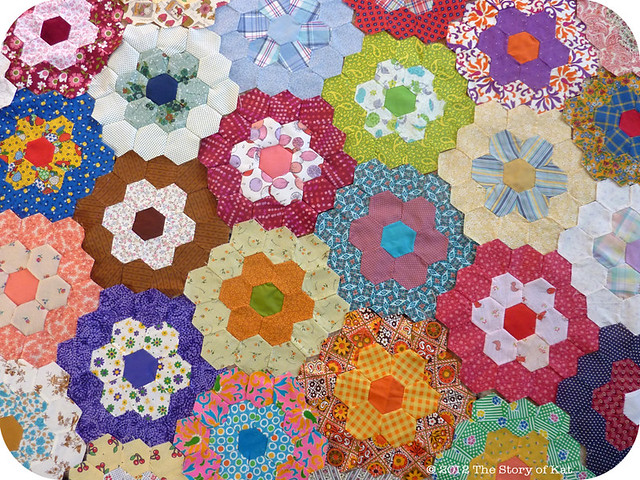
I differ most in my work techniques, having been taught by my Granny who is a very traditional quilter. I tend not to use patterns and though I love and use my machine for a lot of things (and do not want to knock those that use it solely at all!), I personally find a lot more meaning and peace of mind in hand quilting so try to incorporate that whenever I can. I am terrible at free-motion quilting so I avoid it as well as the QAYG method and heavy laundering because my work in textile conservation has helped me to realize that these are not stable, long-term methods.

I also try to limit my stash buying habits to make my work process more green-friendly, using up all the scraps  I can (I love frankenbatting and stuffing plush items with too-small-to use fabric scraps) and avoiding some of the commercialism of quilting where I can. My sewing is slow, each project taking long enough to flow in and out of periods of my life so as to reflect different stories in its making and never keeps up with fabric line releases, try though I might at times.


Little Folks Quilt Top
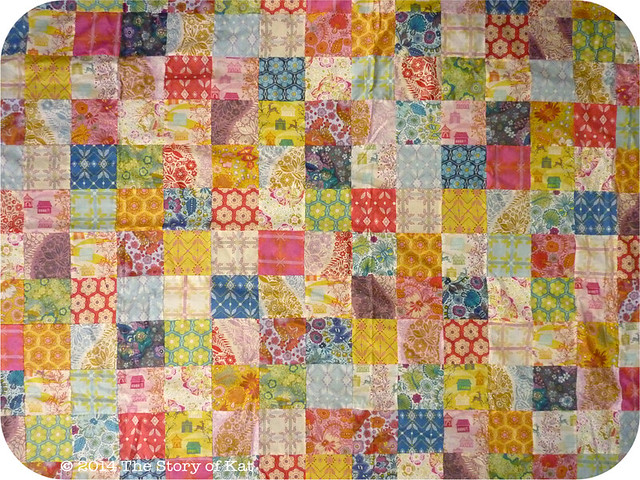
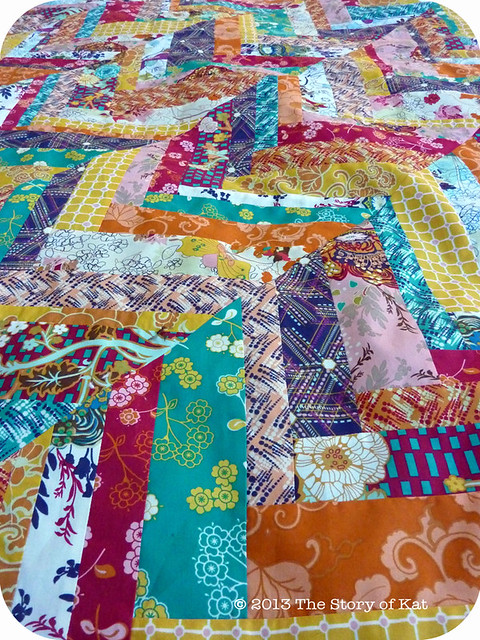
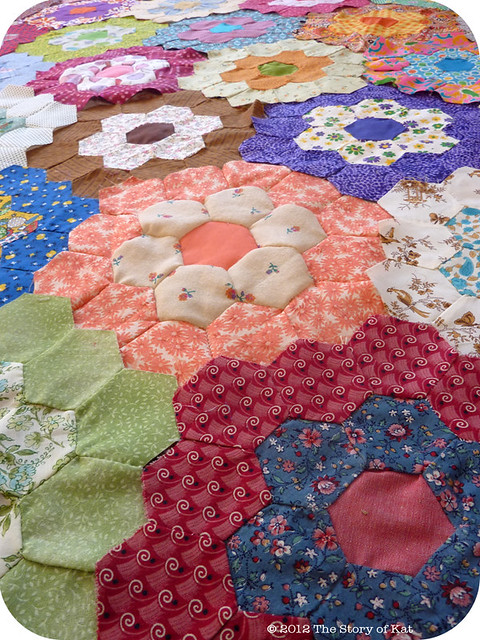
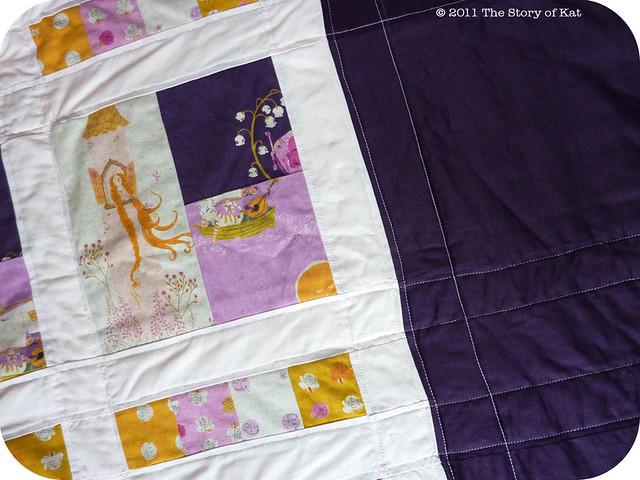
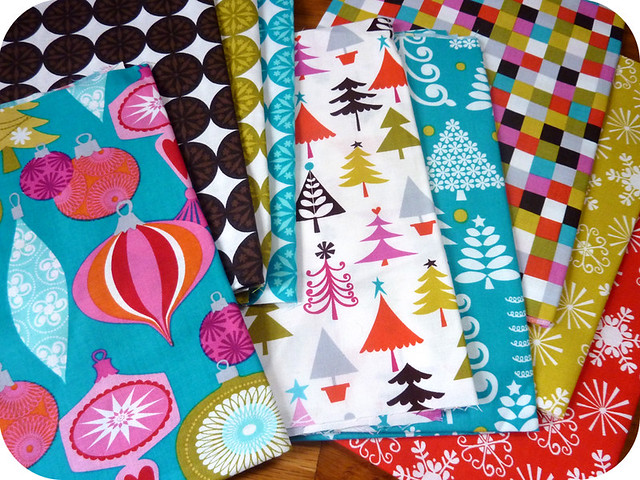
This is a quilt top I have in progress using Anna Maria Horner's Little Folks voile.
I've been hand piecing it for a while now and have no intention of hurrying up! My idea with this was that it was so enjoyable and meditative to stitch into the buttery voile, that I would hand piece and quilt the whole thing as it pleased me. The top is almost 2/3rds done and completely inspired by my love of this fabric.


3. How does my writing/creating process work?

Inspriation comes in various forms for me. Most often, the roots of a quilt design lie in the nature of the specific purpose, person, or season I am making it for. Occassionally they are formed by my vision of a fabric line that really speaks to me (Denyse Schmidt's Chicopea and Anna Maria Horner's Little Folks are examples). Frequently, I am inspired by the work of fellow quilters and love collecting and comparing stellar quilts in my Flickr favorites and on Pinterest. These examples really help me to condense what I aspects I love most and inform my own altered or mish-mashed designs.

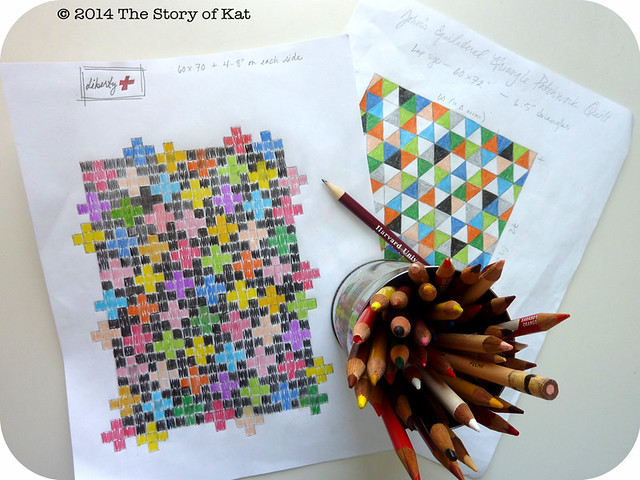
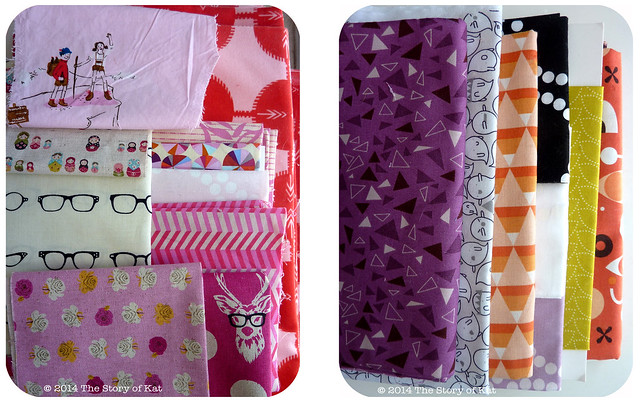
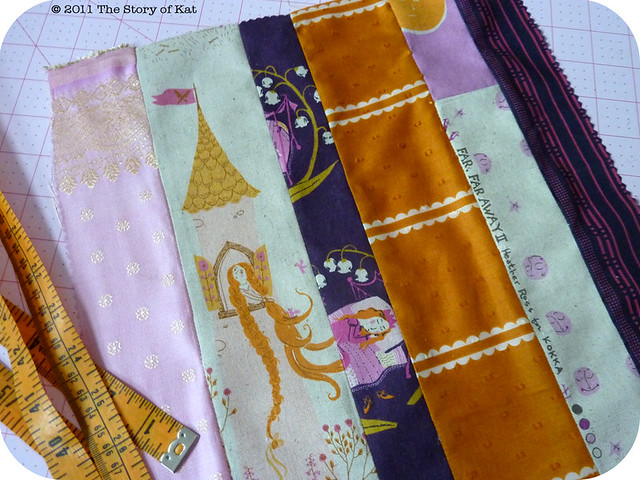
I tend to draw these ideas out on scrap paper so that I can calculate just how much fabric I'll need. As a grad student, I don't have a lot of extra cash for fabric so, though the improv approach is very appealing to me, I tend to plot things out in advance to make the most economic use of my stash. Alternatively, I might start by pulling certain fabrics whose colors or patterns work well together. This part of the process reminds me a lot of blending oil paints as an art student in college. It's really a gut call when it comes to color for me and is the part of my creative process that I love and prolong the most.


I hope you've enjoyed this insight into my work and hope that it's got you thinking about your own habits and style. I'll be back soon with some more progress and finished pieces soon!


Monday, October 13, 2014

Fall Finish: My Modern Maples Quilt

Modern Maples
Fabric from all my favorite designers in this including Anna Maria Horner (and one print from her daughter's first line), Denyse Schmidt, Heather Ross, and that one glorious Lizzy House fox print for good measure.

The first sketch I have for the layout of this quilt is from last August. I've always got several projects going at once, and this quilt was no exception to that rule. Though I did all the piecing in just a week or so during October 2013, I picked it up just here and there over the last year to finish it with some special hand-quilting. There was definitely a point or two where I questioned my sanity, but now that I can see all those little stitches lying next to each other, I'm thrilled with the decision and glad I stuck with it.

Modern Maples, Back

I kind of regret not being able to use the AMH flannel for the entire back. I had just a yard of it on hand so instead of splurging on more, I ended up combining it with some cheaper solid cream flannel. Though it's not topping my favorites chart, I can attest to the fact that backing a quilt for the colder months in flannel is an awesome way to go. I seem to always be cold but also cheap (we are holding out and not turning our heat on until November...) but with this quilt, I've been very toasty the past couple nights!
Modern Maples, Detail
Variegated Valdani pearle cotton and AMH voile pastry line binding details

All of the maple leaf blocks are quilted with a cream perle cotton which has given this quilt a surface texture that I am head over heels for. I've never been a big fan of variegated threads, but thought the white spaces in between would be an appropriate way to use them so as to echo the idea of changing colors. I had a really difficult time finding the colors I wanted from DMC perle cotton but found these fabulous tones from Valdani online in size 8 which worked really well for the hand quilting. Plus, I kind of just like seeing the lovely little paper lables noting they are from Romania

It's nice to look back on the progress of this quilt so I've gathered up all my instagram pics of it below from the past year...nothing quite like the satisfaction of seeing something come together that you made with your own two hands!!

Modern Maples, WIP Detail

From my original sketches and fabric selections to finished blocks and in-progress quilting


Monday, September 8, 2014

The DS Picnic Quilt

DS Picnic Quilt

Most of my summer sewing time has been devoted to repairing worn items of clothing in our closets, creating class and shop samples, and making gifts for friend's adorable babies and babies-to-be. I did manage to get in some time for my own projects though—one of which I finished a part of today!

DS Picnic Quilt, detail

I've been collecting bits of Denyse Schmidt's line of fabrics for JoAnn since they started appearing in stores back in 2011 and know I'm not alone in deciding these would make a perfect picnic quilt. I didn't get around to it right away but that has allowed me to shake up the color palette and bit by adding in a few yellows and oranges from later releases into the mix. Between all the primary colors, the reminder of old feedsack fabrics in Schmidt's designs, and the "small plates" quilt block, I think this is definitely one of the most traditional style quilts I've made so far. It's all very simple right angles, but  for all the wear this quilt will see, I'm just fine with that.

I finally tracked down a few yards of the fabric below for the back and am thinking of making a scrappy binding of all the other prints to echo the patchwork border. What do you think—scrappy binding or settle on one print and, if so, which one? Also, I have no clue as to how to quilt this...I'm not a free-motion quilter but would appreciate any suggestions you might have as I'm don't have anything in mind for it!

DS Picnic Quilt, WIP
Initial sketch and backing fabric

Tuesday, June 24, 2014

Finishing Touches: The Indie Herringbone Quilt

Herringbone Quilt
just realized as I was posting this that the quilt is technically upside down here...so close

Once upon a time, a very very long time ago, I made this quilt which you can read a bit more about here. It languished in a pile of finished projects, just waiting to be photographed so I could hold onto a piece of it before sending it off to its intended owner. Well life happened and as I was feeling low about other things, it was nice to see this in my studio reminding me of what I could accomplish, nudging me to tackle new projects and make something I was equally proud of that I could keep for our home.

The reverse which I think I might actually prefer the most...

It's high time I did just that though so, thanks to some lovely mild weather we had this past weekend, we loaded up the car with finished quilts and set off on an adventure to discover some quiet corners of our town that might provide an interesting background. There are two lakes where we live and along an obscure side street, we came upon a deserted inlet off one of the lakes that seemed to belong to no one. Overlooking the lake, this pine-y point of land seemed the perfect spot to take some photos. It's such an interesting thing to me to find hidden nooks like this in ones own backyard—ones with lakefront access, at that!

But I suppose I digress...here you can see some detailed shots of how the quilting itself ended up. I used some contrasting magenta thread to do some straight line quilting on the top and bottom sashing which gives it such a great texture. For the main herringbone part of the quilt, I simply followed the bars of fabric to quilt an improv zig-zag line through them from side to side every couple rows.

Herringbone Quilt, detail

I finished the binding and embroidered label by hand—finishing touches that really pull the whole thing together. For the label, I was trying to create a visualization of how I actually went about constructing the rows of herringbone. I used back stitch and satin for the design and split for the little lettering in colors that matched as close as I could get them. I really do love when a label can tell a bit of the story of how a handmade object came to be, even in the smallest sense.

Ok, one last gratuitous glamor shot. The direct afternoon light and reflections off the lake made trying to do this successfully kind of impossible, but I just had to share it because I got excited about the idea of pulling if off while we were there and, a few half-baked attempts with fixing it in photoshop later, it will at least suffice—

Herringbone Quilt The fabric used is from Pat Bravo's Indie line by Art Gallery Fabrics

Wednesday, June 4, 2014

Trying Something New


Excuse the late afternoon light and the mess...clearly an indication of intense work!

I recently rearranged my entire studio in an effort to make the space a bit more fluid and useful. The added bonus is that I now have a design wall! Well, if you consider an old piece of batting hung with thumb tacks a design wall...

It's been somewhat of a revelation to have a place to lay out ongoing work in a way that it is clearly visible and yet not taking up more surface space. A place where I can consider as much or as little of any particular challenge at once. As you can see in the photo...I'm a bit of a piler and tend to have several different projects going at once so the immediate nature of it does help me focus and contend with different arrangements and possibilities for each item. I still see myself as planning a lot of quilts out with paper and pencil (especially before cutting into particularly precious stacks of fabric), but I felt it was high time to add this tool to my arsenal and em enjoying experimenting with it.

The blocks in progress are for a Valentine's quilt I've got in the works. I know, just in time for...June? I had the best of intentions and at least started thinking about it back in February—though I'm not a big fan of the holiday it occurred to me that having a lap quilt to display on the back of the couch according to season/holiday would be an excellent excuse for more fabric shopping and quilts. Also, I found 3 yards of Anna Maria Horner velveteen for a cold weather quilt backing on major clearance so clearly the universe was trying to tell me something, duh! I didn't want to do anything too literal but have embraced a whole lot more pink than usual and contrasted it with greys. Each block features a very loose theme of fabric featuring things I love (photography, sewing, hiking, cats, etc.) and either start with or extend out towards saturation of pink or grey. I'm not sure each one I've done is completely successful as it requires a whole breadth of fabrics I don't keep on hand, but am finding it an enjoyable challenge to find the right gradation of shades and how to work in low volume prints to my satisfaction. This is one of my favorite blocks so far:


note the scrap of little red scissors I hoarded for years and finally cut into—can anyone tell me the name/designer of it?

This summer brings with it a bit more free time for me to sew and I'm looking forward to sharing a few of the quilts I've finished these past few months here soon. Until then!

Tuesday, February 4, 2014

How Do You Approach a Quilt?


DFD quilt, WIP
Wrestling to quilt my "Damn Fine Day" queen size quilt in my home studio

I've scraped together some bits of studio time over the past few weeks and have managed to make a lot of progress on my personal projects including getting three quilts near to finished! Two just need binding now and one is ready for hand quilting with my new q-snap frame.

As my list of WIP projects slowly but surely diminishes, I can't help myself but start to dream up more and sketch out quilt ideas that I've had on the back burner. I'm not the type to get through several quilts in a year due to my museum work, teaching, etsy, and grad school (yes, I'm crazy), but I do so like making plans and there is nothing more inspiring than a cleared worktable and fabric that has waited so patiently for its turn in the ring. Whether it's planning, starting, or finishing a quilt, it's an activity that allows me lots of creative freedom while also calming me down and focusing my overly-scheduled self.

Quilting PlansI should invest in some graph paper, but find reusing the back of
scrap paper around the house is so much easier to grab when an idea strikes!

We all have different ways of going about a quilting project and I find many of the different approaches help the quilter focus on whatever part of the process they most enjoy. For me, I can't get enough of playing with different patterns and colors as well as how to best combine my fabric choices with an appropriate piecing and quilting design. I wish I had a big ole design board but the low slanted ceilings in my attic studio won't stand for it (get it?! ok, sorry 'bout that one...). Instead I often reach for paper and colored pencils which allow me to still envision the overall look (but, alas, does limit the ability to improv-piece). I love the drawings all on their own and find it a relaxing activity I can accomplish while catching up on a favorite tv show without being stranded in another room away from my husband in the few hours we have together each day.

I usually start with a person/holiday/purpose that the quilt is destined for and start to play with fabrics that would be a good match. I've been getting more adventurous in my groupings, sometimes sticking to just one fabric designer/line, and sometimes combining lots of different ones for the desired effect. Recently, I've been toying with the low-volume trend and arranging designs of different scales or illustrated vs. pattern to achieve what I'm calling a "sketchbook look." My fabric choices are usually quite bright and bold, but I try to keep my walls and decor very neutral and sparse so textiles can stand out in nice way (as opposed to looking like clown vomit).

Quilting Plans Fabric I've started to set aside for Valentine and Halloween quilts:
Sometimes I let things sit out where I can see them for awhile to see if I like they way they work
together over time, also allowing for the combination of new/unexpected fabric releases

Not every sketch or fabric stack I dream up becomes a quilt, but those that do definitely evolve over time for me and therefore represent a range of memories, decisions, and build on my evolving skill set (every quilt I make seems to make me realize how much more I have to learn!). How about you? What influences the way you approach a quilting project? What is your favorite part of the process and how do you go about putting a quilt together that highlights that part?

Sunday, September 22, 2013

Herringbone Indie Quilt Top: Mini How-to

Herringbone Quilt Top

This is a quilt top that I just finished for my sister. The more I look at it, the more I love how the herringbone design and these fabrics came together. I'll definitely be using this herringbone design in the future as it's very straight forward to do and yet you end up with something intricate and modern looking that really packs a punch....so much of a punch with all these different colors that I wanted to give the eye a rest a bit and tacked on the cream cotton sateen sashing I had leftover from a previous project to quiet it down and add some length. It's a lap quilt size but I wanted it to be as long as possible in order to cover those toes on cold nights.

Herringbone Quilt Top, detail

I don't have the photos to do a full tutorial, but I will give you a run down on how I achieved these particular rows of herringbone:

You see, I had bookmarked and pinned approximately a bajillion different chevron/herringbone piecing methods when I came across the book "Scrap Basket Beauties" by Kim Brackett. In it she has a pattern called "peaks and valleys" that has long rows like what I wanted to achieve. Everything else I'd found online worked the herringbone in just blocks or used strips that were all the same size, breaking up the overall true effect I wanted.

upload
 WIP: here you can see how the piecing of each row began

In this approach,  each row starts with an inverted triangle like in the above photograph, and then you continue piecing your strips off of that, alternating from one side to the other as the row grows. Instead of using trapezoids like she did in the book though, I just cut strips from 1/4 yard cuts of Pat Bravo's Indie collection and squared up all the edges once I was done piecing before joining all the rows together.

I also cut mine in various widths. I prefer the finished look those different widths gave, but it did mean that keeping the same central point was a bit trickier and each row ended up being a tad wider or narrower than it's neighbor, depending on the placement of each strip (If that doesn't make complete sense, scroll back up to the top two photos and see how the placement point of each "v" changes according to the width of the strips used). For me, I'm totally ok with that wonkiness and think it just adds to the charming handmade quality of an item (as long as it's structurally and technically sound). I only had so much fabric to work with (if you could cut longer strips, you'd be able to make wider rows) and this method allowed me to achieve the desired effect without too much planning or math up front. Always a good thing if you don't mind fly-by-the-seat-of-your-pants-quilting like me!

The other difference from my quilt and the "peaks and valleys" pattern I was inspired by, was that I hacked off the triangles I started piecing from at the top of each row as well as the points at the end of the row, making for straight edges across the top and bottom where sashing could be added on. I prefer the bands of sashing I chose for just the top and bottom but you could also frame the whole thing with sashing or do a whole quilt of just these herringbone rows.

Herringbone Quilt Top, detail

Monday, January 7, 2013

A Flower Garden for Cold Nights

Grandmother's Flower Garden

I wanted to share a glimpse at one of the many WIP's I have going, this one something I have been picking up during quiet nights at home around the holidays lately. Sometimes I get so ashamed of the vast number of planned projects I have going, but I am learning to cherish the joy I get out of pondering over each one and the satisfaction of crossing each one off my list at its own appropriate time, rather than worrying about what others will think.

Alas, I was an over achiever with plans and dreams that went beyond the scope of my own hands and time, even in grade school. My granny was the person who taught me to sew then when I went to stay with them for a couple weeks each summer as a kid. After lots of crooked hand stitches on fabric scraps, she and I poured over all her quilting books and she let me pick out a block to work on. The one that had caught my eye was Grandmother's Flower Garden, which seemed appropriate besides being intricate and lovely. A story + detail + aethetically pleasing = right up my alley! This was in third or fourth grade I think and I remember her gently trying to tell me that it wasn't exactly a beginner's block, but being the good and encouraging sport she is, she showed me how to use a template to cut out lots of little hexagons and I got through a nice little stack of them by the end of that visit, lopsided as many of them turned out to be. We've laughed at them since but at the time, I remember her telling me they were beautiful no matter how long they took me or how uneven my stitches were.

Grandmother's Flower Garden
Fabric from the dress my Granny made my first china doll,
fabric from my Grandpa's and husband's old shirts,
fabric from my 5th grade halloween costume (a "Laura Ingalls Wilder" dress) made my my mom,
fabric from my favorite pajama pants in college

Granny is a firm believer in the value of a quilt sewn by hand, nevermind the fact that you could make several by machine in a fraction of the time. She has made such quilts on the machine, and so have I, but when it comes to REAL QUILTING, only hand stitches will do. I never cease to be grateful for being taught that from the start. While I love working with my machine for so many projects and appreciate what modern quilters do (myself falling into that  category I suppose), I sometimes get a little sad reading blogs where people churn out a bajillion different quilts a year by machine alone. At a certain point of saturation, do they mean the same thing? Personally, I think there is a difference. One is no less valuable, but there is a difference in that value and that difference is why I'm ok with admitting that I'm working on blocks by hand for a quilt I started in grade school. It's not in fashion, and I think I love it all the more for that.

I really started adding to this pile back in 2008 when I took up sewing again after college and every year since, I add a few to the pile. Once I have enough for a queen size quilt, will put them altogether, perhaps with sashing, I'm not sure yet. Sometimes I pack them into the car on visits home to show her and we lay them all out and marvel at the stories each little scrap holds or my own stories of when and how I worked on each one. Each block combines some of her material that she gave me back in grade school, and some of my own that I have stashed away. I've finished 7 for 2013 so far and will pack it back away again in my sewing room soon as I need to get back to orders and school, and...my machine. Until next year!

Saturday, July 7, 2012

It's Christmas in July! (+ A Giveaway Announcement)

Whoville Quilt Top
60x60 inches of machine pieced goodness

Finishing a big project seems to spur me on to crossing other things off my list, it's just addictive once you get a taste of that satisfaction. It is perhaps the most pleasant part of being the kind of person who starts a lot too many things at once—you also get to finish a lot of things at once and the giddiness that causes is more than enough to keep me adding things back onto the list. Yup, it's a vicious cycle!

I finished this quilt top when I got back from Michigan and—gasp!—it's actually a quilt that I will be keeping to use in our very own home. I wanted to have something special to put out around the holidays each year that would become something of an heirloom. Yes, it's a bit loud. But, as I've mentioned before, this fabric instantly reminded me of the childhood classic "How The Grinch Stole Christmas" and all the crazy colors the animators used to depict Whoville. It is, therefore, our "Whoville Quilt" and keeps alive all those memories of childhood christmases. I definitely like the idae of snuggling up under all of that!

Whoville Quilt Top, detail

I have this draped across the couch in my studio now as I'm not quite sure how I want to finish it. I *think* I want to add a 2 inch white border all the way around and bind it in the red snowflake fabric. On the back, I'd like to repeat the LeMoyne Start block (aka my poinsettia/christmas star) and a block with embroidery noting when it was made and all that good info. As a nerdy museum person, I love finding any bit of information attached to a textile that's been handed down so I think incorporating that with embroidery is something I'd like to keep up on all my quilts in one way or another.

P.S. I have an announcement about the giveaway my last post! I want to give more people the chance to enter so I am extending the deadline until tomorrow at noon. Please enter and pass the word along and I will announce the winner tomorrow afternoon. Good luck!

Saturday, June 16, 2012

At Long Last...

Finished at last!

If you've been following me here for a while, you may remember the first glimpses of this quilt from back in  2010. Um, yeah, so that's kind of embarrassing. Life happens though and you get frustrated with the progress and then make a mistake that puts you off it for a while and then you start grad school and then you start working three jobs and then you decide to do some crazy laborious embroidery on the back...you know, the norm.

Detail
I centered the embroidery right at the top so she'd catch a glimpse whenever she snuggles into bed

Well, I managed to finish the binding by hand in one long car ride yesterday that my husband and I just made from Massachusetts to Michigan to visit family. I was bound and determined to be productive as long as I was just going to be sitting in that car for 12+ hours! I finished it just as we came across the border from Canada (having driven about half the distance too and maybe with a bit of a lead foot so that I could get back to sewing...) and GOOD GRIEF was I elatedproudexcitedestatic to say the least. Today I gave it to my three year old niece, as I'd planned all along, and have to admit it was a little hard to let the thing go after all this time. I've done several doll/lap/baby quilts over the years, but never a big one like this, hence all my squeals of joy at having finished it. Definitely enough of a good feeling to spur me on to finishing other projects!!

I know the cool blogger thing is to just show the finished quilt, but my granny, who taught me to sew, always takes one of her with it and I feel that is a tradition well worth honoring so here I am in all my nerdy joy:

Me and my FO

The quilt is twin sized for her big girl bed and is made with Heather Ross' Far Far Away II line in the plum colorway. The backing, sashing, and binding is kona cotton while the purple border is a cotton sateen. I machine pieced and quilted it, but did the binding by hand. You can see the full progress here, from design to quilt top:
Beginnings
Design and progress
Another iron in the fire
The quilt top

Thursday, December 22, 2011

All Quilted Up

Finished quilting at last!
Once I get the binding done, I'll post a photo of the whole completed quilt!

I've finished the quilting on my FFAII quilt! A very exciting day for me, indeed. I did some simple outline quilting using my machine and was surprised by how quickly it went, having never worked on a quilt of this size before (a twin size for my niece). I am happy with the pink thread contrasting against the deep eggplant color as it lightens it up a bit and brings the whole thing together.

I do think I have some practicing to do on my machine quilting skillz though...I'm probably being more critical of my work than anyone else, but there are a couple places where the fabric bunches up or my stitching isn't quite straight. I suppose practice makes perfect, right?!

Quilt back

I also finished the embroidery on the back and now just need to bind the whole thing off and put it through the wash. One sticking point...despite my best efforts, I didn't quite manage to line up the embroidery with where the lines of quilting have ended up so I've got to make up my mind as to whether I should just go right through it and not worry about it or quilt around it and then tie off that area. I was planning to do some tie-offs in the middle of each big square anyways, so maybe it wouldn't be so bad....what would you do?

(see the full quilt top here)

Saturday, October 15, 2011

Back in the Studio

FFAII Patchworked Pillow
I decided to make a simple pillow of scraps to go with the FFAII quilt and now just need to attach the back. I like how it turned out with additional bits from Anna Maria Horner collections and some scrap sari silk.

I've got my work cut out for me this weekend. Well, literally in some cases. In the first time in a long time, I have one whole day to work on personal projects (goodgravyhoorayfinally!) so I am revisiting the Far Far Away II quilt for my niece that has had to take a backseat to so many other projects this year. It's embarrassing really as it has been sitting in a corner of my studio all this time, silently taunting me from it's perch and reminding me I could be working on it if I would just stop stretching myself so thin. Well, no more! At last it is all ready to be quilted minus some last minute embroidery I decided to add on the back. More on that part later, for now, let's just revel in the first sight of fabric to grace this here blog in way too long:

Zoë, my little helperIs it possible to lay out a quilt sandwich without having furry little helpers coming to judge your handiwork? Zoë approves *I think* but is a brutal task master.

As I work today, I am already thinking of the other projects that await me on the horizon: A couple items for friend's that have had babies recently/soon and some pillows for our own living room (A project I get to keep?! someone see if there are pigs flying outside your window, quick!). I've made some progress on a few pillows for us but my thoughts on the final look have changed a bit since then in terms of color and we need more than originally planned due to a new (rather massive) couch.

So many plans, so little time! I should get back to my sewing now because tomorrow I'm off to visit another museum for a paper that needs to be several pages longer than I care to think about at the moment. Sigh...it seems I must learn to embrace moderation and not just admire it from afar. Do you have a laundry list of grandiose things you'd like to make? Maybe we can each pledge to finish just one of them by the end of the month! I know I'm just the kind of person who's going to keep biting off more than I can chew so I'm all about making lists and enforcing manageable timelines on myself that include downtime. What kinds of things do you do to keep yourself productive but sane?

Friday, February 11, 2011

a girl can dream.

AMH patchwork
i definitely set this to be my new computer desktop

today is one of those quiet fridays that i relish in. i'm baking rye bread, getting all my custom orders organized for a weekend of embroidery, and i still haven't changed out of my pajamas. shush now, don't spread that last part around.

i'm also taking a bit of time to work on my of my own projects (yes, there are just too many that i have going right now...) as this afternoon light fades and, as long as we're on the subject of anna maria horner, i thought i'd share with you my progress on my AMH queen-size patchwork quilt! now, if you remember from my first post on this, i am doing the whole thing by hand...piecing, quilting, binding, the works. i started it back in the fall and i now have six rows done and sewn together which amounts to 126 squares. if all the holidays had not taken place right after starting it, i'm sure i'd be further along but that's ok because it's also something that i just want to relish in. the above photo shows some of my finished rows and some of the next ones that i have planned out.

the voile is so nice to handle and the colors make it such a cheery and relaxing thing to work on...i am really finding that piecing, designing, and planning a quilt is my favorite part! as i work i think more about my overall vision for the design of our bedroom: this folksy and luxurious quilt on the bed, creeky wooden floors, sweet and bright little accent items a la anthropologie, all contrasted by clean white walls and all white wooden furniture so that it's not at all overwhelming or clownish but anchored in peace and calm: very grimm brothers meets anthro meets cape cod meets prairie homestead meets color theory art student....a girl can dream right?!

Thursday, December 30, 2010

Whoville quilt progress..at last!

piecing for my whoville quilt

Ok, I couldn't stay away any longer because I couldn't wait to share this with folks that I knew could get just as excited about it as I am! I have a few personal projects that I am bouncing between this week (as soon as i have a bit of time to myself I tend to get visions of grandeur and put way too much on my plate..) but this one is definitely the one I am most thrilled to see the progress of.

It took me forever to draw out a quilt design that I thought worked but I am very happy with how this one is coming to life and how it takes advantage of the all the colors in this fabric collection (Michael Miller: Christmas Spice) and the various size/scale of the patterns themselves.

lemoyne star
lemoyne star quiltblock

In particular, I've been a bit giddy about finishing up the first LeMoyne star! I picked it because the star design fit with the central star on the Whoville christmas tree as they all sing around it and with the Christmas theme in general. But as an added bonus, I like how the alternating red and green make it look a bit like an abstracted poinsettia!

I am waiting on a bit more of this fabric to arrive since I didn't have quite as much as I needed with just the fat quarters and seem to have snagged up some just in time as it is getting harder and harder to find on the ole internets. In the meantime, I'm going to get to work on a few other things that I hope to share here as well in the days ahead and the next time you see this, it will be a finished quilt top!

Tuesday, November 16, 2010

the makings of our whoville quilt

Christmas Spice by Michael Miller

this beautiful fabric is currently sitting on top of my printer waiting for me. yes, that's about how organized i am right now with piles of fabric laid aside for certain projects all over my workroom.

i apologize for all the early holiday posts! usually i don't decorate for christmas or anything until after thanksgiving but i've got to get the shop ready prior to that so i've got it on the brain now!

my last machine quilt gave me a lot of confidence and ever since i thought a fun and relatively quick project would be a christmas lap quilt to go in our living room during the holidays. i agonized over picking out the perfect fabric that we would want to curl up in year after year and finally fell in love with michael miller's "christmas spice" collection for it's bright cheery look and it's mix of retro and modern lines. the colors remind me of the old cartoon version of whoville in "how the grinch stole christmas."

my only problem now is that i can't for the life of me decide what kind of quilt design to use with it since some of the prints are huge and others so small in comparison. i just can't find a quilt pattern that will show them all off equally. and some are so different from each other that i might just give up on being able to combine them all into one quilt. what do you think, any ideas on what kind of design would work best?

Friday, November 5, 2010

grandma ida's crazy quilt

grandma ida's crazy quilt, detail

this is the other lovely (an understatement perhaps?!) heirloom that i inherited from my grandparents on my recent trip home to Michigan. um, i don't have words....i'm just flabbergasted and awed and humbled by it's beauty and meaning and i feel incredibly honored that i get to take care of it until the next generation of our family comes along...hopefully someone who knows a bit about sewing and will appreciate all the hard work and talent that went into it!

grandma ida's crazy quilt, detail

the box was found in my great grandma ida's ceder chest upon her death and we're not certain if she worked on it or if it was in fact begun by her mother, fannie, who was known to be a bit more crafty in her time. my granny and i poured over the thing looking to identify certain stitches and styles and we both agree that it's probably likely more than one person contributed to it.

there are eight quilt blocks in all, some that have been embellished with embroidered top-stitching and some still left to do. they were all folded up neatly in this little old christmas box (which is totally going to have a place of honor among our christmas decorations although i bet my ancestors would laugh). can you believe that the needle was still stuck in one of the blocks, threaded and all?! and look at all that original floss and thread that we found in the bottom. my quilter self and my nerdy museum worker self is going nuts:

grandma ida's crazy quilt

all of the pieces seem to be upcycled from silk ties, handkerchiefs, menswear fabrics, and a few knits, velvets, and tapestry pieces here and there. it's amazing to me how conscious they were of not wasting a single little scrap of fabric...check out those button holes from a men's shirt that was used to piece part of the back!

grandma ida's crazy quilt, detail

my museum trained self is afraid to touch it and i want to take my time in deciding how to finish it. my mind just reels thinking about ones similar to this that i've seen in textile museums! i talked to granny about wanting to be able to piece all the blocks together while keeping true to the original style but she said something that really struck a chord with me, "don't be afraid to add your own element to it, your own part of the quilt's story."

Tuesday, October 19, 2010

A grin and a sigh of relief

"Heather Ross" "far far away two" quilting,quilt,sewing,purple,pink "plum colorway"

my completed Heather Ross quilt top!

I think it was about 11:30pm last night when my sewing machine finally stopped whirring. I honestly could not stop grinning for a little while as I love love love how this came out and it feels better than I could have imagined to make something this large with my own two hands! I'm just completely floored to see my original design come to life!

I'm also particularly pleased with the way the purple cotton sateen looks to be slightly contrasting but it was only a matter of changing the direction of the weave when I cut the pieces. I was worried about having to use so much sashing but I think that will be a nice effect when it drapes over the side of the bed.

I'm going to start quilting it today if time allows. I've got to start packing and i'm doubtful that one day is enough time to quilt and bind this whole thing. I feel good knowing that I'll have something substantial to show and i can always take it back home and finish it up. I'll get to enjoy it a little longer that way plus I decided it's going to have to count as her christmas present too since I am not a rich aunt by any means!

Friday, October 1, 2010

The beginnings of progress


I've been rather content this afternoon, listening to the new jenny and johnny album and putting together the quilt top of my niece's quilt. But let me back up just a smidge...

(I was elated to finally find pink pinking shears at joann's. I've been looking for a while and had to get them!)

Last week I'd finished sewing together all of the heather ross fabric sewed into blocks (the main rapunzel, owl and pussycat, and sleeping beauty prints) and accent rows (the rose and moon prints). every night since then I've been drawing and cutting out a ridiculous amount of pale pink sashing and just today started piecing them altogether. You can see there's a bit of puckering where I backstitched on each piece with the machine but I'm not sure what I can do about that. On the whole, I'm pretty darn excited to see it coming together! Maybe I will make this deadline after all (fingers crossed).


This is my plan for the overall quilt which will be a twin size. Hooray for ridiculous amounts of sashing! I found some gorgeous cotton sateen for the purple bit. It's really more of an eggplant color and I was a bit nervous about using it for a toddler's quilt but the colors worked so well together I decided to go for it. If this child is at all related to me she will appreciate the aesthetics. Stay tuned, hoping to post next week with the finished quilt top!

Friday, September 24, 2010

marathon quilting

the first completed quilt block

i know that i have too many irons in the fire at the moment but i've added in one more project because, well, i just can't help myself. my niece's birthday is in late october and her mom told me that the last quilt i made her is suffering a bit of wear and tear since the soon to be two year old insists on taking it with her everywhere. this warms my heart through and through and of course i will bend over backwards for that girl any day so, yeah, i am working on another quilt that i hope to get done by the end of october. so i am definitely crazy. and yes, i am using the machine on this one the whole way!! we'll see, this might end up as a christmas present...

when my sister-in-law said they could really use it sized up a bit for her new big girl bed and told me about the colors of her room, i knew that heather ross' far far away II line of fabrics in the plum colorway would be absolutely perfect! i have to admit, i am really happy to have an excuse to get some of this gorgeous fabric!

you can see in the photo above the first completed quilt block that i've done. i could only afford one fat quarter set of the plum colorway so i spent HOURS doing math (which i detest) and drawing out different quilt block patterns that would take my fabric as far as it would go and feature the different fabric designs in the best way. i think i've finally got it now so as soon as i get a row of the quilt top done, with sashing, i will be sure to show it off here! wish me luck, i am so going to need it.

Thursday, September 16, 2010

in the works:


while awaiting the arrival of two remaining prints in anna maria horner's little folks collection, i've managed to get the rest all cut up into squares for the queen-sized patchwork quilt i'm making. for me, arranging and handling all the pieces is one of my favorite parts of the quilting process, it's such an orderly, imaginative, and soothing activity!

i decided to do a patchwork design because it seems to best showcase the prints which are easily among my favorite fabric designs...um, ever. o wait, did i mention that before?! ok, so maybe only several hundred times...ANYWHO. the cotton voile is such a joy to work with and this will be the biggest quilt i've ever made sooo i made the decision to do it all by hand—from piecing to quilting and binding, stitch by little stitch. i know, i might be a little off my rocker, but this is a very special project that i actually get to keep so i want to take my time and enjoy it! so having said that, it may be a little while before i'm able to share the completed quilt top...

my other idea is that for the actual quilting, i think i want to use a thicker strand of embroidery floss or pearl cotton in various colors to complement the variety of color and pattern in the fabric itself. have you ever quilted with anything but regular ole mercerized thread? did you like the results?