
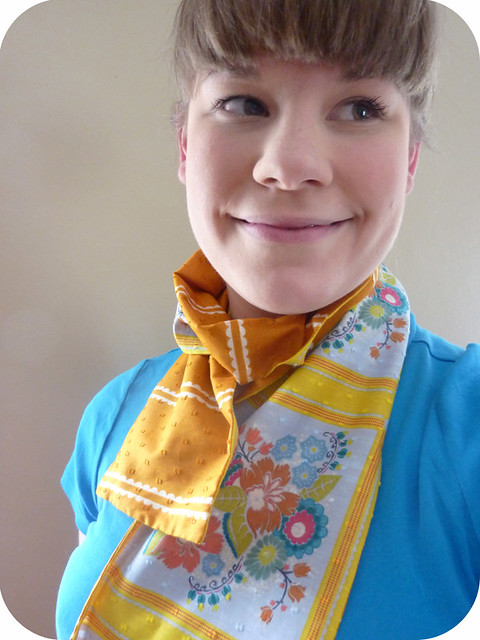
me and the finishd double-sided scarf
as you probably know, anna maria horner's little folks and dance line is my favorite fabric EVAH. all year long i've been saving up and buying small amounts all piecemeal like only to end up hoarding the stuff big time when i realized i still didn't have enough for every single project i wanted to make. yep, i'm in total covet mode and yep, i'm laughing at myself right now.
one of those projects is the double-sided scarf like the one featured in the promo photos for when the line first came out. she's since put out some kits for making these with other voiles from the line (and i'm thinking of getting one of the velveteen kits for the figure-8 scarf for my upcoming birthday...), but not any with the square dance and i thought that, to make my fabric stretch further for more projects, i could make one of these scarves with the the 6 inch squares instead of the 12 inch ones as featured and only 1 fat quarter of the pastry line cut from the width of the fabric instead of the length (double bonus: this way your dobby dots will run the same way on either side too!)...and tada! the double-sided AMH "on the cheap" scarf was born!
you can make a large version with the 12" squares or a smaller accent scarf with the 6" squares as i've done
now the concept and steps are totally simple so even beginner sewists can accomplish a scarf such as this one with minimal tools and experience. materials are as follows:
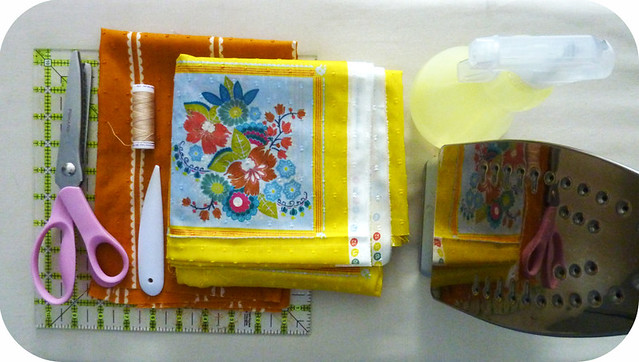
-1 fat quarter of the pastry line fabric in your chosen color
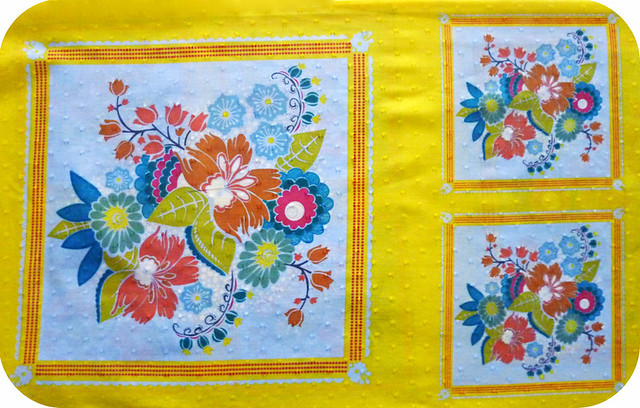
-1 panel of the square dance fabric in your chosen color
-thread (matching is nice for the hand stitched knot at the end)
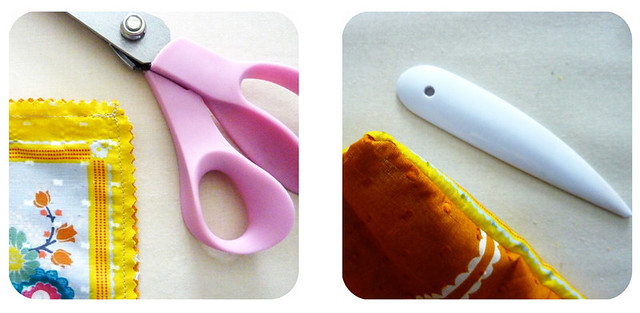
-scissors (pinking shears are helpful but not absolutely necessary)
-point turner
(if you don't have one or just lose track of things as i do sometimes, a chopstick works well. o, the wisdom i have to impart!)
-quilter's ruler
-iron and ironing board
first off, you'll need to cut 1 strip of the square dance panels (that's a row of 8 squares for the 6" size) with a 1/4 inch seam allowance going around the whole thing (it may be a smidge tight on the long sides but you'll have a bit extra on the ends). i found measuring exact lengths for this material unnecessary since you can just follow the lines around each square and still be as exact as you need to be.
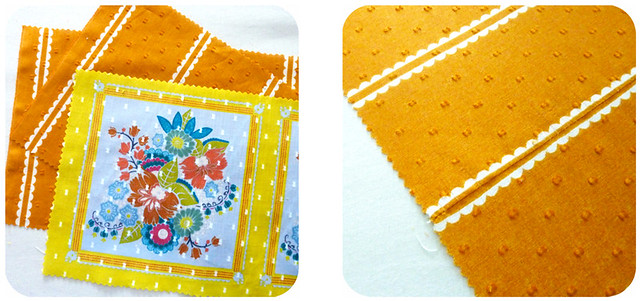
second, you'll cut two strips from the fat quarter of the pastry line fabric. each strip should be 27 1/2 x 7 inches which will use it up perfectly with some scrap leftover for patchwork projects! your pastry lines should run perpendicular to the length of the strip so that your dobby dots mimic the direction of those on the square dance fabric. even if you have the new printing of these fabrics, which do not have the lovely little dobby dots, i still prefer this placement of the fabric as it shows off the pastry lines quite nicely.
as you can see in the above photo on the right, i've cut and sewn my two strips of pastry line fabric together (right sides facing when you sew) right in-between the lines so that the seam is barely visible when you're wearing it. neat, huh? if you wanted to make one of these scarves that is double the length, you would just do this for two lengths of the square dance fabric and 4 lengths of the pastry line fabric.
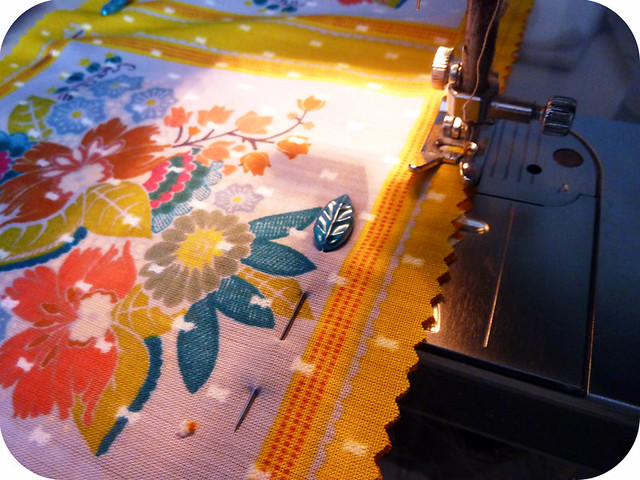
now, place the right sides of your fabric together and pin it so nothing shifts and gets wonky while you're sewing such a long strip of slippery material. sew both long sides and one of the ends shut with a 1/4 seam allowance (making sure to backstitch at each corner to secure your stitches). since the amount of fabric on the edge of the squares can be a bit tight, pinking your edges is a smart safety measure to take here.
the voile is a bit more buttery than what i usually sew with and i've learned now to take the tension on my machine down just a tad when working with it from now on.
wah-lah: you've got an inside-out tube looking thing with one open end now...you are going to look great! but better if you follow the last few steps, i promise.
on that last open end, begin to sew as if you were going to close it up like the other end. instead of going all the way across though, only sew about 2 inches in from the corner on each side, still making sure to anchor your ends by backstitching on the machine. this will leave you with an app. 2" opening and nicely uniform corners. go ahead and trim off the corners diagonally to reduce on bulk leaving about 1/8 of an inch between your corner seam and your cut so that it won't unravel on you.
now you are ready to turn it right-side-out through that 2" opening at the end. use your point turner (or chopstick..just nothing too sharply pointed) to make sure your corners are completely turned out.
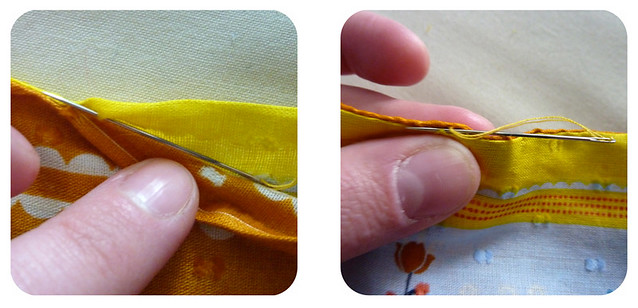
once that's done, use your fingers to flatten the seam, pressing with the iron as you go. go ahead and also press that opening flat with the seam allowance toward the inside so that you have a straight edge. you can use the ladder stitch to close it (also known as a blind stitch), sewing along the inside of the seam allowance as shown above. the knot is the only thing that will show on the outside so that's why i recommend matching thread. it's great practice and one of my favorite stitches.
when that's done, so is the scarf!


6 comments:
Cute! I love scarves... and need them pretty ferociously right now with all this weather.
Really cute :)
Very nice...and sew simple! ;-)
Love that fabric line...gorgeous colors!!
It looks wonderful against your blue shirt.
This is the cutest scarf I've ever seen! And so are your bangs, your pins, and I totally got all goosebumpy at how perfect that seam lined up, lol!
Very pretty! I love that fabric. A very nice tutorial too. :) It looks great on you too, by the way!
Great tutorial!
Post a Comment