
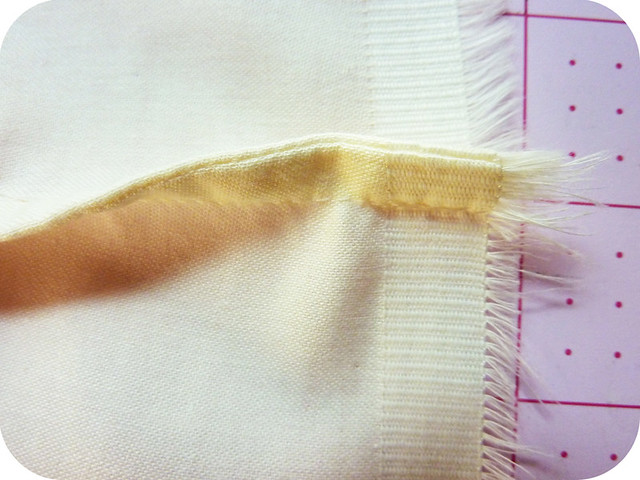
The backside of a finished french seam.
I've been working on a chuppah for a friend's wedding and since the piece will be viewed from both sides in such a formal setting, I knew I would need to finish the seams in such a way so that no raw edges could be seen.
Enter my new best friend: french seams.
At first they seemed intimidating but once I got my head around the way the fabric should fold back on itself before sewing the seam closed, it was a piece of cake and I can see how useful they'll be for finishing all sorts of items, but especially on home decor pieces such as pillowcase edges and curtains where both sides of the piece are more often seen as opposed to clothing where serging the raw edges of the inside seams does the trick just fine. I made sure to document my process as I always find photographs the most useful for learning a new technique when I'm not able to observe it in person.
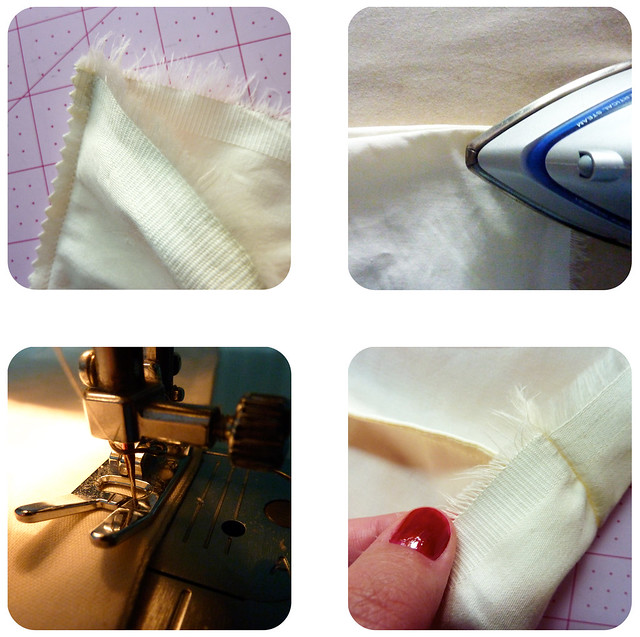
1/4 inch french seams, clockwise from top left.
Step one: A french seam consists of two seams, one that encloses another so that no raw edges are visible from the outside. To accomplish the first seam, simply sew as you normally would any seam with the only difference being that you have to make sure that you are sewing WRONG SIDES TOGETHER. Once sewn, trim off half of your seam allowance (see top left photo).
Step two: Once your first seam is sewn and trimmed, fold the fabric at the seam back on itself so that the right sides are facing each other. In other words, this means that the edge you just trimmed will be sandwiched inside the fold and the clean side of the seam will be facing out. Press that seam flat (see top right photo). While I tend to get a bit footloose and fancy free in deciding just how often I need to press my seams as I work, it really is necessary here as you need the fabric to lay nice and flat in order to sew it closed in the next step.
Step three: Ok, take a breath because the hardest part is over and you've just got one more thing to do!
Step four: With that pressed seam as the edge of your piece (your wrong sides are still facing out just as you pressed it, see placement of the pressed seam in the bottom left photo), go ahead and sew 1/4 inch away from that (1/4 inch if you started with 1/4 seam allowance on the first pass or 1/2 if you started with 1/2 seam allowance on the first pass). In doing so, you are effectively enclosing the first seam within the second so that your raw edges are hidden inside.
For clarity's sake, like this:
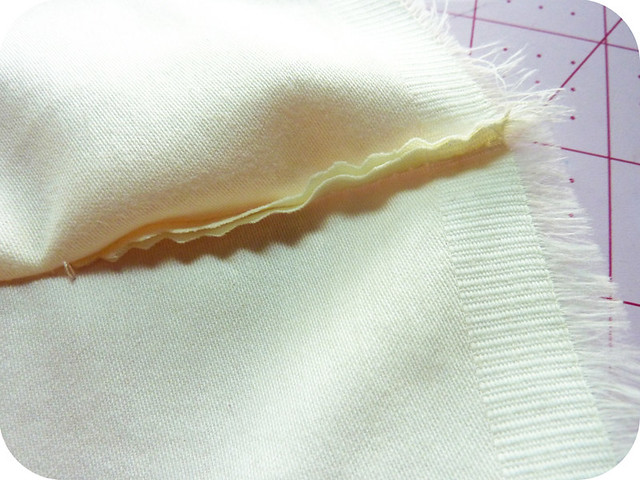
The second seam coming together and enclosing the first.
Some Helpful Hints:–In the above example, I've ended up with 1/4 inch finished french seams for which you need to be sure to allow for a 3/4 inch total seam allowance before cutting your fabric to the desired size. For a finished 1/2 french seams, allow for 1 1/2 inches of seam allowance.
–Pinking shears are a great way to trim the first seam as it adds a little extra durability and defence against fraying.
So now that you've got the the basic concept, why not take your fancy french seams out for a spin? I've gathered up a few projects that make use them in very different ways, both for functionality and for a professional finish:
Pillowcases with Cuff and Trim from Film in the Fridge
DIY Duvet Cover from DesignSponge
Drawstring Bag from WhipUp


5 comments:
Frech seams are a lifesaver at times...especially when you don't have a serger or you need something more finished looking than an overlock stitch...great tutorial Kat!
Thanks, Kat. I didn't know how to do this and it would have been handy a few times now. Great pics!
I have never tried this! Great tutorial Kat -- thanks!!!
I love me a good french seam :)
Thanks guys! They are pretty rad, aren't they?
Post a Comment