Showing posts with label herringbone quilt. Show all posts

Tuesday, June 24, 2014

Finishing Touches: The Indie Herringbone Quilt

Herringbone Quilt
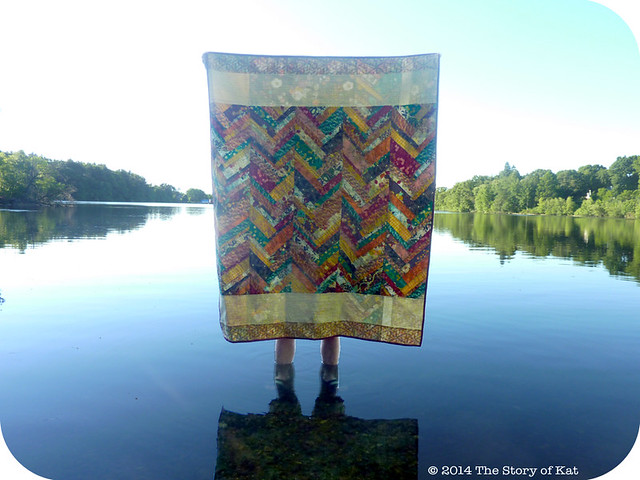
just realized as I was posting this that the quilt is technically upside down here...so close

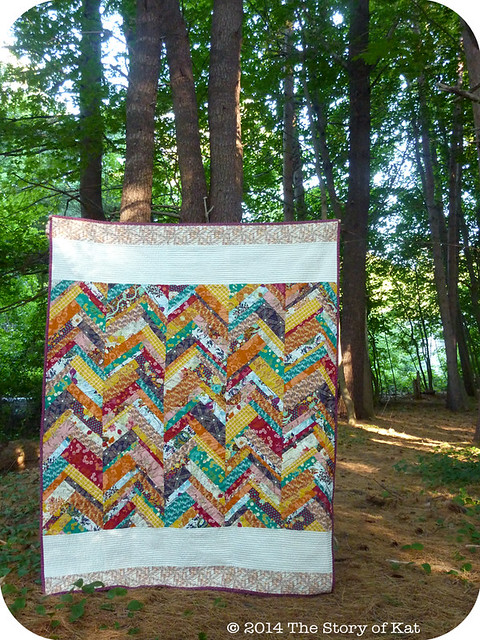
Once upon a time, a very very long time ago, I made this quilt which you can read a bit more about here. It languished in a pile of finished projects, just waiting to be photographed so I could hold onto a piece of it before sending it off to its intended owner. Well life happened and as I was feeling low about other things, it was nice to see this in my studio reminding me of what I could accomplish, nudging me to tackle new projects and make something I was equally proud of that I could keep for our home.

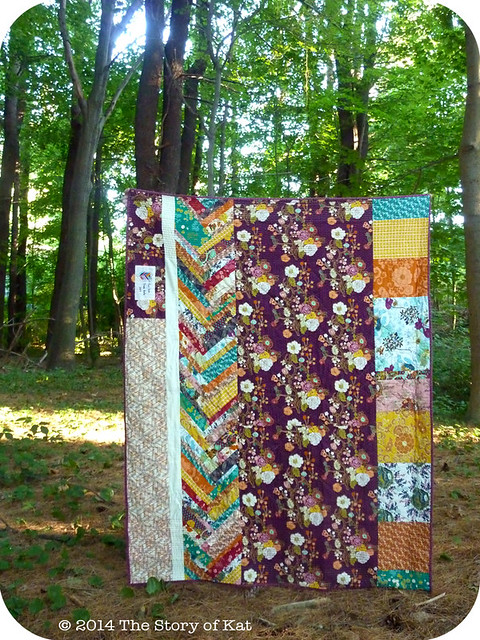
The reverse which I think I might actually prefer the most...

It's high time I did just that though so, thanks to some lovely mild weather we had this past weekend, we loaded up the car with finished quilts and set off on an adventure to discover some quiet corners of our town that might provide an interesting background. There are two lakes where we live and along an obscure side street, we came upon a deserted inlet off one of the lakes that seemed to belong to no one. Overlooking the lake, this pine-y point of land seemed the perfect spot to take some photos. It's such an interesting thing to me to find hidden nooks like this in ones own backyard—ones with lakefront access, at that!

But I suppose I digress...here you can see some detailed shots of how the quilting itself ended up. I used some contrasting magenta thread to do some straight line quilting on the top and bottom sashing which gives it such a great texture. For the main herringbone part of the quilt, I simply followed the bars of fabric to quilt an improv zig-zag line through them from side to side every couple rows.

Herringbone Quilt, detail

I finished the binding and embroidered label by hand—finishing touches that really pull the whole thing together. For the label, I was trying to create a visualization of how I actually went about constructing the rows of herringbone. I used back stitch and satin for the design and split for the little lettering in colors that matched as close as I could get them. I really do love when a label can tell a bit of the story of how a handmade object came to be, even in the smallest sense.

Ok, one last gratuitous glamor shot. The direct afternoon light and reflections off the lake made trying to do this successfully kind of impossible, but I just had to share it because I got excited about the idea of pulling if off while we were there and, a few half-baked attempts with fixing it in photoshop later, it will at least suffice—

Herringbone Quilt The fabric used is from Pat Bravo's Indie line by Art Gallery Fabrics

Sunday, September 22, 2013

Herringbone Indie Quilt Top: Mini How-to

Herringbone Quilt Top

This is a quilt top that I just finished for my sister. The more I look at it, the more I love how the herringbone design and these fabrics came together. I'll definitely be using this herringbone design in the future as it's very straight forward to do and yet you end up with something intricate and modern looking that really packs a punch....so much of a punch with all these different colors that I wanted to give the eye a rest a bit and tacked on the cream cotton sateen sashing I had leftover from a previous project to quiet it down and add some length. It's a lap quilt size but I wanted it to be as long as possible in order to cover those toes on cold nights.

Herringbone Quilt Top, detail

I don't have the photos to do a full tutorial, but I will give you a run down on how I achieved these particular rows of herringbone:

You see, I had bookmarked and pinned approximately a bajillion different chevron/herringbone piecing methods when I came across the book "Scrap Basket Beauties" by Kim Brackett. In it she has a pattern called "peaks and valleys" that has long rows like what I wanted to achieve. Everything else I'd found online worked the herringbone in just blocks or used strips that were all the same size, breaking up the overall true effect I wanted.

upload
 WIP: here you can see how the piecing of each row began

In this approach,  each row starts with an inverted triangle like in the above photograph, and then you continue piecing your strips off of that, alternating from one side to the other as the row grows. Instead of using trapezoids like she did in the book though, I just cut strips from 1/4 yard cuts of Pat Bravo's Indie collection and squared up all the edges once I was done piecing before joining all the rows together.

I also cut mine in various widths. I prefer the finished look those different widths gave, but it did mean that keeping the same central point was a bit trickier and each row ended up being a tad wider or narrower than it's neighbor, depending on the placement of each strip (If that doesn't make complete sense, scroll back up to the top two photos and see how the placement point of each "v" changes according to the width of the strips used). For me, I'm totally ok with that wonkiness and think it just adds to the charming handmade quality of an item (as long as it's structurally and technically sound). I only had so much fabric to work with (if you could cut longer strips, you'd be able to make wider rows) and this method allowed me to achieve the desired effect without too much planning or math up front. Always a good thing if you don't mind fly-by-the-seat-of-your-pants-quilting like me!

The other difference from my quilt and the "peaks and valleys" pattern I was inspired by, was that I hacked off the triangles I started piecing from at the top of each row as well as the points at the end of the row, making for straight edges across the top and bottom where sashing could be added on. I prefer the bands of sashing I chose for just the top and bottom but you could also frame the whole thing with sashing or do a whole quilt of just these herringbone rows.

Herringbone Quilt Top, detail